Welcome back to the Divi 5 Mastery Course. In Part 7, we completed the bottom of every page with a custom global footer that matches the header we built in Part 6. Both global areas were styled with the Design Variables from Part 3 and the Presets from Part 4.
Now, in Part 8, we’ll use the Theme Builder to make the rest of the coworking website feel like one unified brand. Instead of designing every template-driven page manually, we’ll create reusable layouts that automatically apply to posts, archives, search results, and error pages.
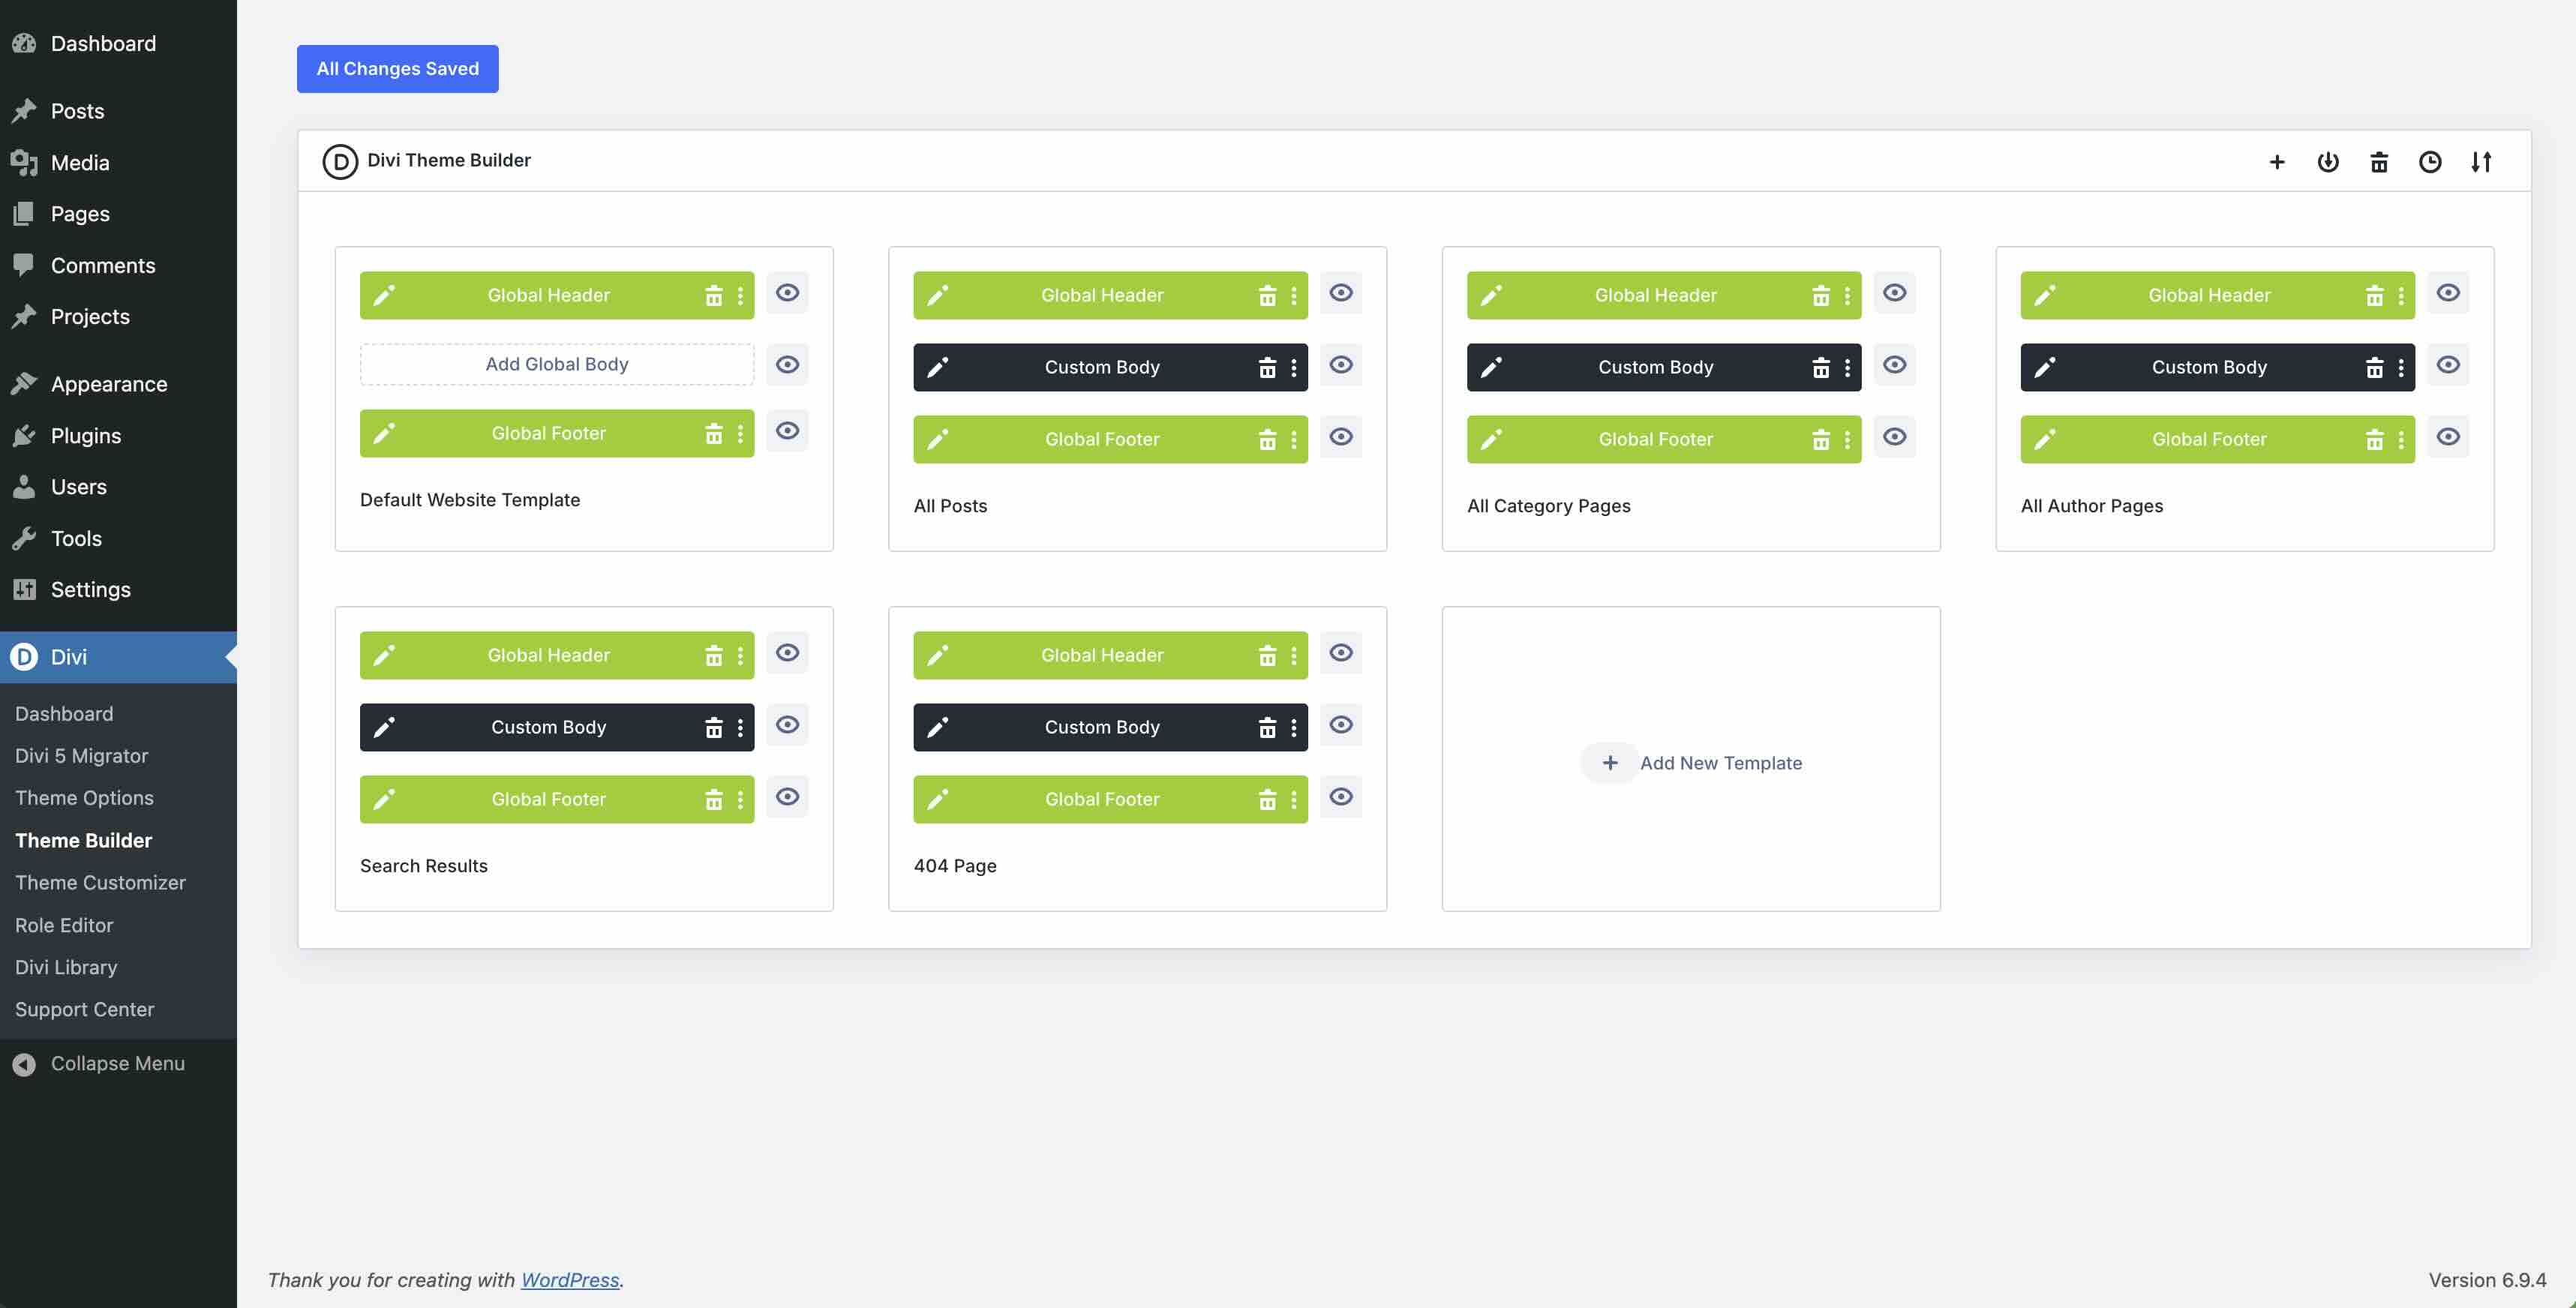
By the end of this post, you’ll understand how to build Theme Builder templates for All Posts, Category Pages, Author Pages, Search Results, and the 404 Page. We’ll also walk through the full creation of an All Posts template, so you can see the process in action.
Let’s get started.
Why Global Templates Matter
The Theme Builder lets you design a layout once and assign it to specific parts of your WordPress site. For example, one template can control every blog post, while another can control category archives, author archives, search results, or the 404 page.
This is where the design system from Parts 3 and 4 becomes even more valuable. Design Variables keep shared values like colors, spacing, typography, and border radii centralized. Presets package those values into reusable styles. Together, they help your templates stay consistent without forcing you to restyle every module manually.
Dynamic Content is the other key piece. It pulls real data from WordPress, including post titles, featured images, author details, publish dates, categories, and post content. As a result, one template can display different content for every post or archive while keeping the same overall layout and design.
Creating A New Theme Builder Template
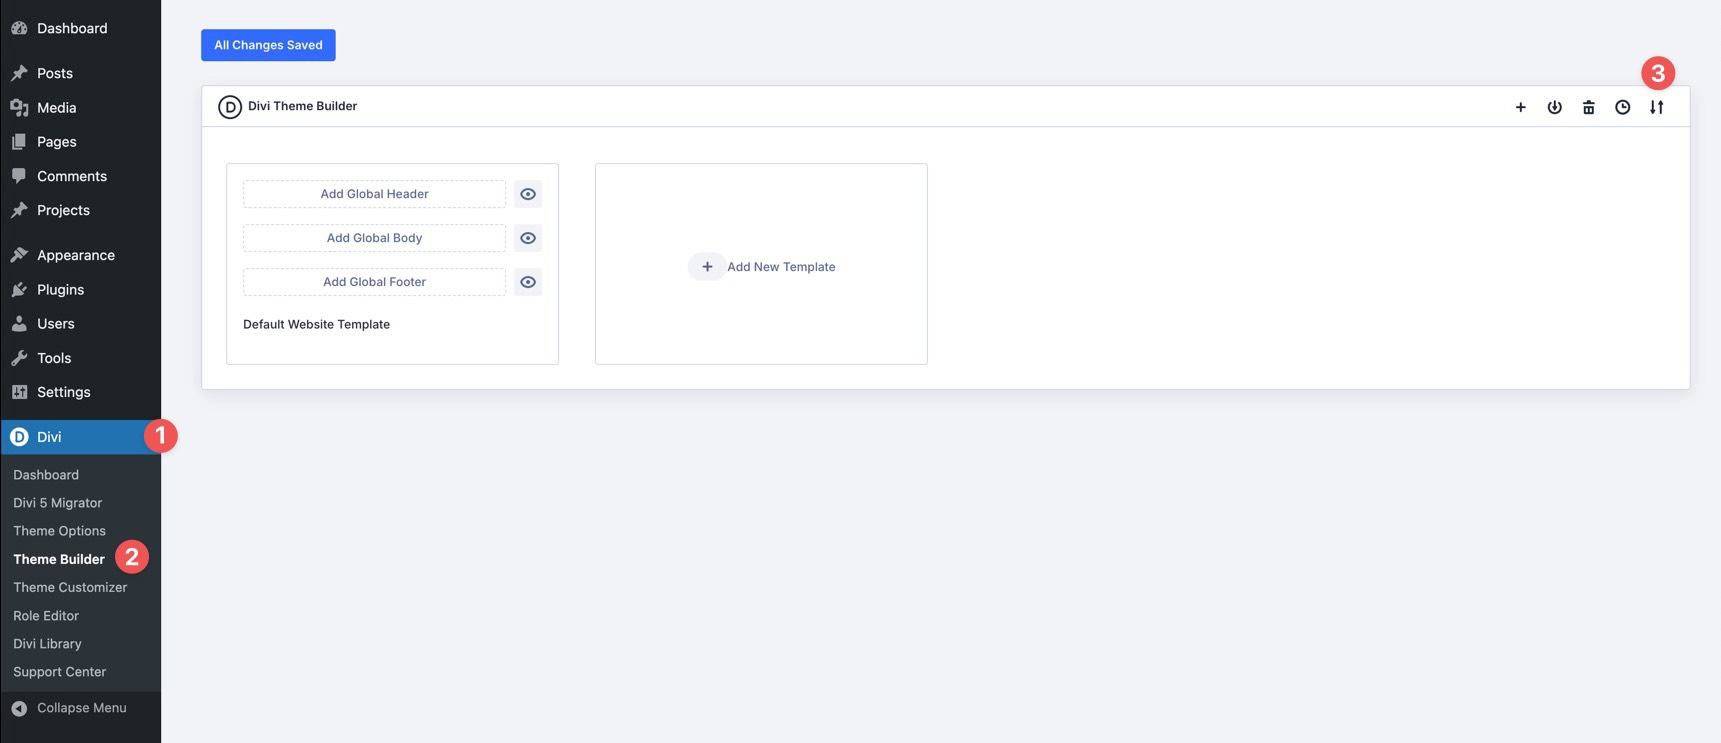
Navigate to Divi > Theme Builder in your WordPress dashboard. If you’ve been following along in the series, the Default Website Template should already include the Global Header from Part 6 and the Global Footer from Part 7.
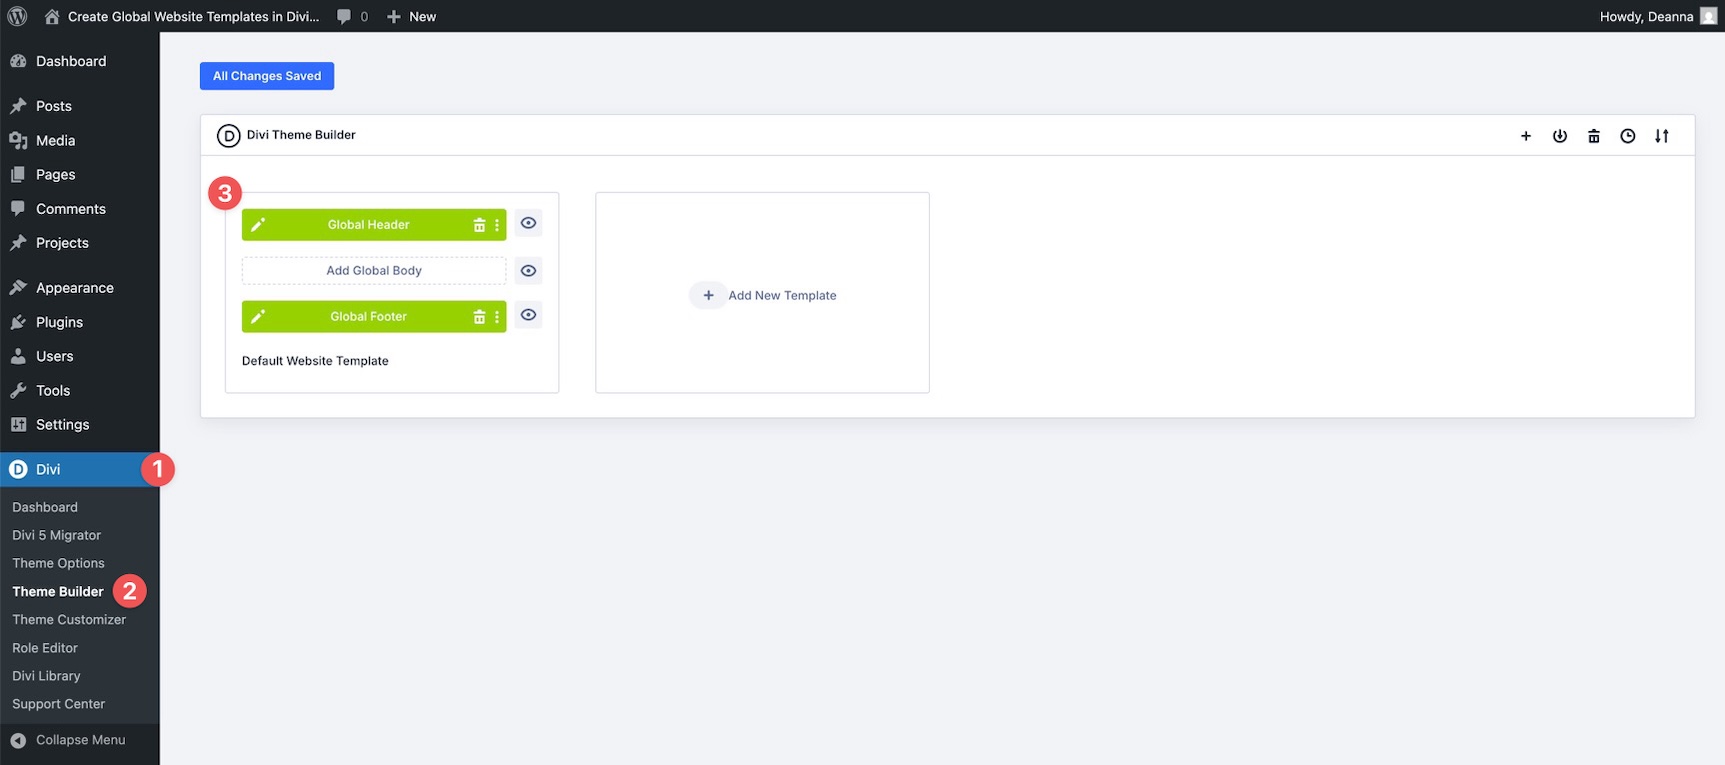
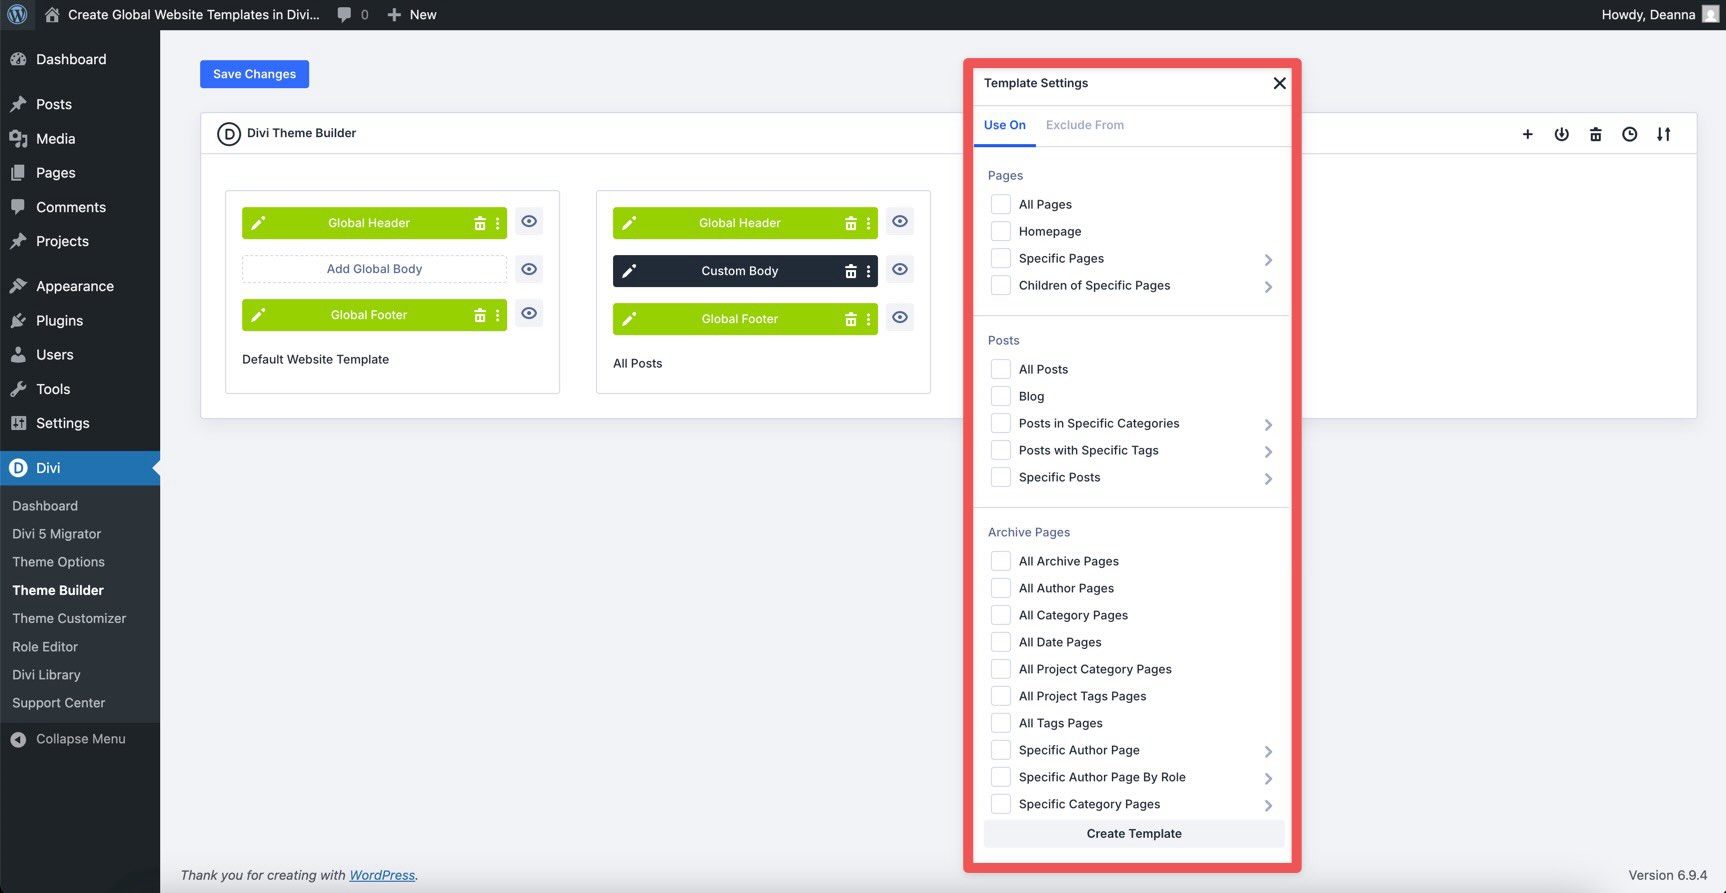
Click + Add New Template, then choose Build New Template. When the Template Settings modal appears, look for the Post options. Select All Posts, then click Create Template.
Next, click Add Custom Body, then choose Build Custom Body. This opens the Visual Builder, where you can start building the template body.
Repeat the same process for the remaining templates you want to create. In each case, assign the template to the appropriate area of the site in the Template Settings modal.
The Power Of Dynamic Content In Templates
One of the biggest advantages of building templates in Divi 5 is Dynamic Content. Instead of hardcoding text, images, or metadata that would only apply to one page, Dynamic Content pulls information directly from WordPress. This lets the same template display different post titles, featured images, authors, dates, and content depending on what the visitor is viewing.
To insert Dynamic Content, look for the Insert Dynamic Content icon in supported text fields, image fields, headings, and module settings.
![]()
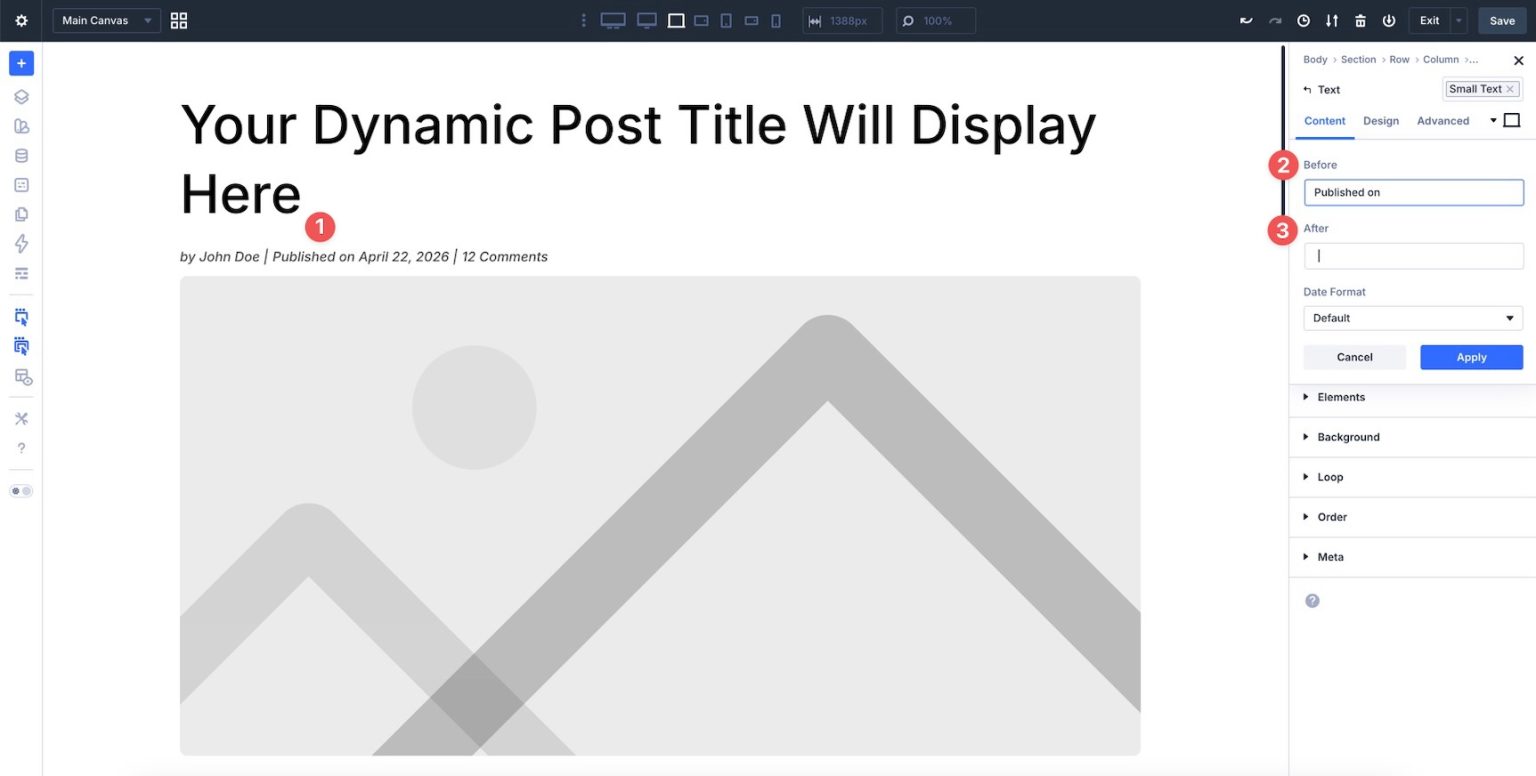
Click the icon, select the data you want, and Divi connects that field to the relevant WordPress data.
In some fields, you can also add Before or After text for context. For example, you can add Posted on before a publish date or By before an author name.
Because the templates also use the Design Variables and Presets we created earlier, the layout stays visually consistent while the content changes dynamically.
Here are the main templates we’ll use for the coworking website and the dynamic elements each one typically needs.
Post Template
This template controls individual blog posts. It typically includes the post title, featured image, post content, publish date, author name, author bio, comment count, previous and next post navigation, comments, and optional related posts.
The Post Content module displays the body content of whichever post the visitor is viewing. That includes the post’s text, images, embeds, and formatting. Style this module once with your typography settings, Design Variables, and Presets, and every blog post can follow the same design system.
Category Page Template
Category archive pages display posts filtered by a specific category. For example, the coworking blog might include categories like Events, Office Tours, or Member Stories.
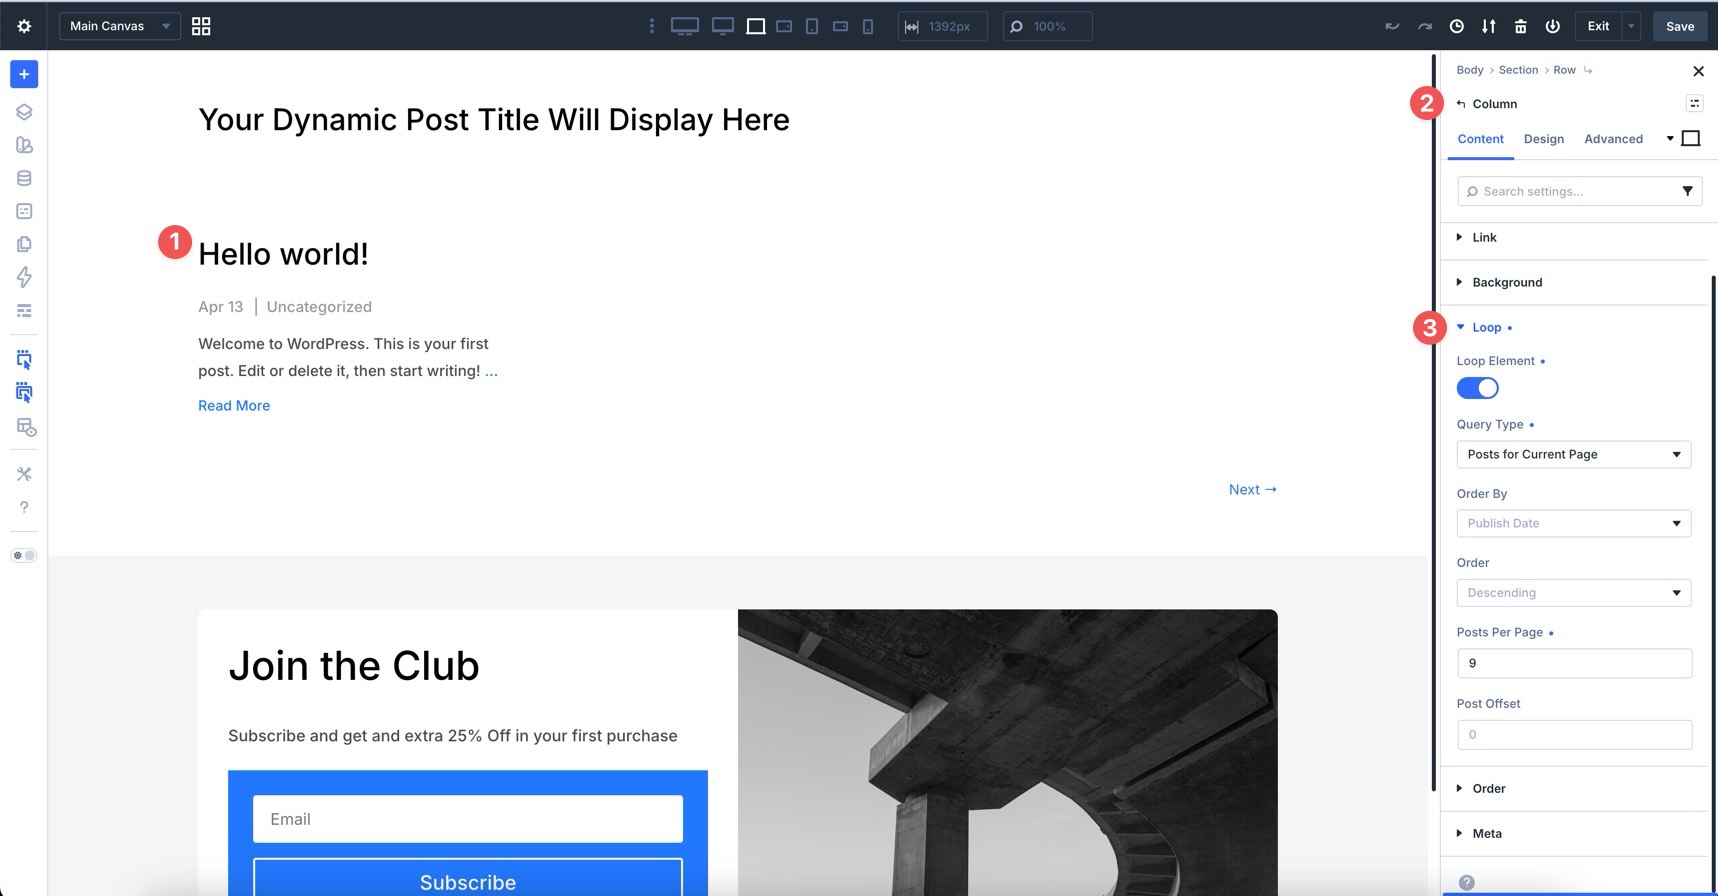
This template typically uses a dynamic archive title and a Blog module or Loop Builder layout to display the posts for the current category. For more design control, use the Loop Builder to design the repeated post item and pull content from the current archive context.
Author Page Template
Author archive pages display posts written by a specific author. They are useful for highlighting team members, contributors, or community writers.
This template typically includes dynamic content for the author name, author profile picture, and author bio. It also needs a post list or loop that displays posts from the current author archive.
Search Results Page Template
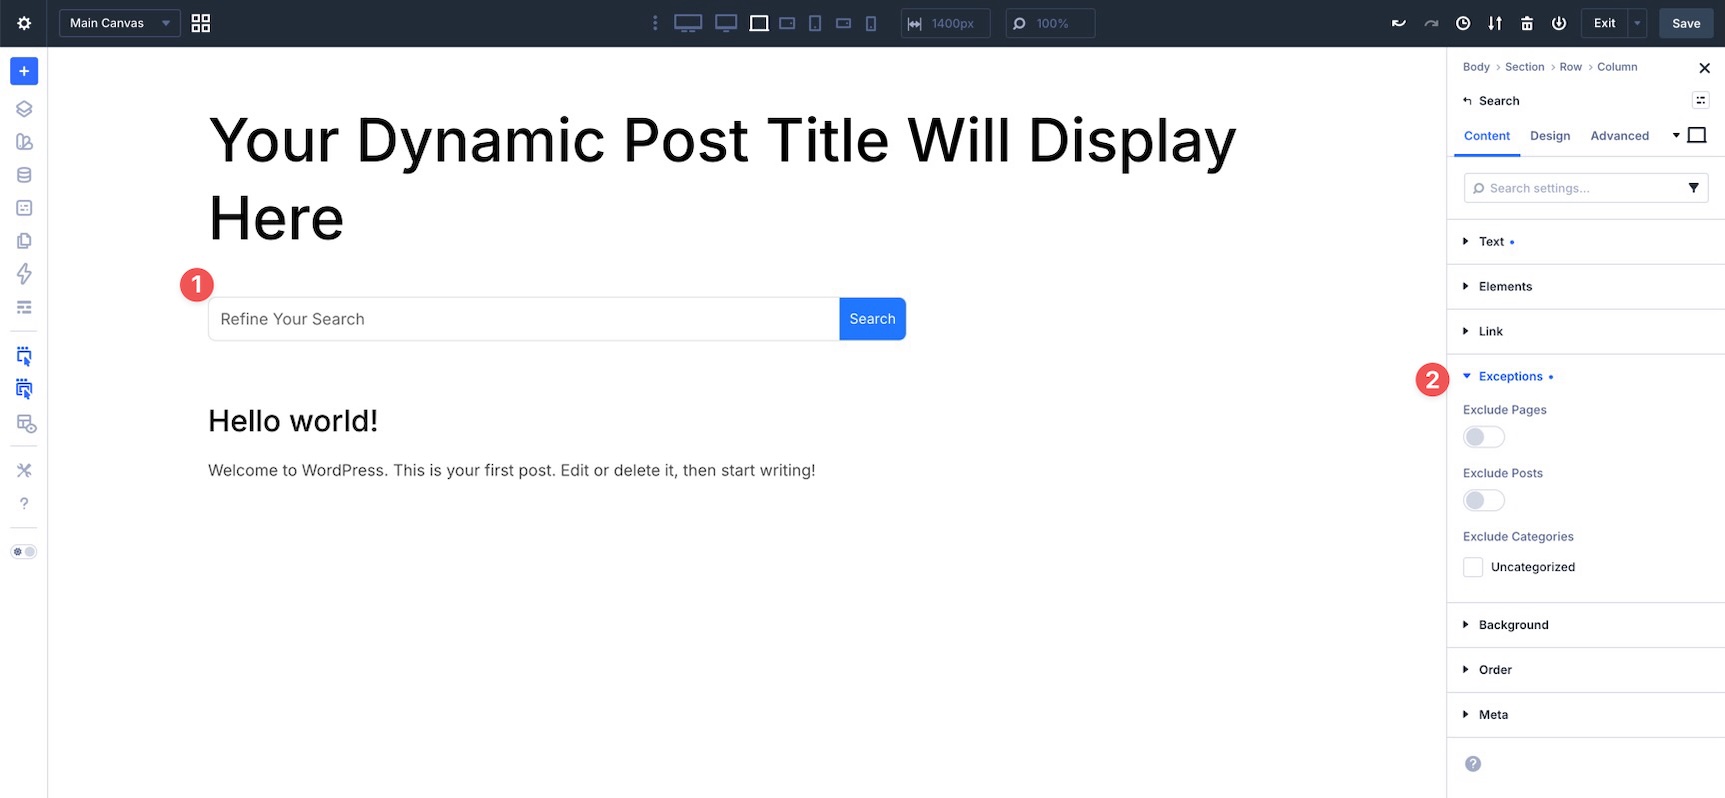
The Search Results template controls what visitors see after submitting a search query. A strong version usually includes a Search module so visitors can search again, plus a Blog module or Loop Builder layout to display the matching results.
Depending on your module settings, you can also refine what appears in search results by excluding specific content types, pages, posts, or categories.
404 Page Template
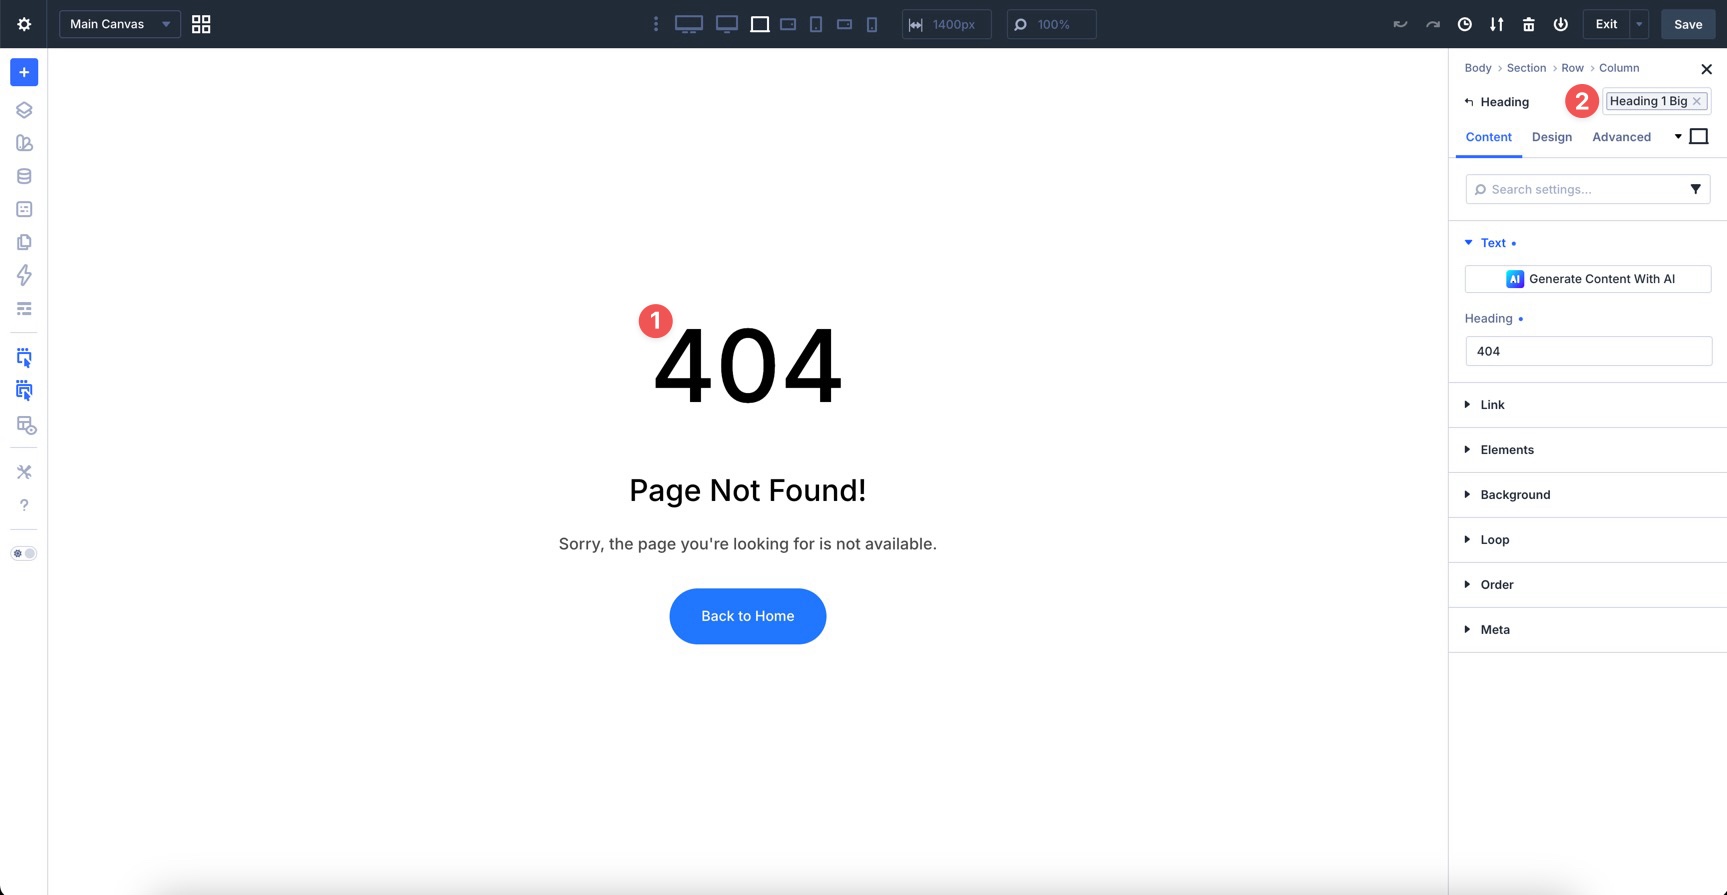
The 404 template appears when a visitor tries to access a page that does not exist. Unlike a single post template, it does not have one main post body to display. However, it can still include helpful modules like a Search module, recent posts, popular links, or a CTA back to the homepage.
You can also use your existing Variables and Presets for headings, buttons, spacing, and other design details, so even error pages stay on-brand.
With these dynamic pieces in place, a single template can power dozens or hundreds of posts, archives, and system pages while keeping everything consistent.
How To Build The All Posts Template
Now that you understand how Dynamic Content works in Divi 5, let’s build the template that controls every blog post on the coworking website. This layout wraps each post in a clean, readable structure that matches the rest of the site.
We’ll use the Design Variables and Presets from Parts 3 and 4 to keep the styling consistent. We’ll assume you have already created your All Posts template and opened the custom body in the Visual Builder.
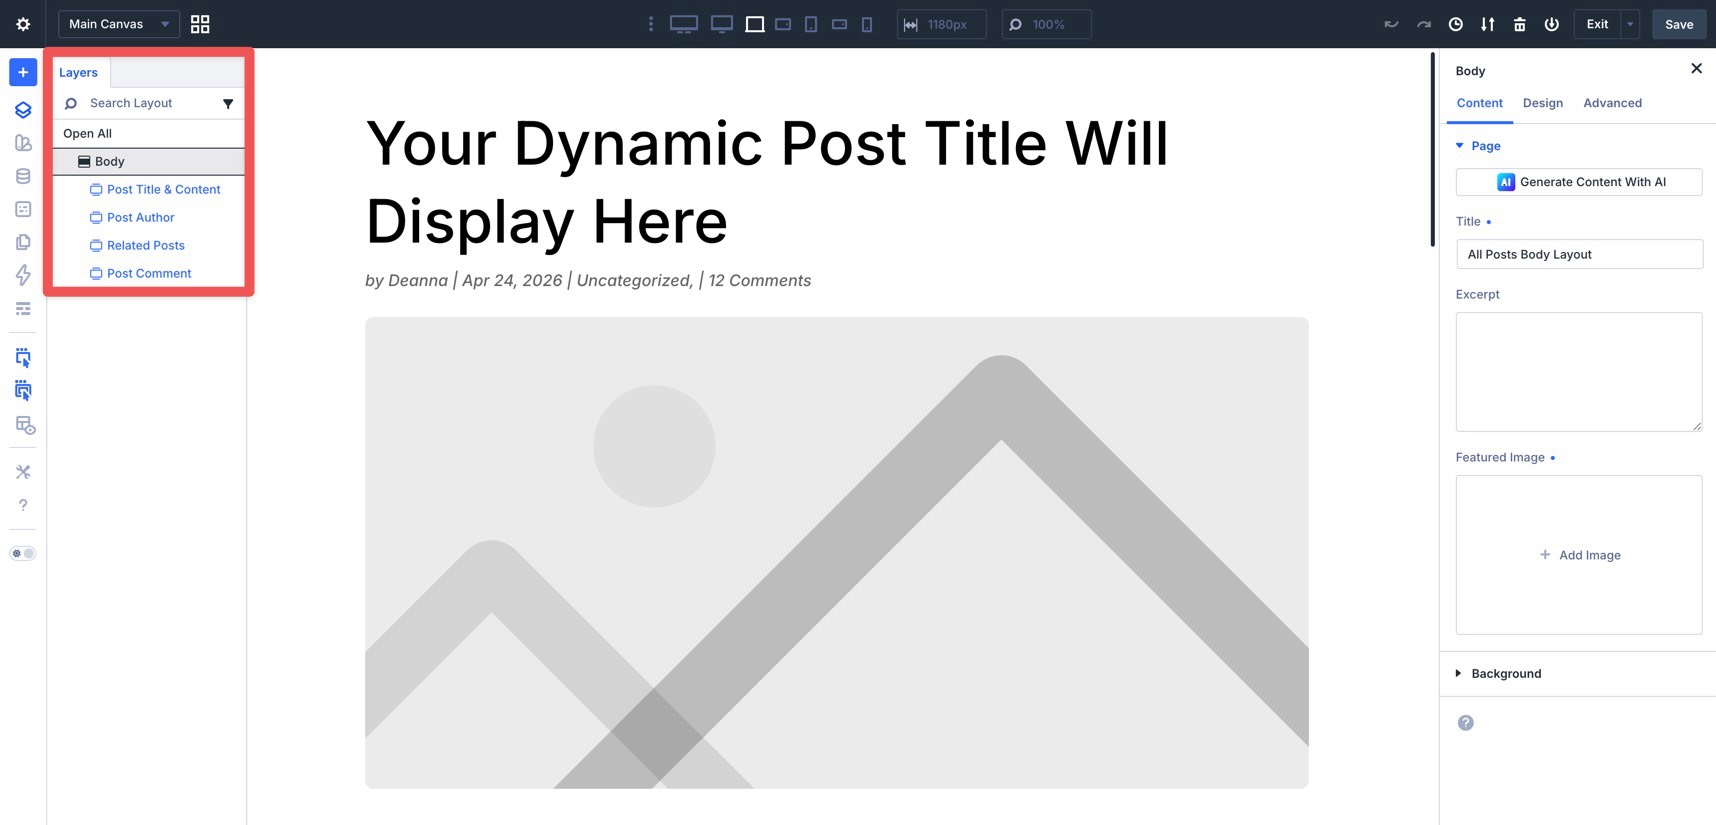
Step 1: Post Title And Content
Start by opening the Layers panel in the Builder Bar. Select the single Section and rename it Post Title and Content. To rename it, double-click the Section name, type the new label, and press Return.
Naming sections in your templates is a simple way to stay organized. It also makes elements easier to identify as the template grows.
Before adding modules, adjust the Flexbox settings. With the Section selected, go to the Design tab. Expand the Layout option group, hover over the Vertical Gap field, and apply the Spacing – Medium variable.
Add The Post Title Module
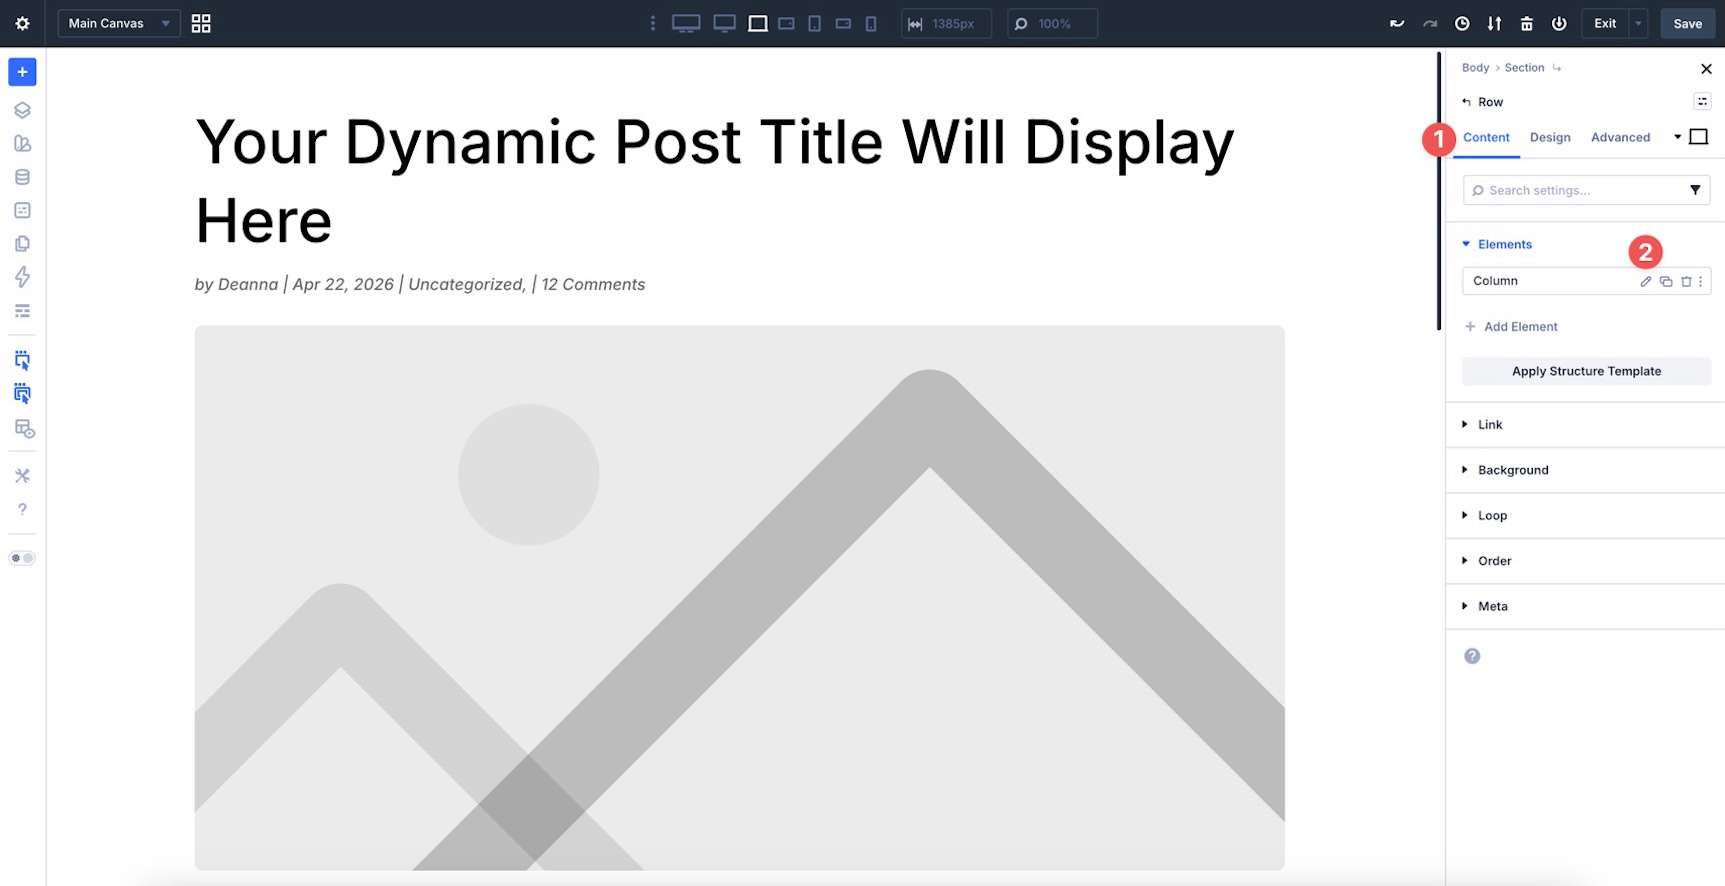
Add a single-column Row to the Section. Then, add a Post Title module inside the Row.
In the module’s Content tab, disable the Show Featured Image toggle. We’ll add the featured image separately with an Image module so we can style it more directly.
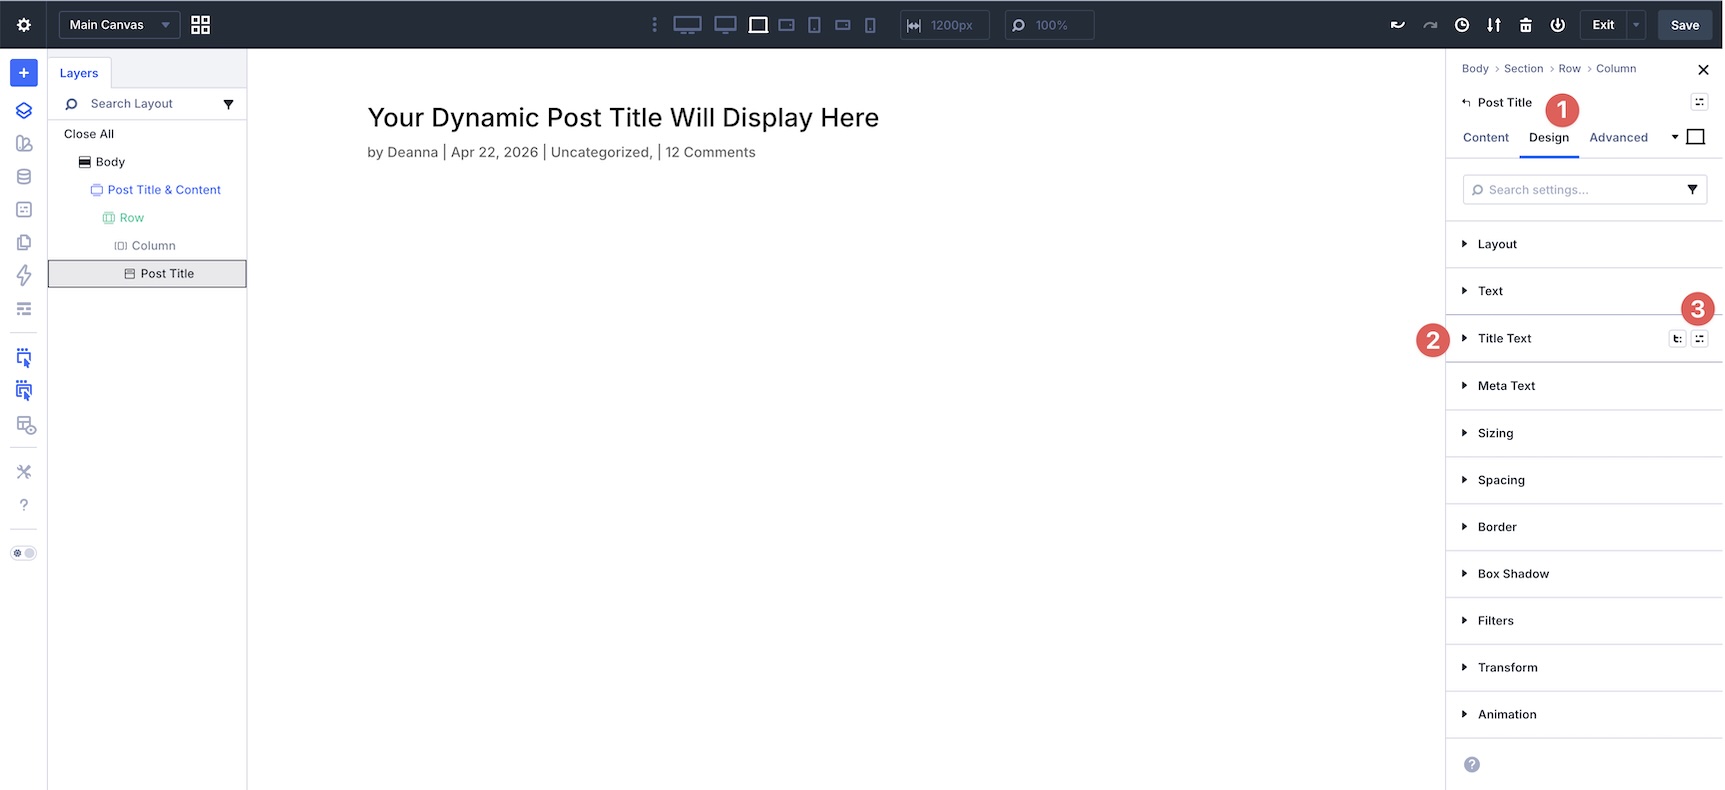
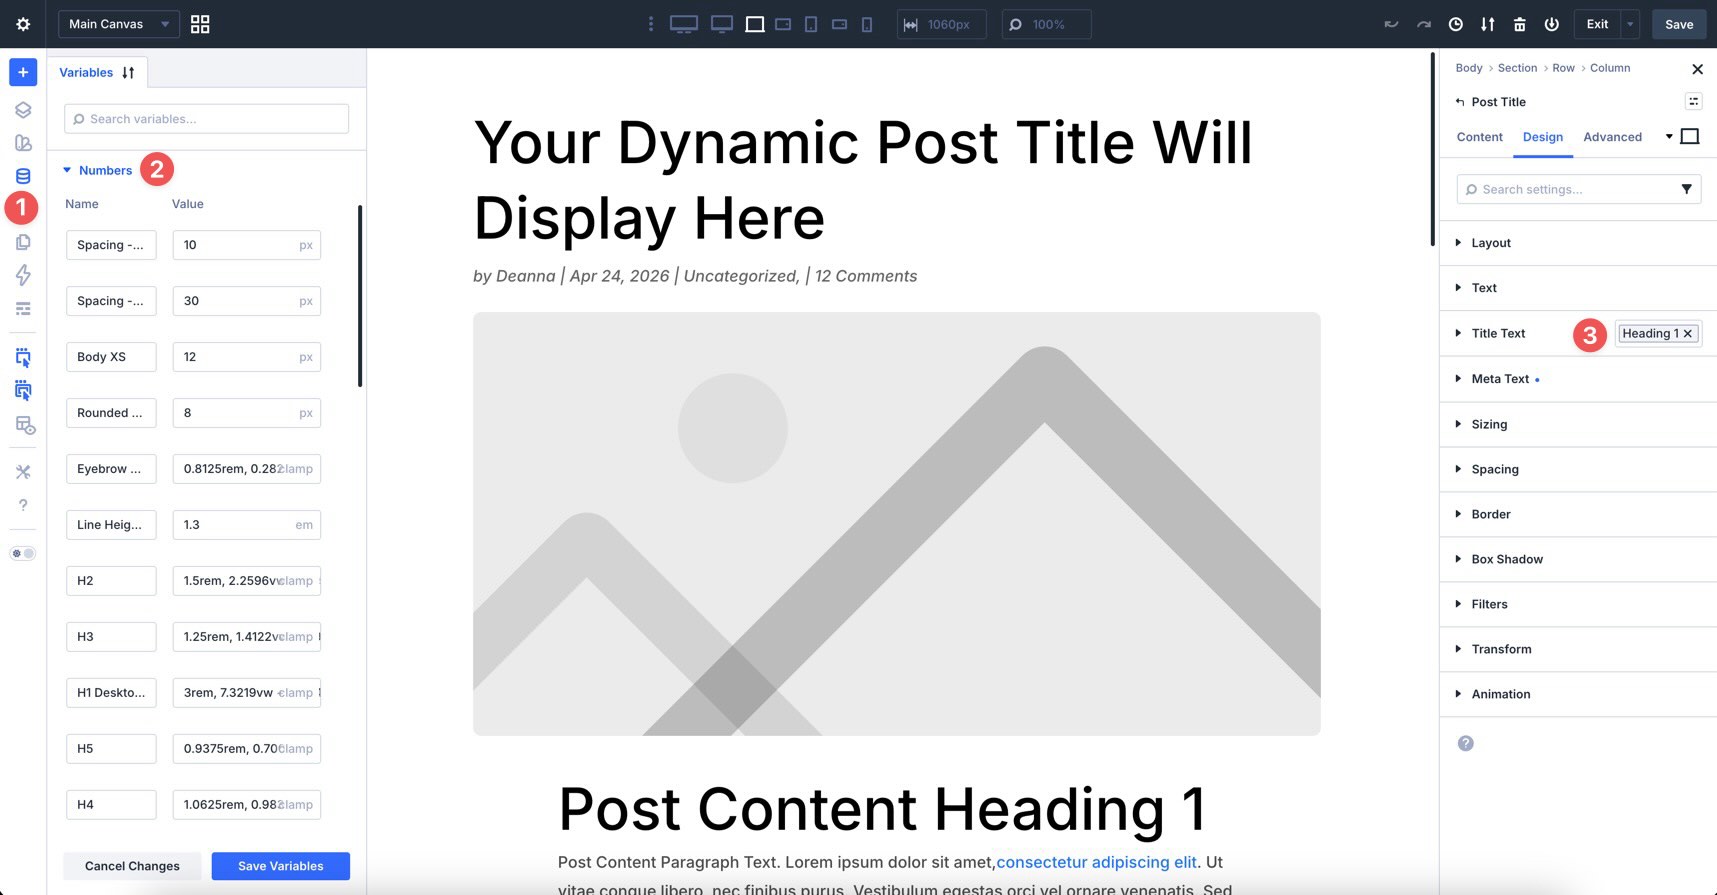
Next, go to the Design tab, hover over the Title Text option group, and click the Preset icon.
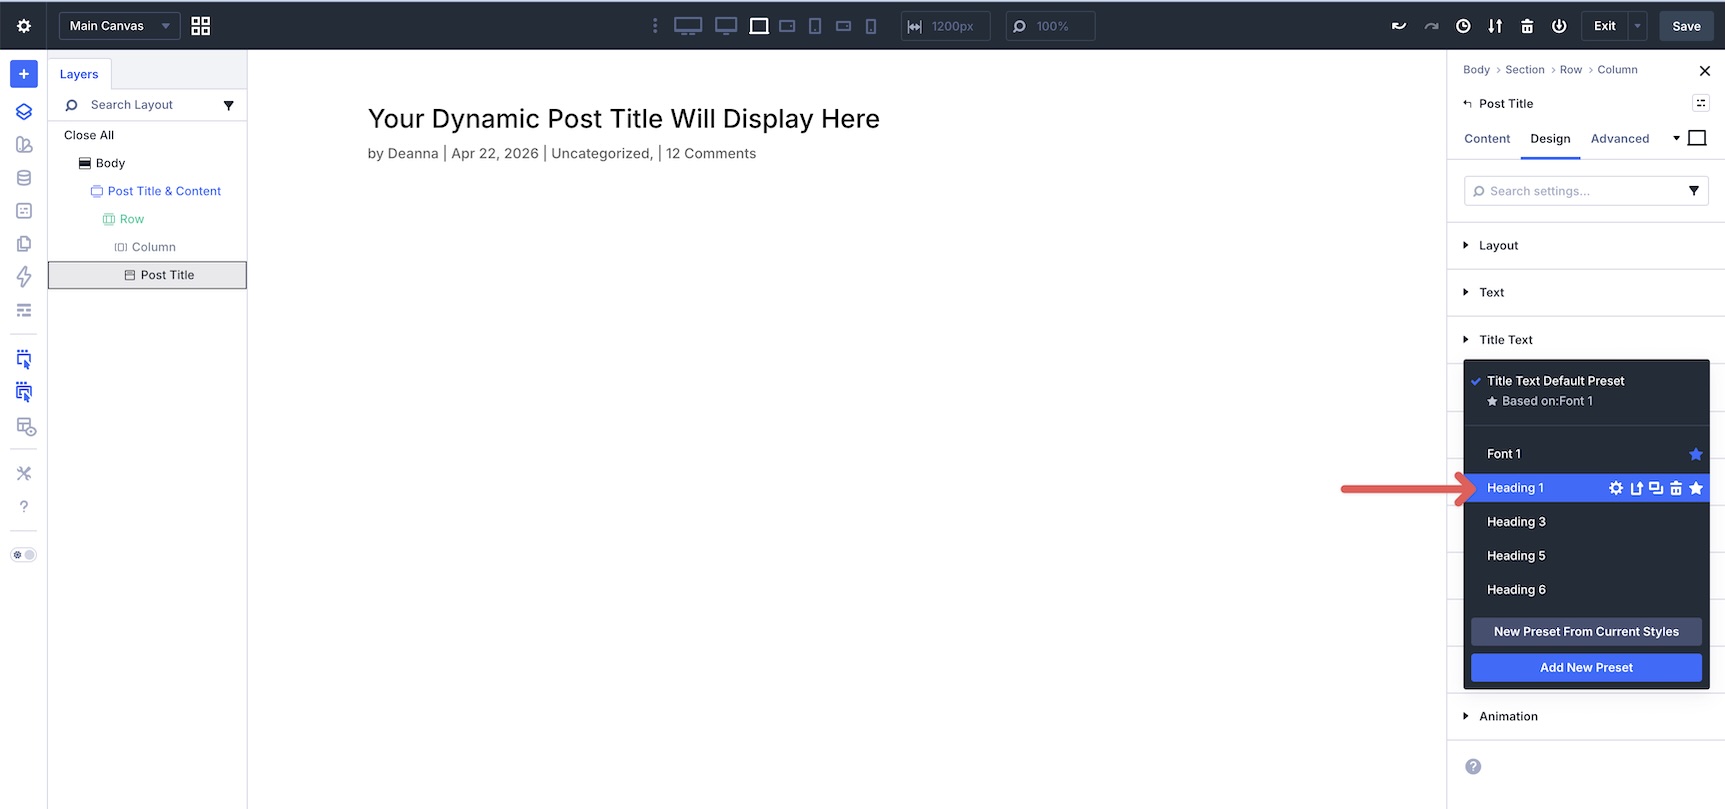
Choose the Heading 1 preset from the available options.
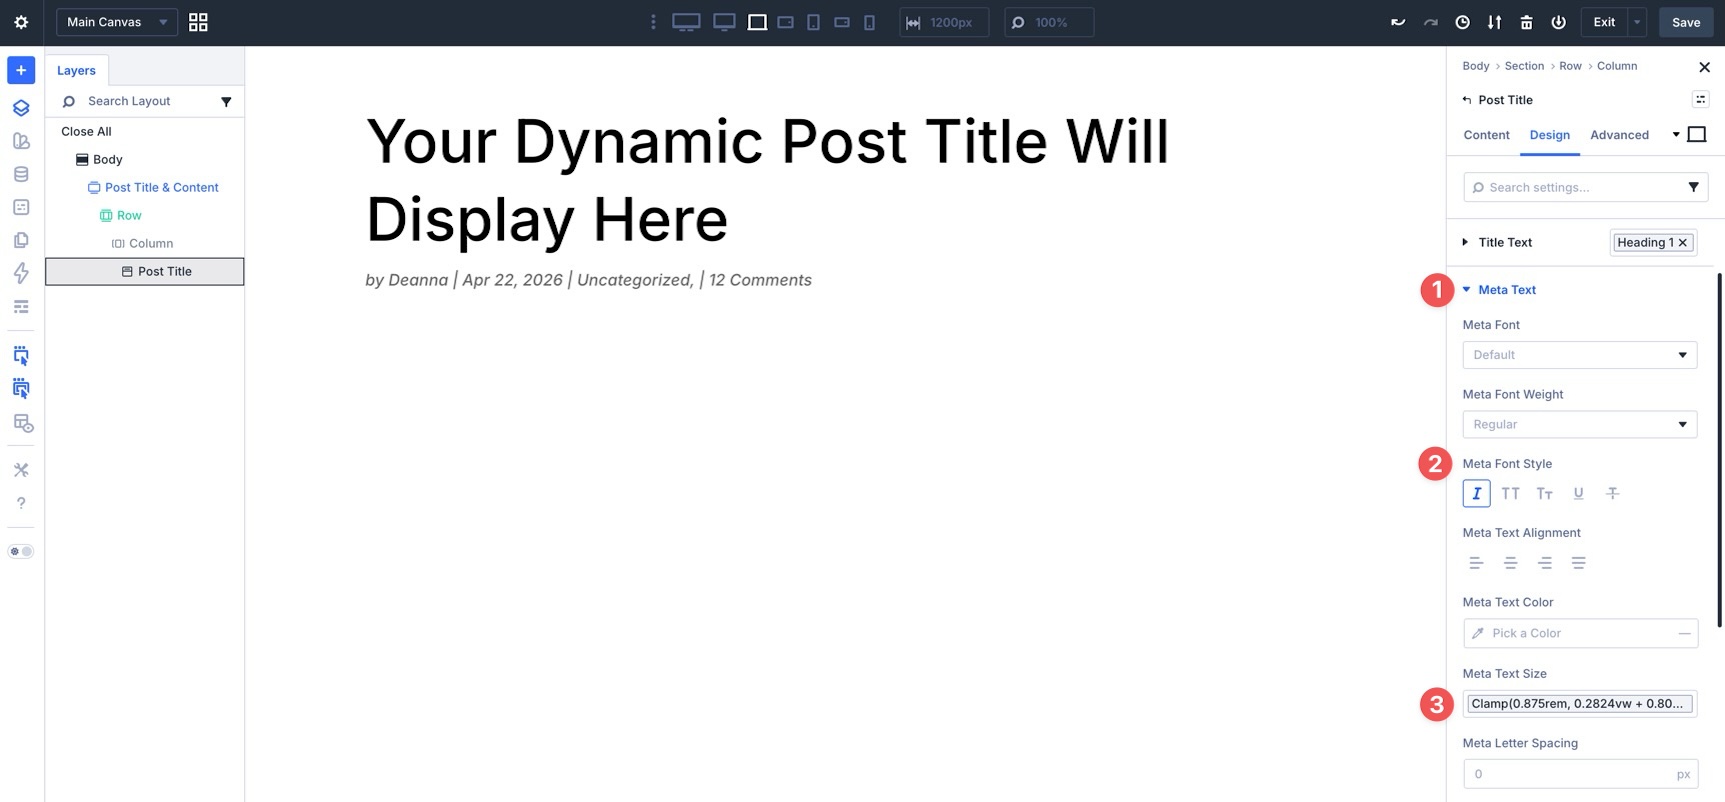
Expand the Meta Text option group and set the Meta Font Style to Italics. Then, apply the Body number variable to the Meta Text Size field.
Add The Featured Image
Add an Image module and assign the Rounded preset to it.
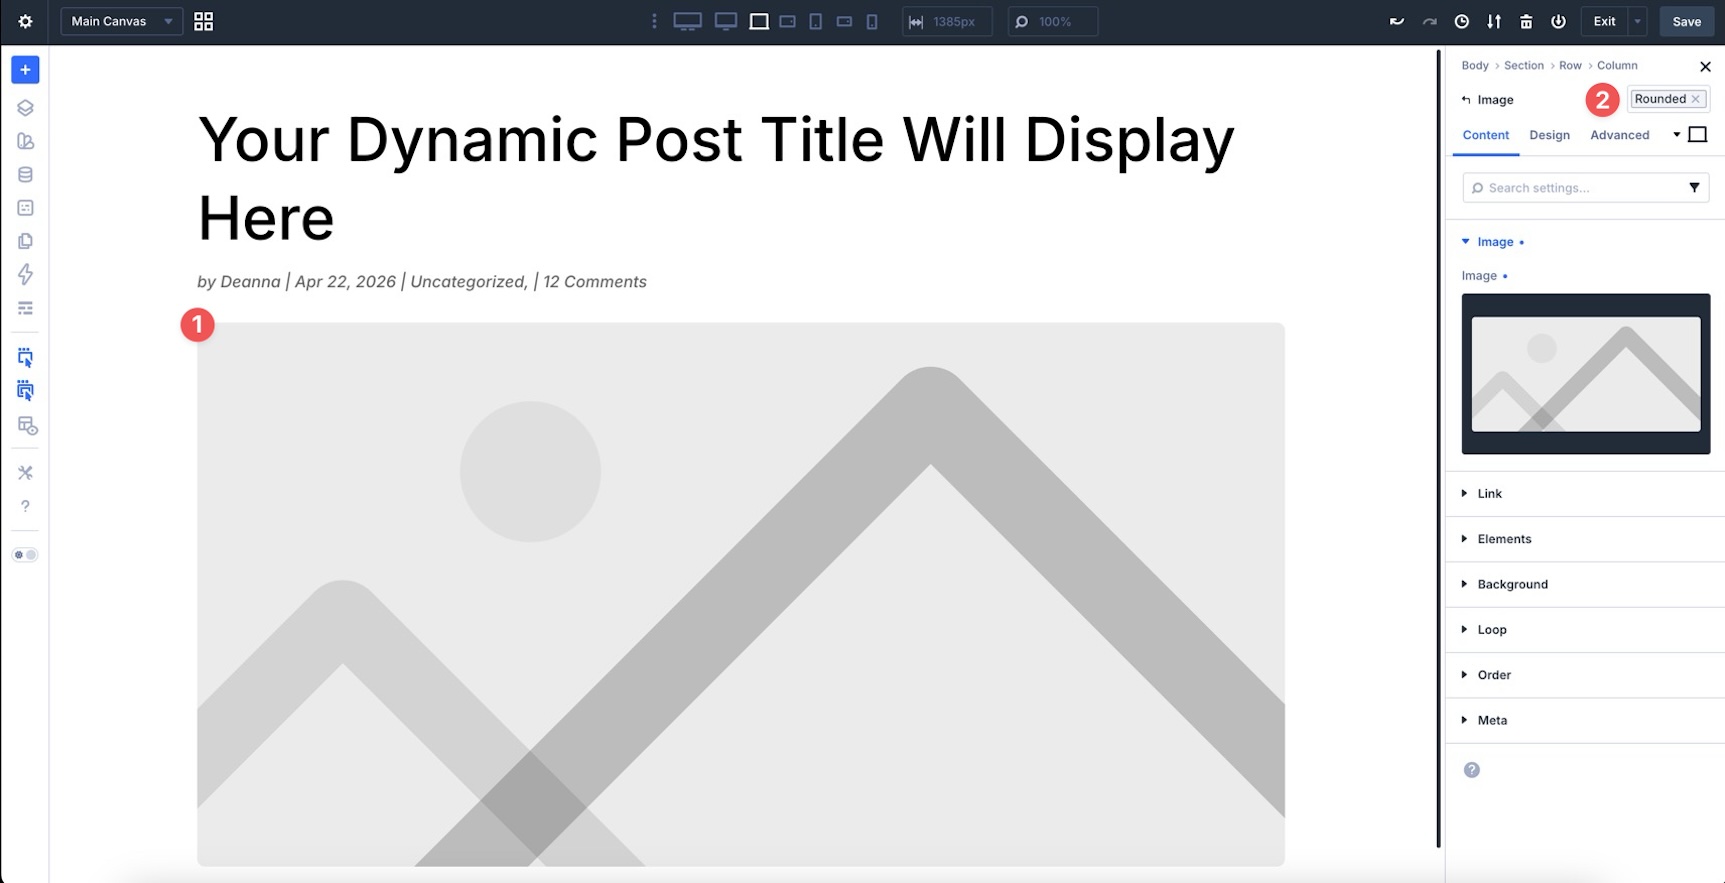
In the Image module’s Content tab, expand the Image option group. Hover over the Image field, click the Insert Dynamic Content icon, and select Featured Image.
Add The Post Content Module
Finally, add the Post Content module to the Row. This module outputs the body content of the current post.
Go to the Design tab and expand the Title Text option group.
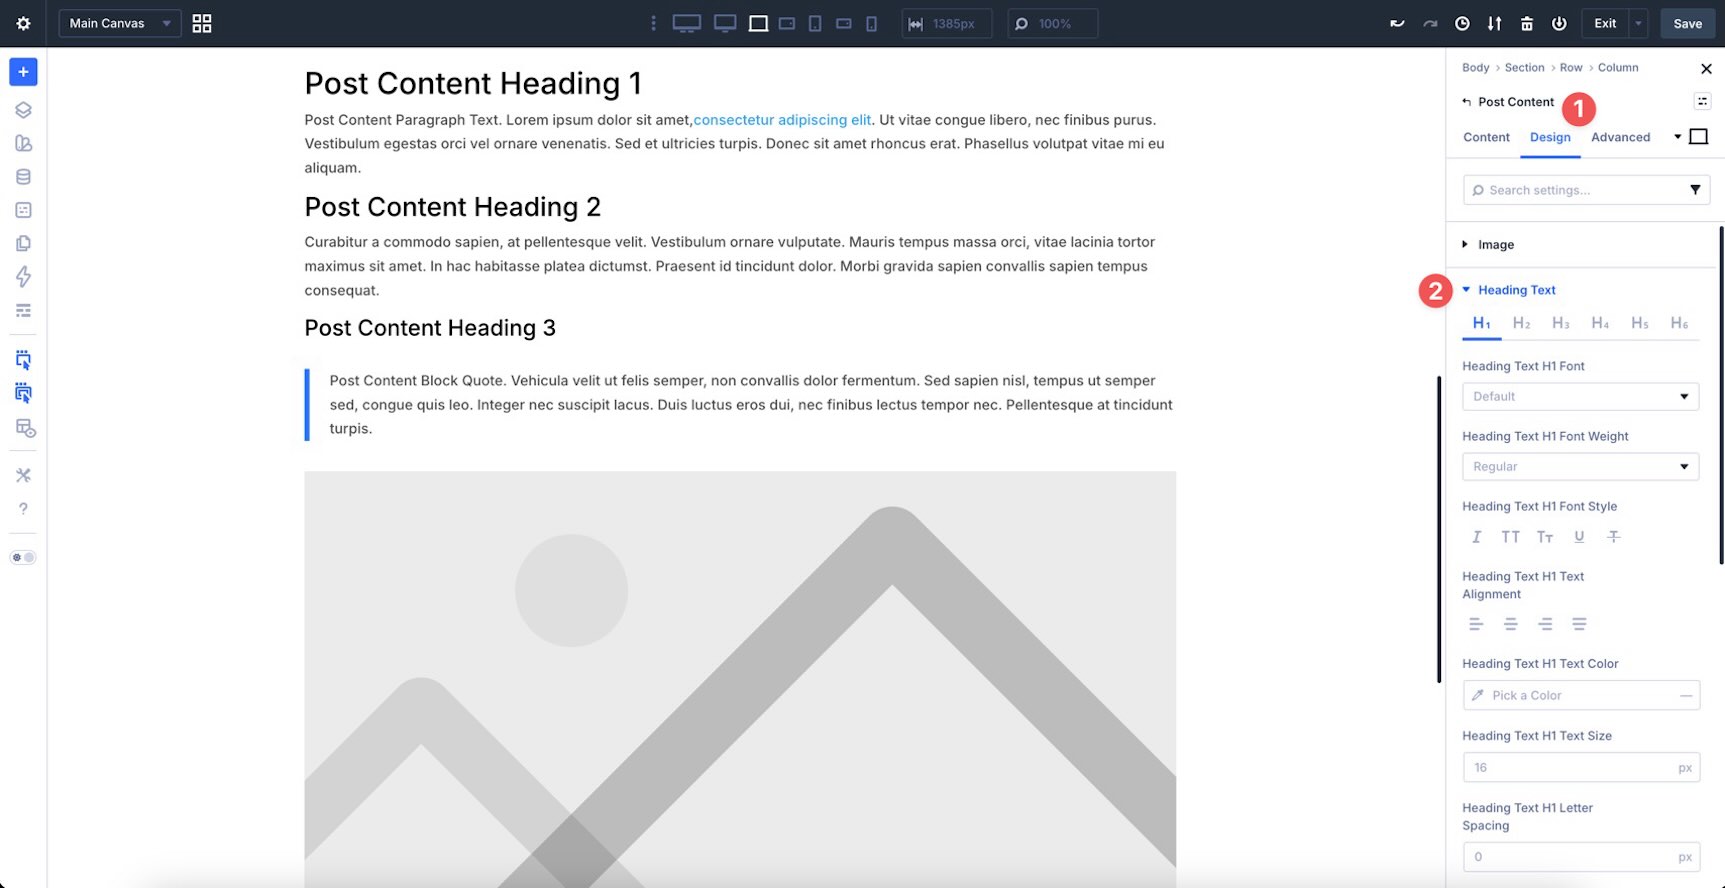
We’ll set typography values for each heading level inside the post content. In the H1 tab, hover over the Heading Text H1 Text Size field to reveal the Insert Dynamic Content icon. Select the H1 number variable from your global numbers.
Next, hover over the Heading Text H1 Line Height field, click the Insert Dynamic Content icon, and select the Line Height – Headings number variable.
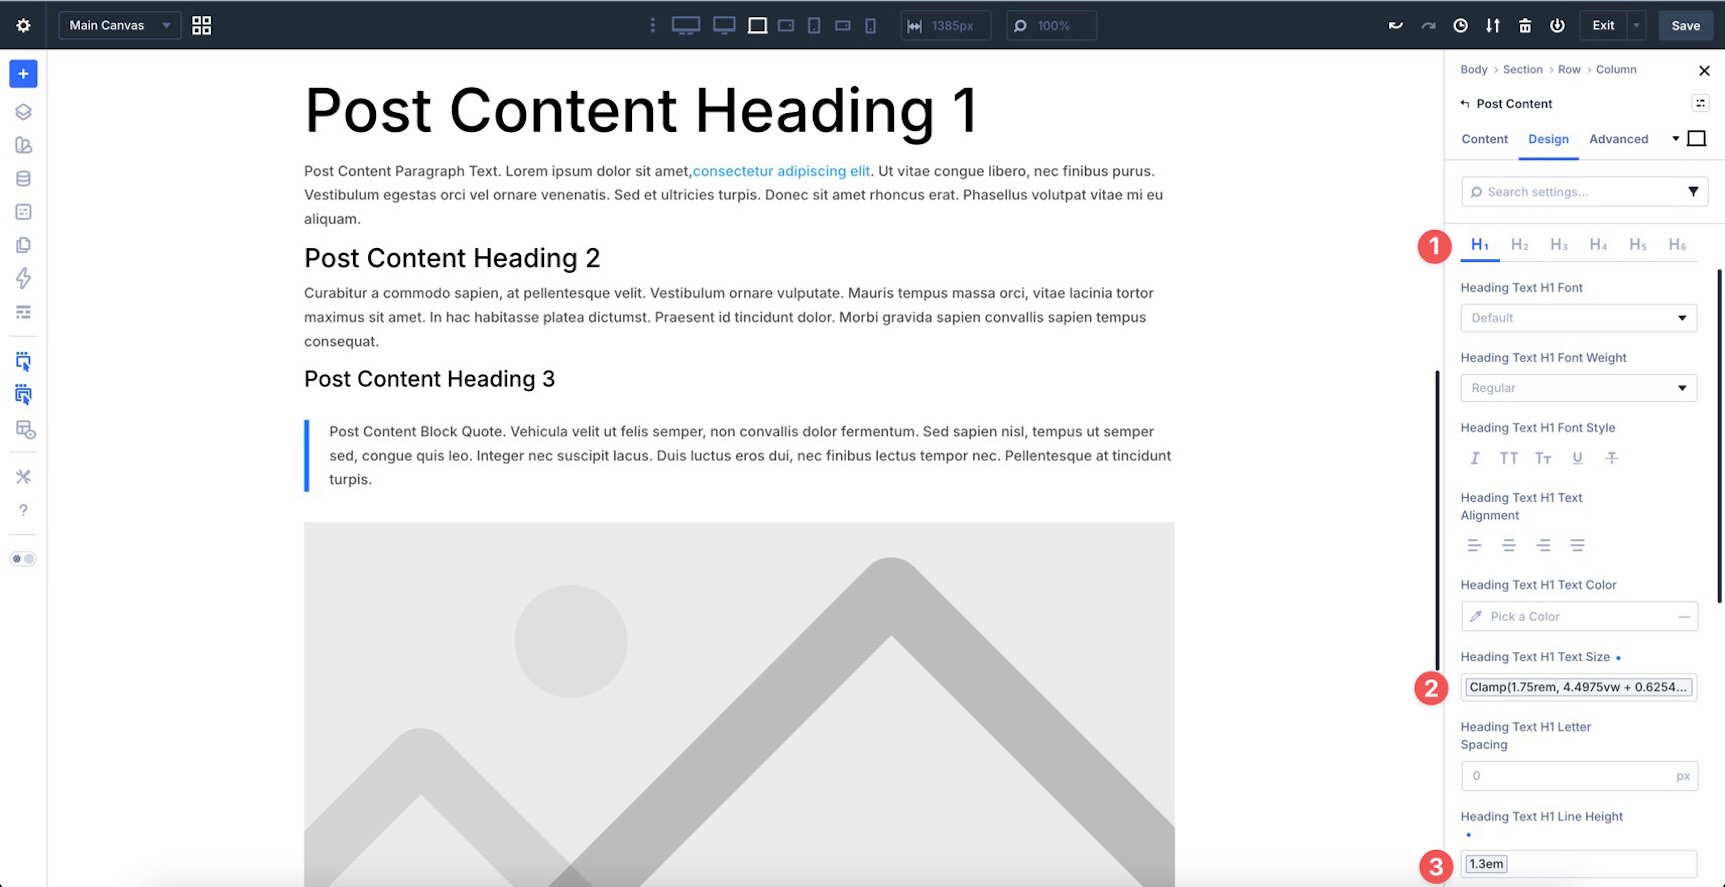
Repeat these steps for the remaining heading levels. Use the matching number variable for each heading size, such as H2, H3, H4, H5, and H6. Then, use Line Height – Headings for each heading line-height field.
Now, expand the Body Text option group. Apply your Dark Text preset or use the relevant Body Text color, Body text size, and Line Height variables from your design system.
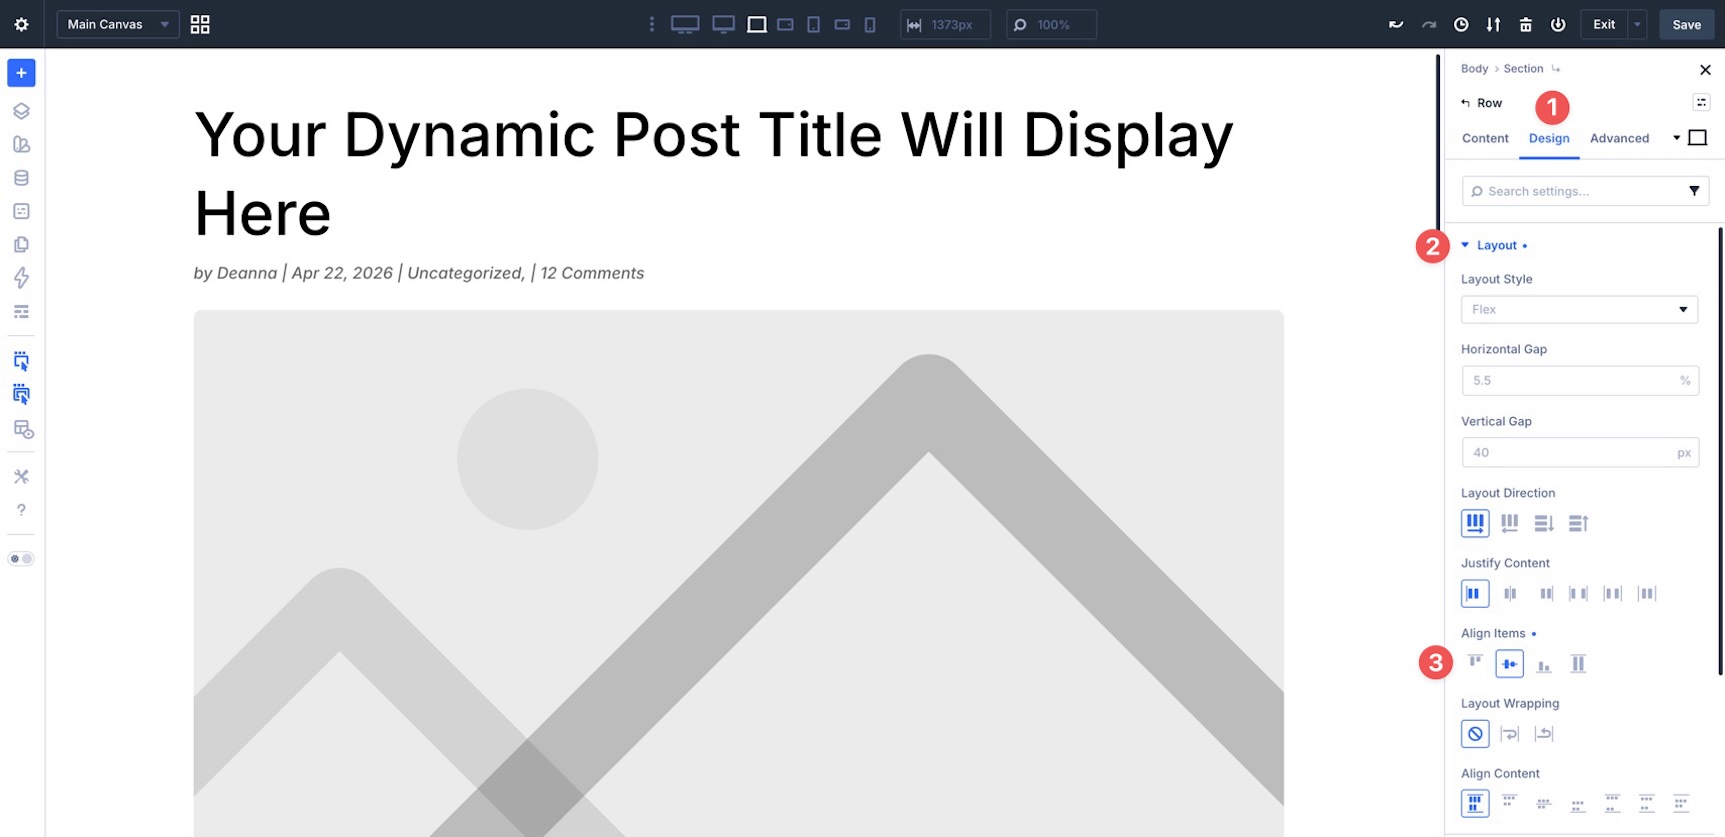
Configure The Row And Column Settings
Before adding the next Row, adjust the Row and Column settings. Select the Row and go to the Design tab. Expand the Layout option group and set Align Items to Center.
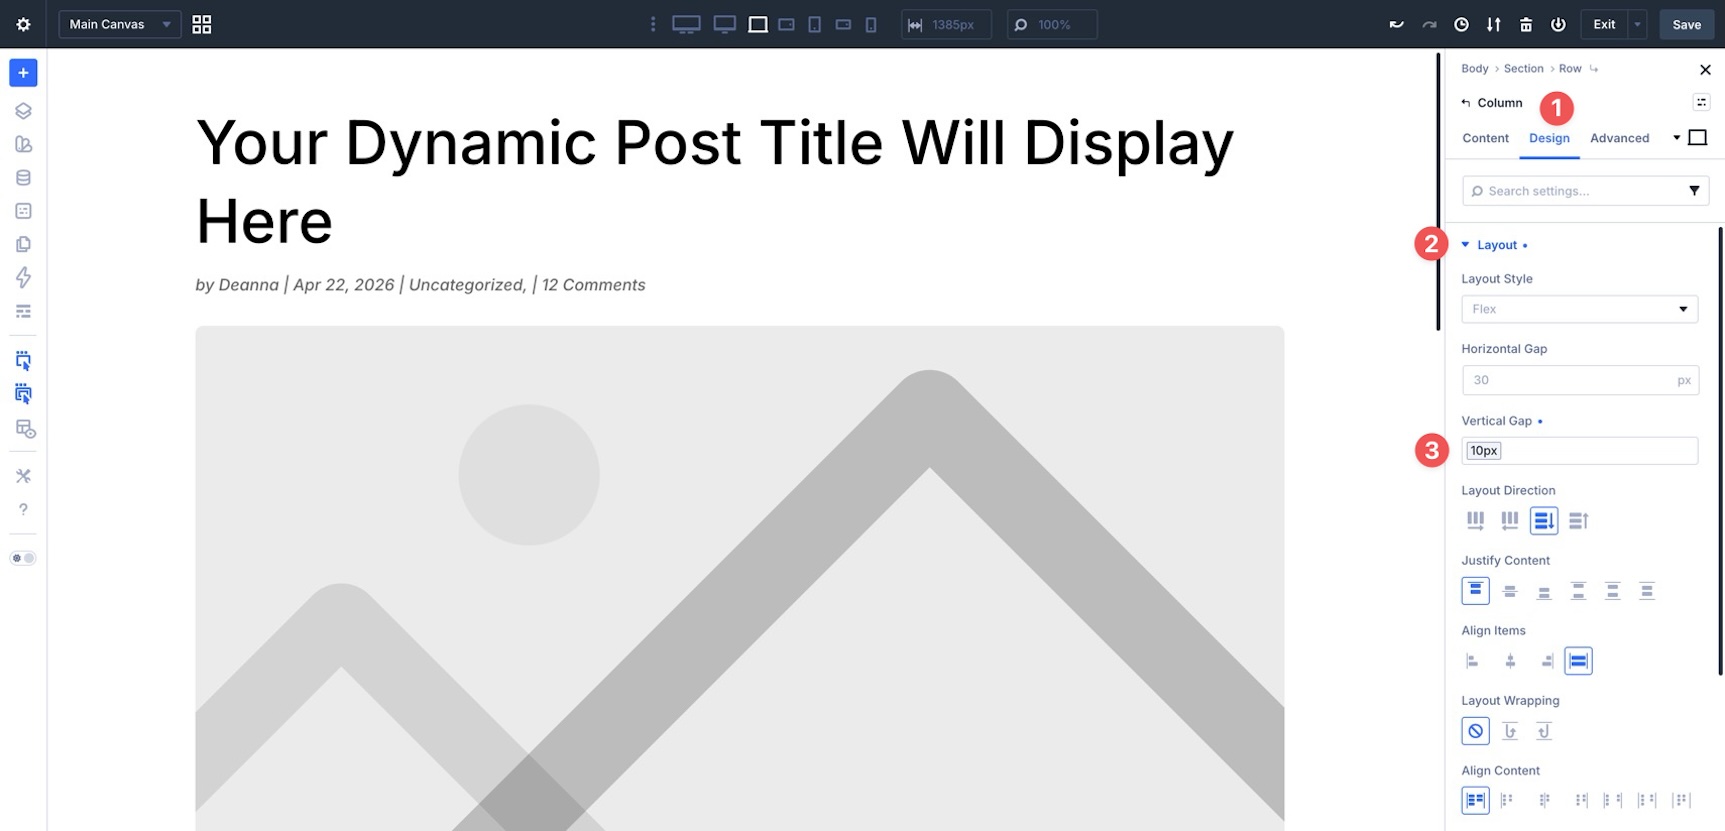
Now, edit the Column settings. Go to the Row’s Content tab and click the edit icon for the Column.
Go to the Design tab and expand the Layout option group. Apply the Spacing – XSmall variable to the Vertical Gap field.
Add Post Navigation
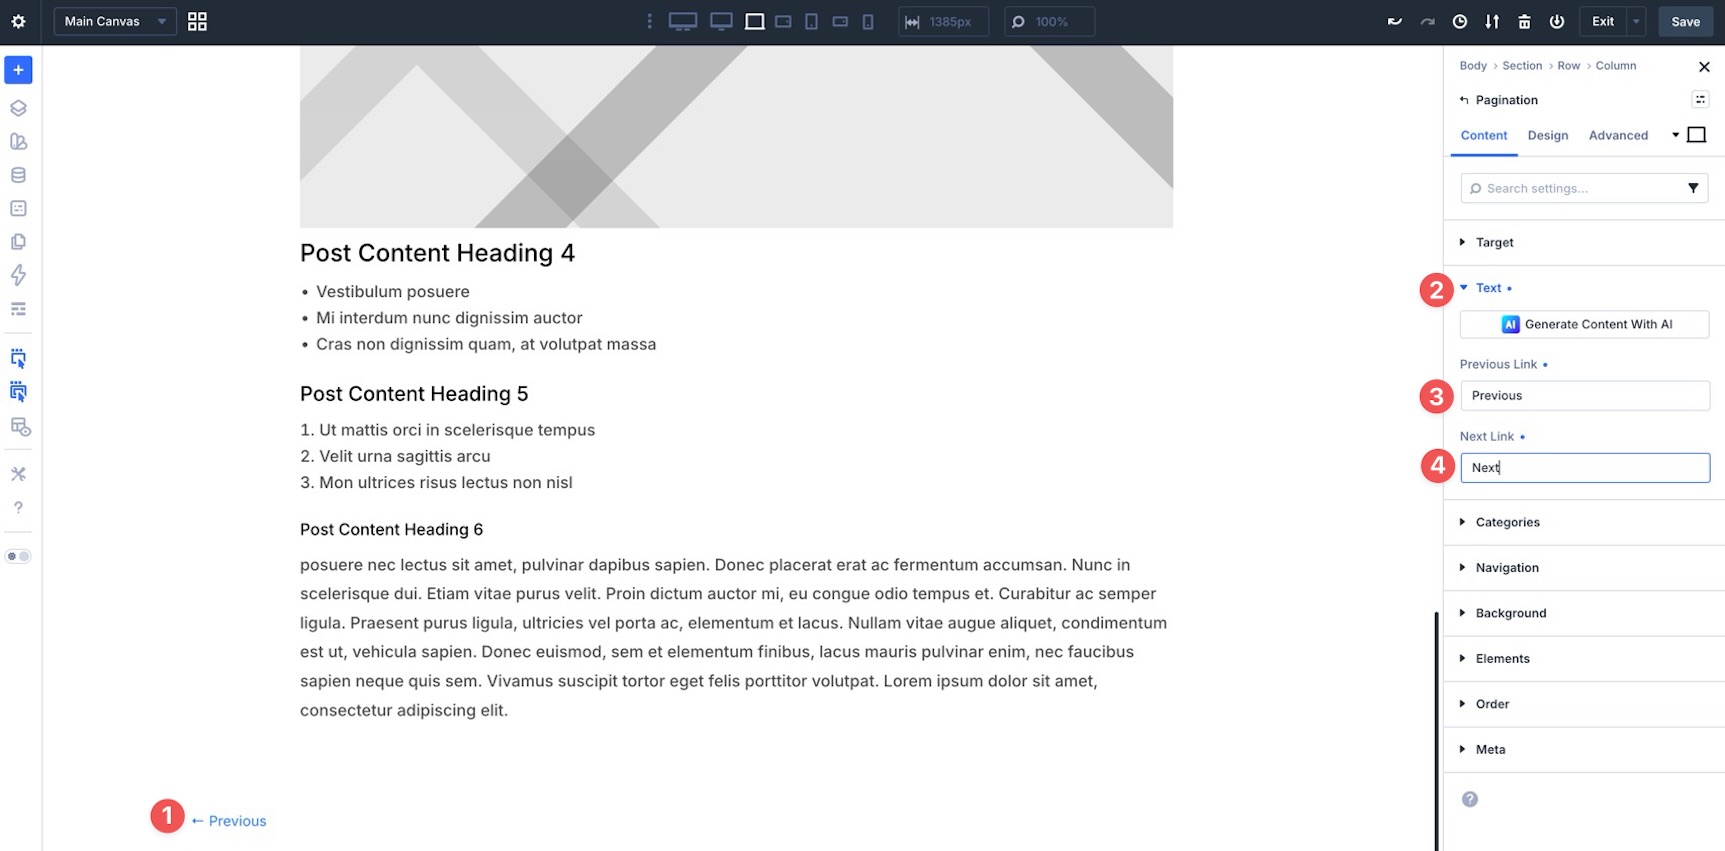
Add another single-column Row to the Section to house the Pagination module. This gives readers a quick way to move to the previous or next post.
In the module’s Content tab, expand the Text option group. Enter the previous and next labels you want to display.
Step 2: Post Author Section
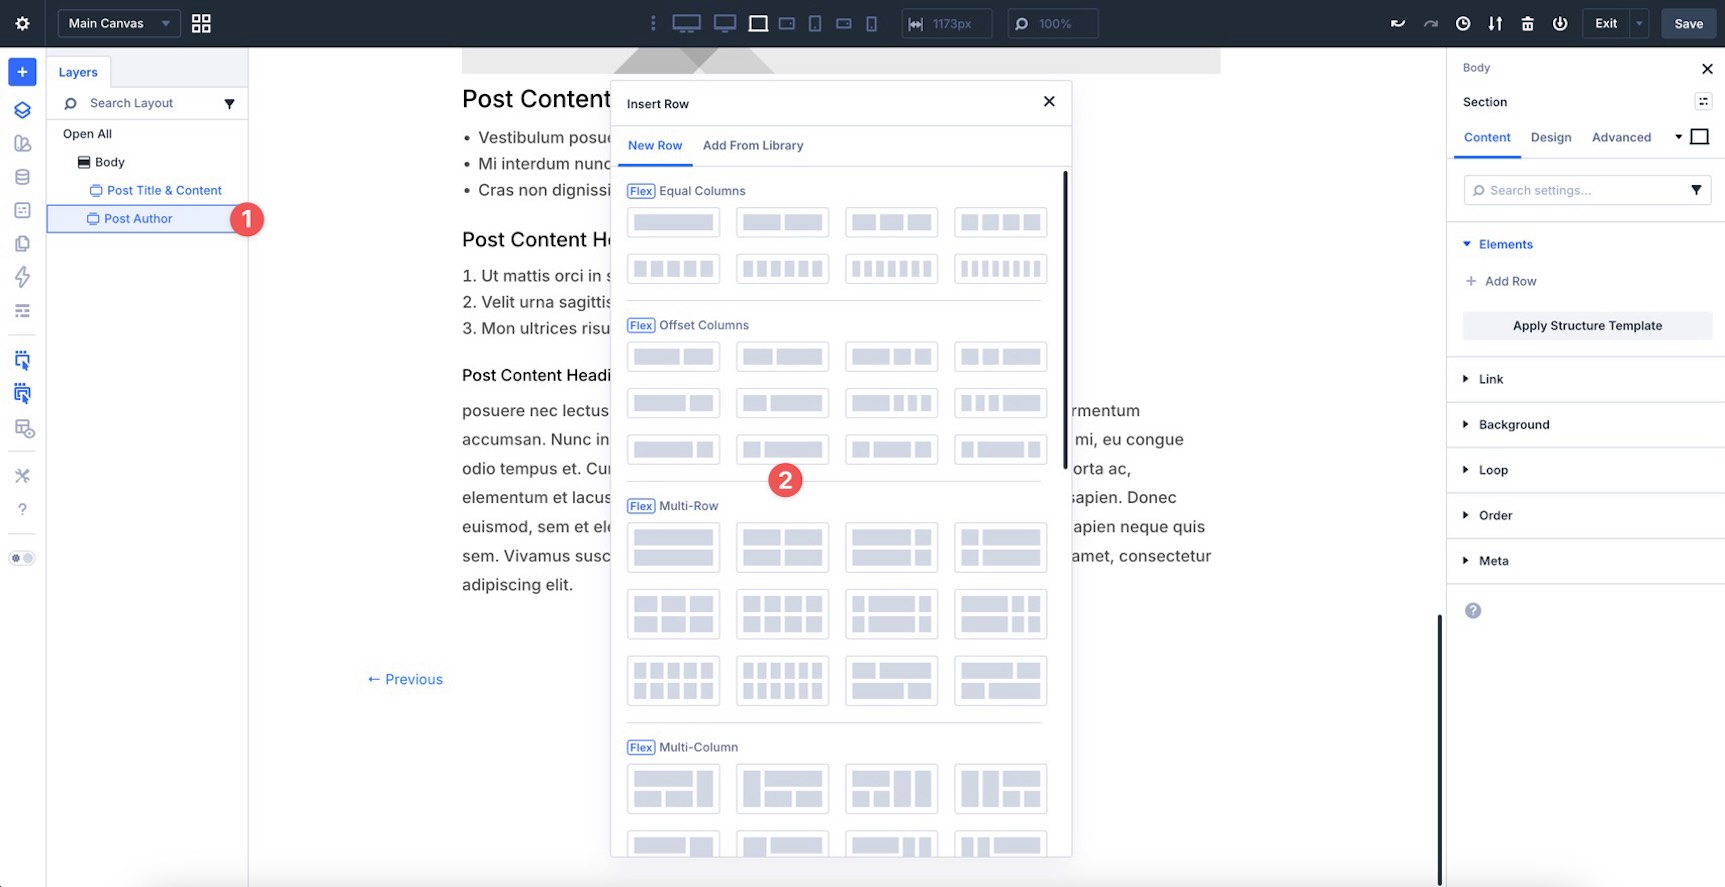
Add a new Section and name it Post Author in the Layers panel. Then, add a new 1/4 + 3/4 Row to the Section.
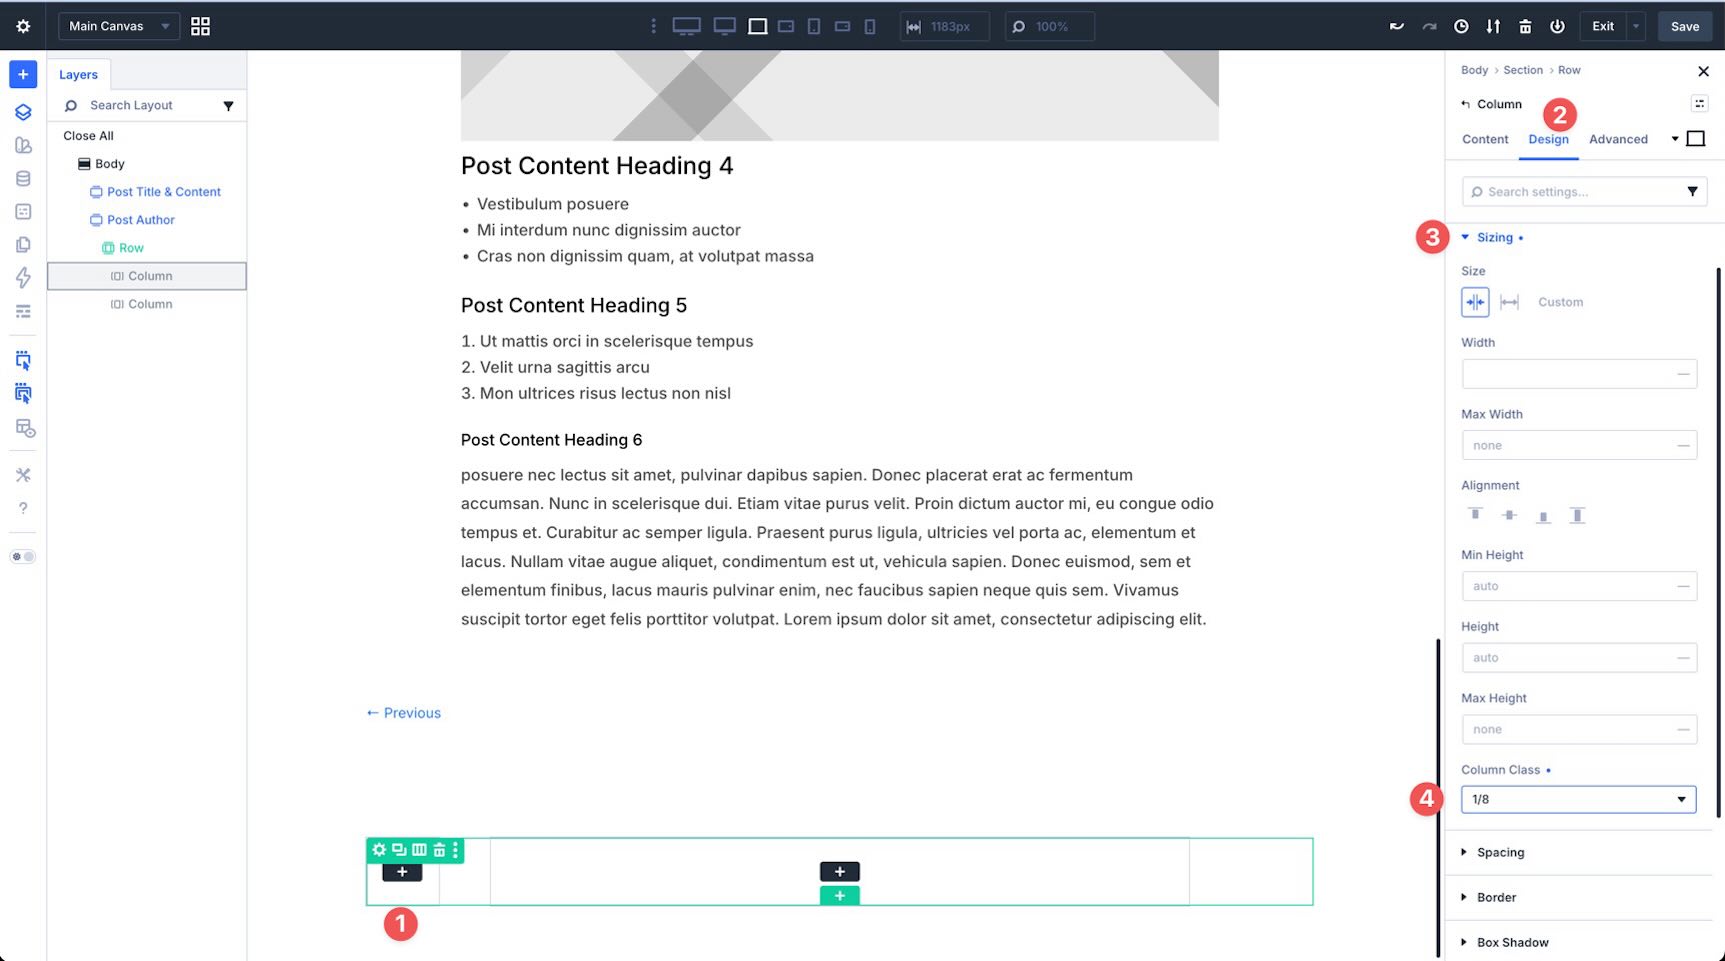
Before adding modules, adjust the sizing settings in each Column. Open the new Row and edit the first Column. In the Design tab, expand the Sizing option group. Set the Column Class to 1/8.
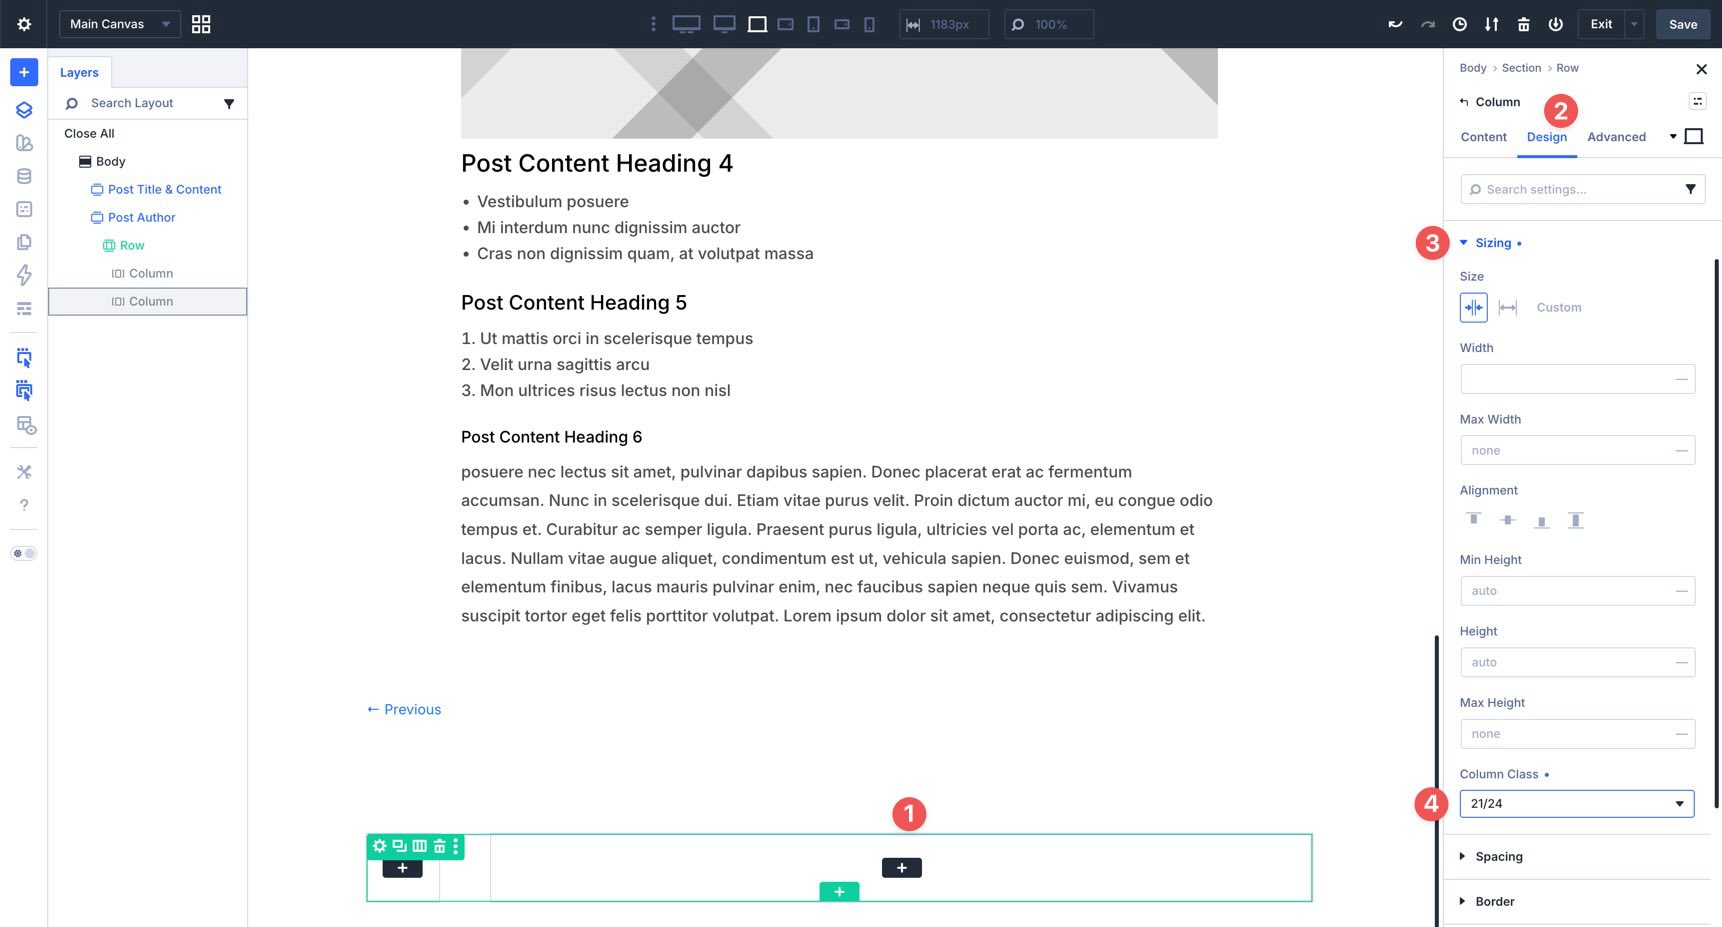
For the second Column, set the Column Class to 21/24.
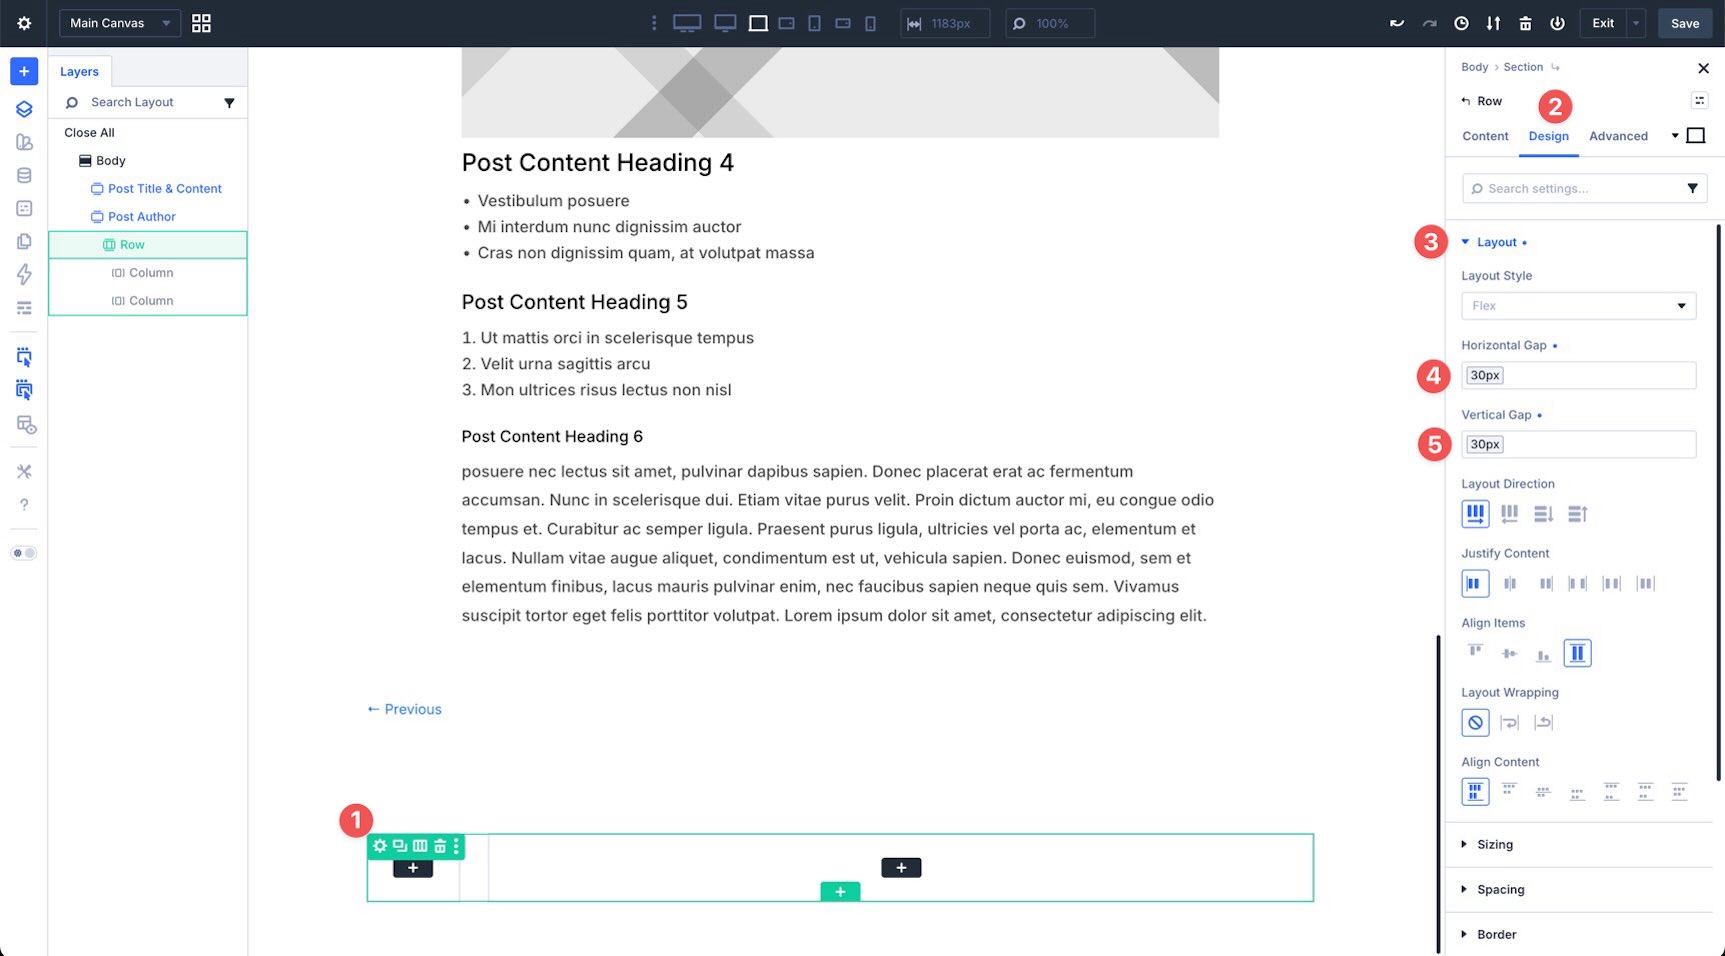
Now, open the Row settings and expand the Layout option group. In the Horizontal Gap and Vertical Gap fields, apply the Spacing – Medium variable.
Add Modules To The Row
In the first Column, add an Image module and apply the Rounded preset.
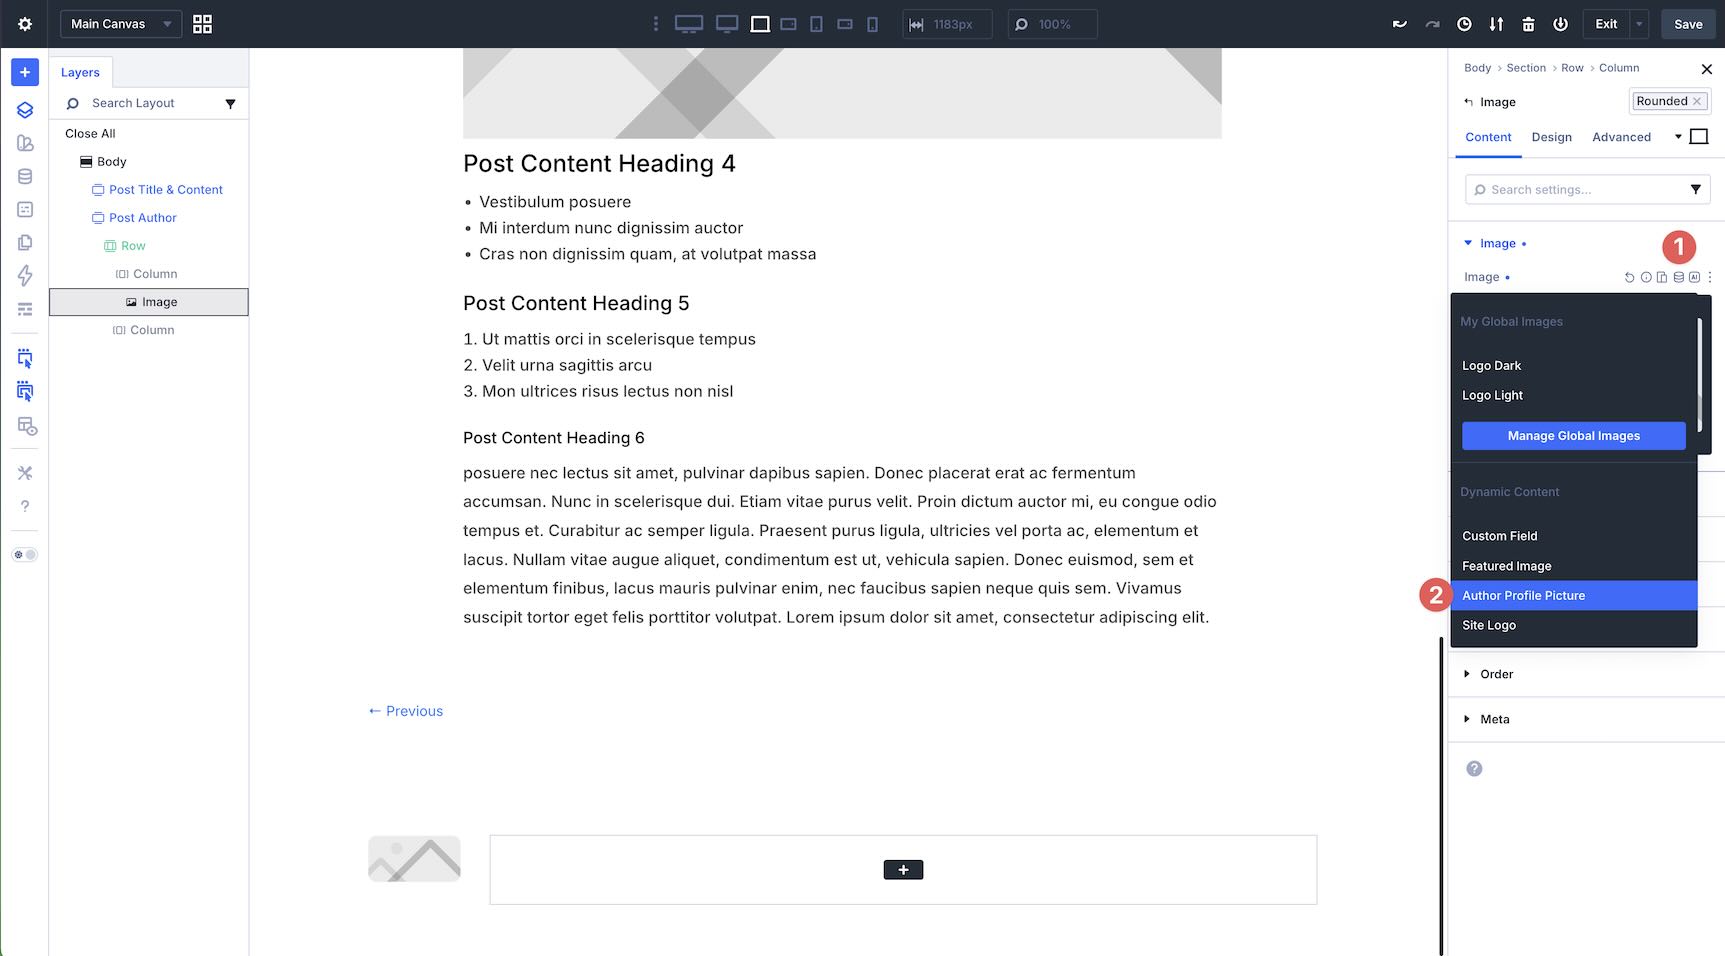
Expand the Image option group in the Content tab, hover over the Image field, and click the Insert Dynamic Content icon. When the options appear, choose Author Profile Picture.
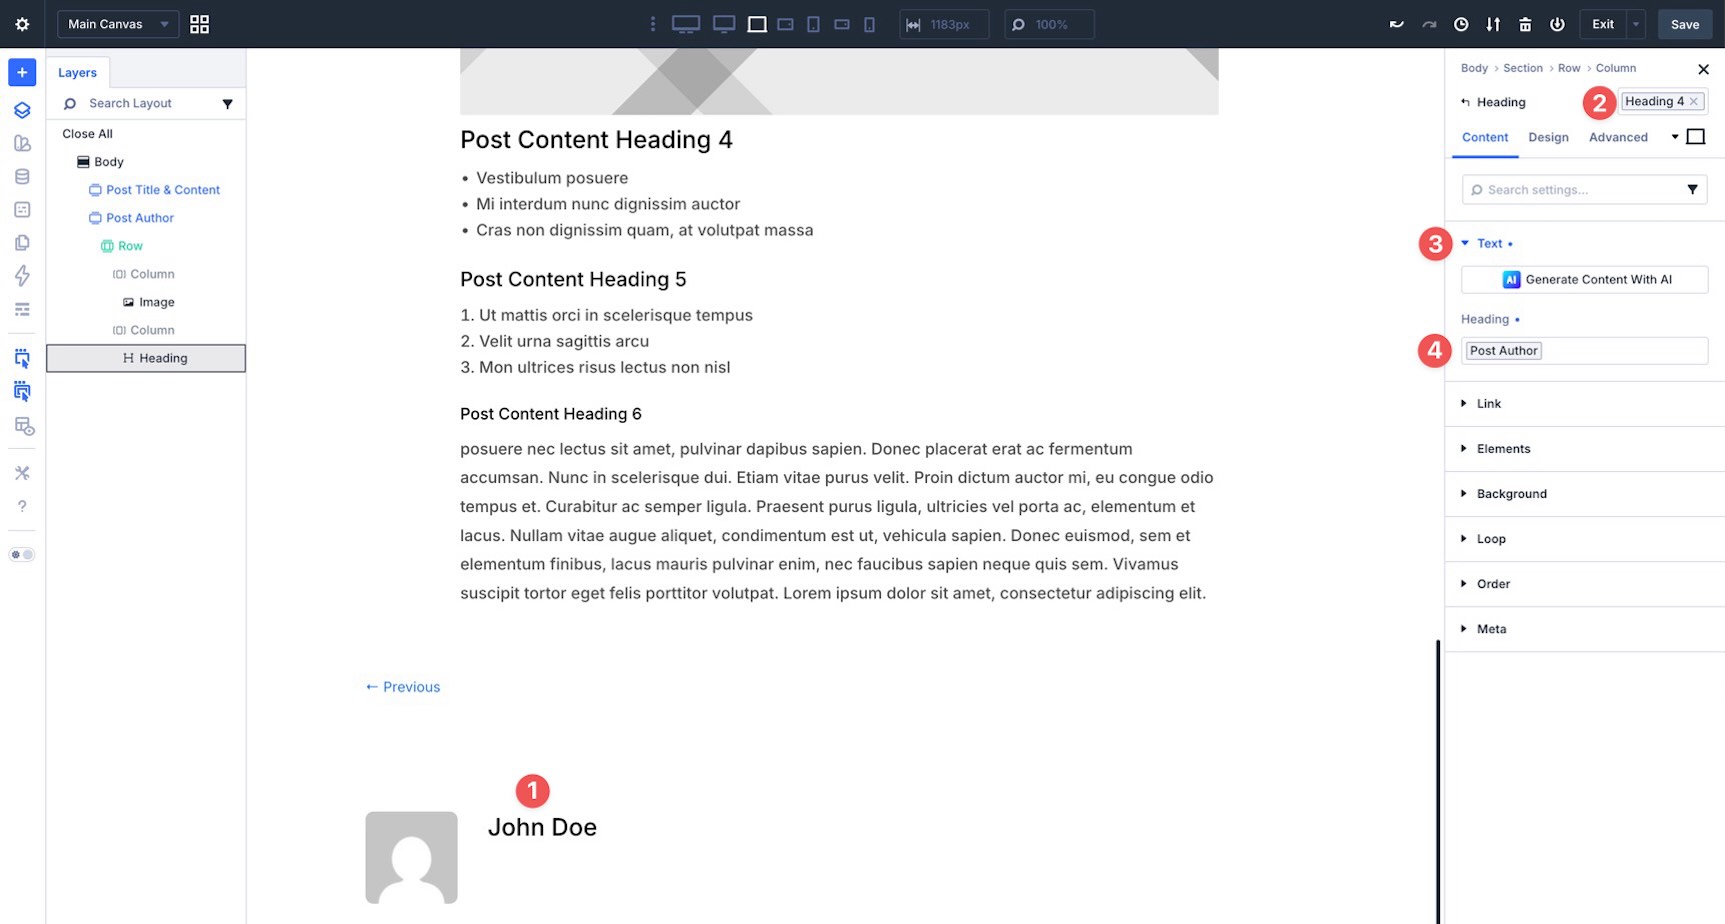
In the second Column, add a Heading module and apply the Heading 4 preset. Expand the Text option group, hover over the Heading field to reveal the Insert Dynamic Content icon, and select Post Author.
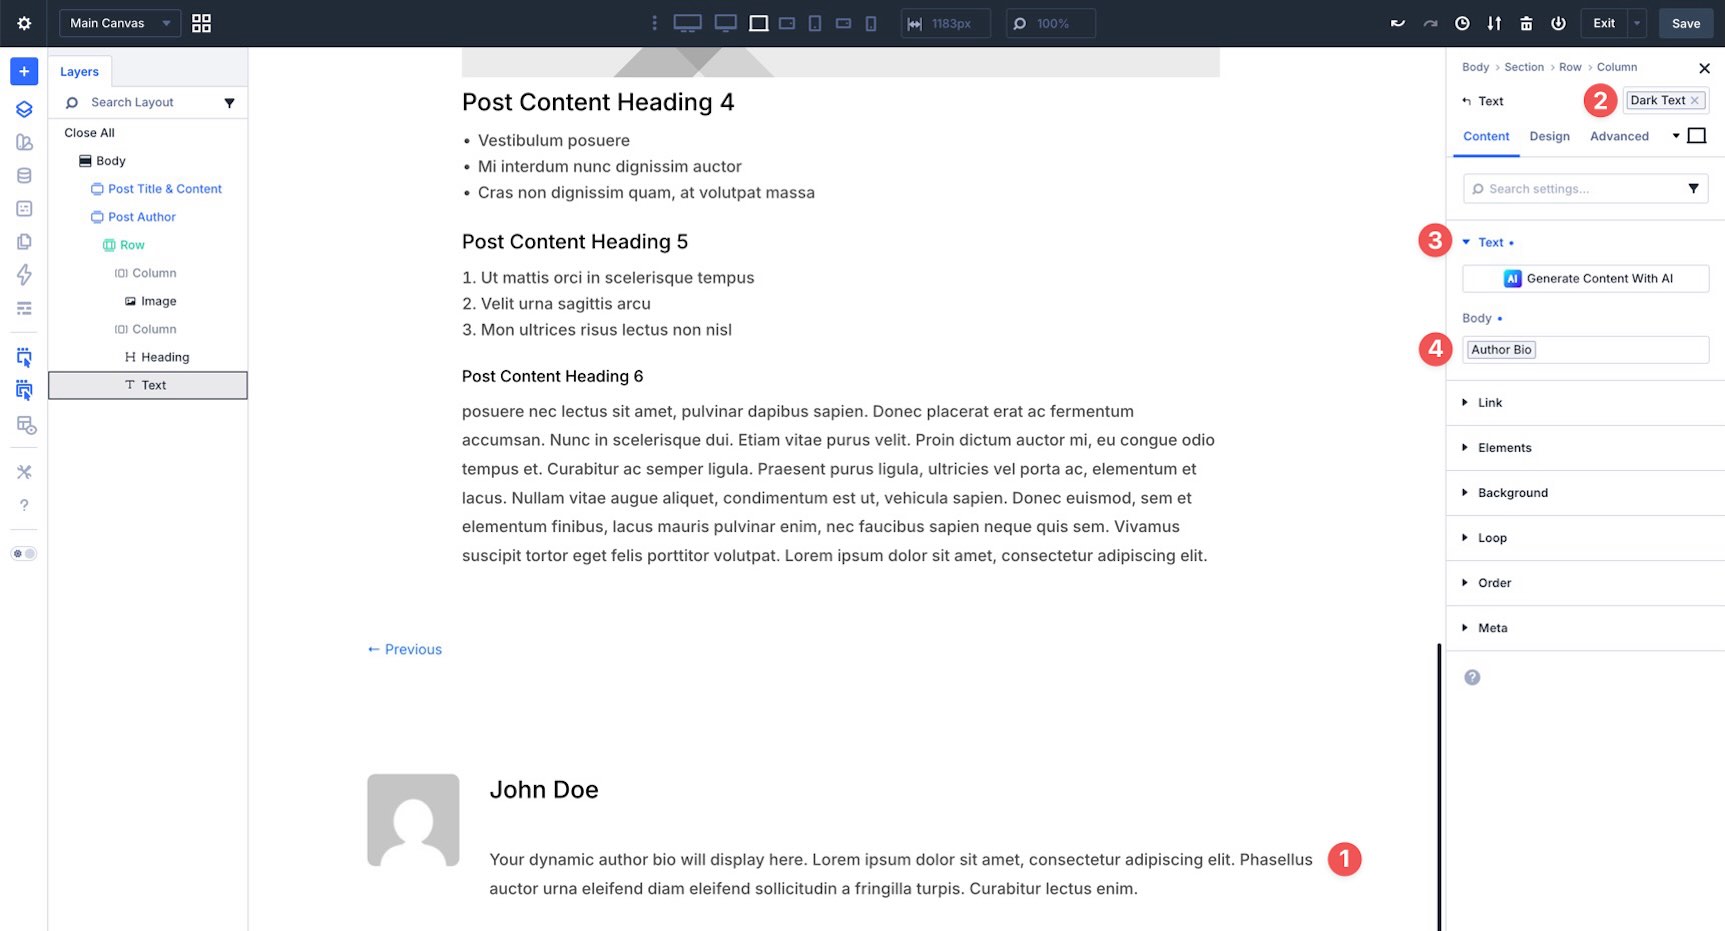
Next, add a Text module. Apply the Dark Text preset, expand the Text option group in the Content tab, and select Author Bio with the Insert Dynamic Content icon.
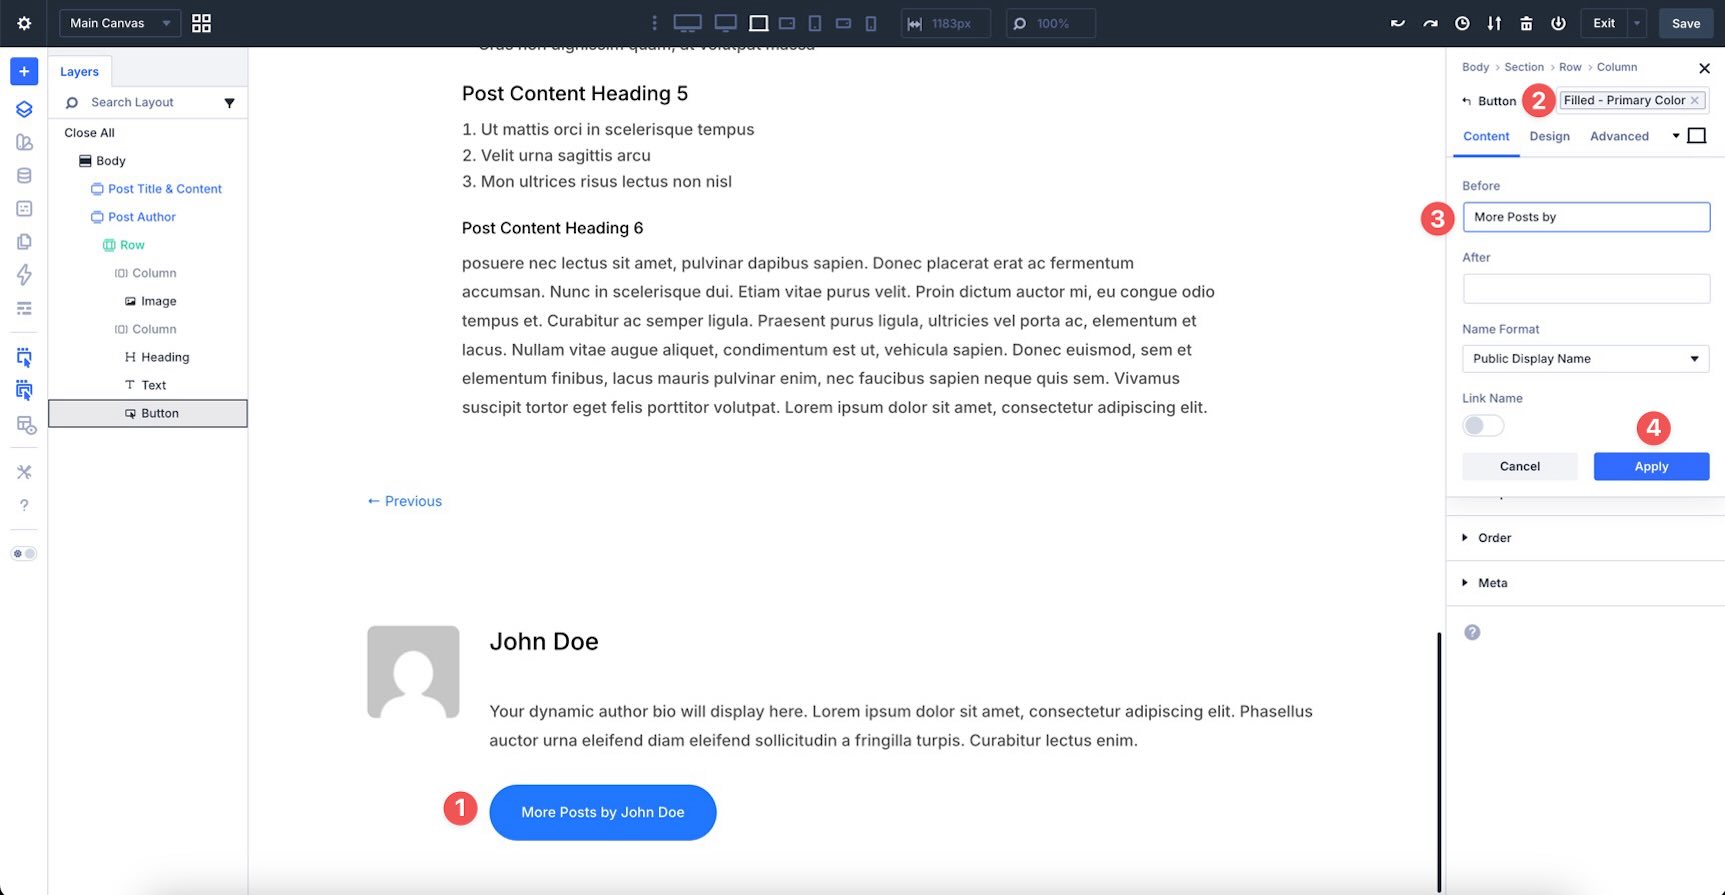
Finally, add a Button module and apply the Filled – Primary Color preset. In the Text option group, use Post Author as the dynamic content and enter More Posts by in the Before field.
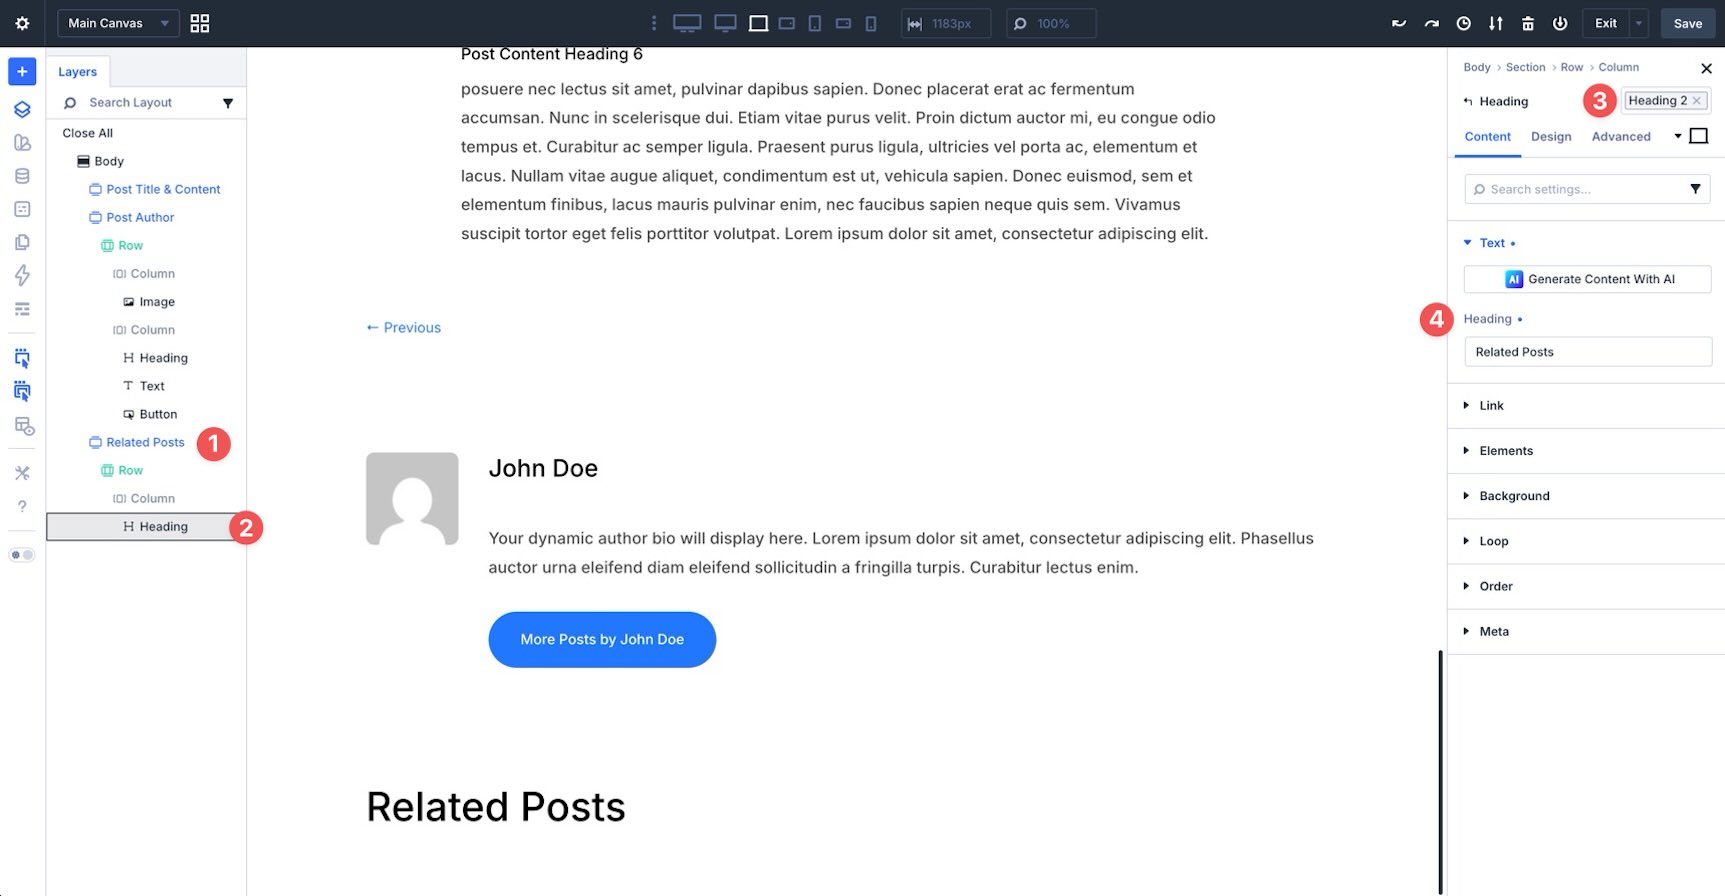
Step 3: Related Posts
Create a new Section and name it Related Posts. Add a single-column Row to the Section, then add a Heading module. Apply the Heading 2 preset to the Heading module.
Next, add a Blog module. In the Content tab, expand the Content option group and set the Post Count to 3.
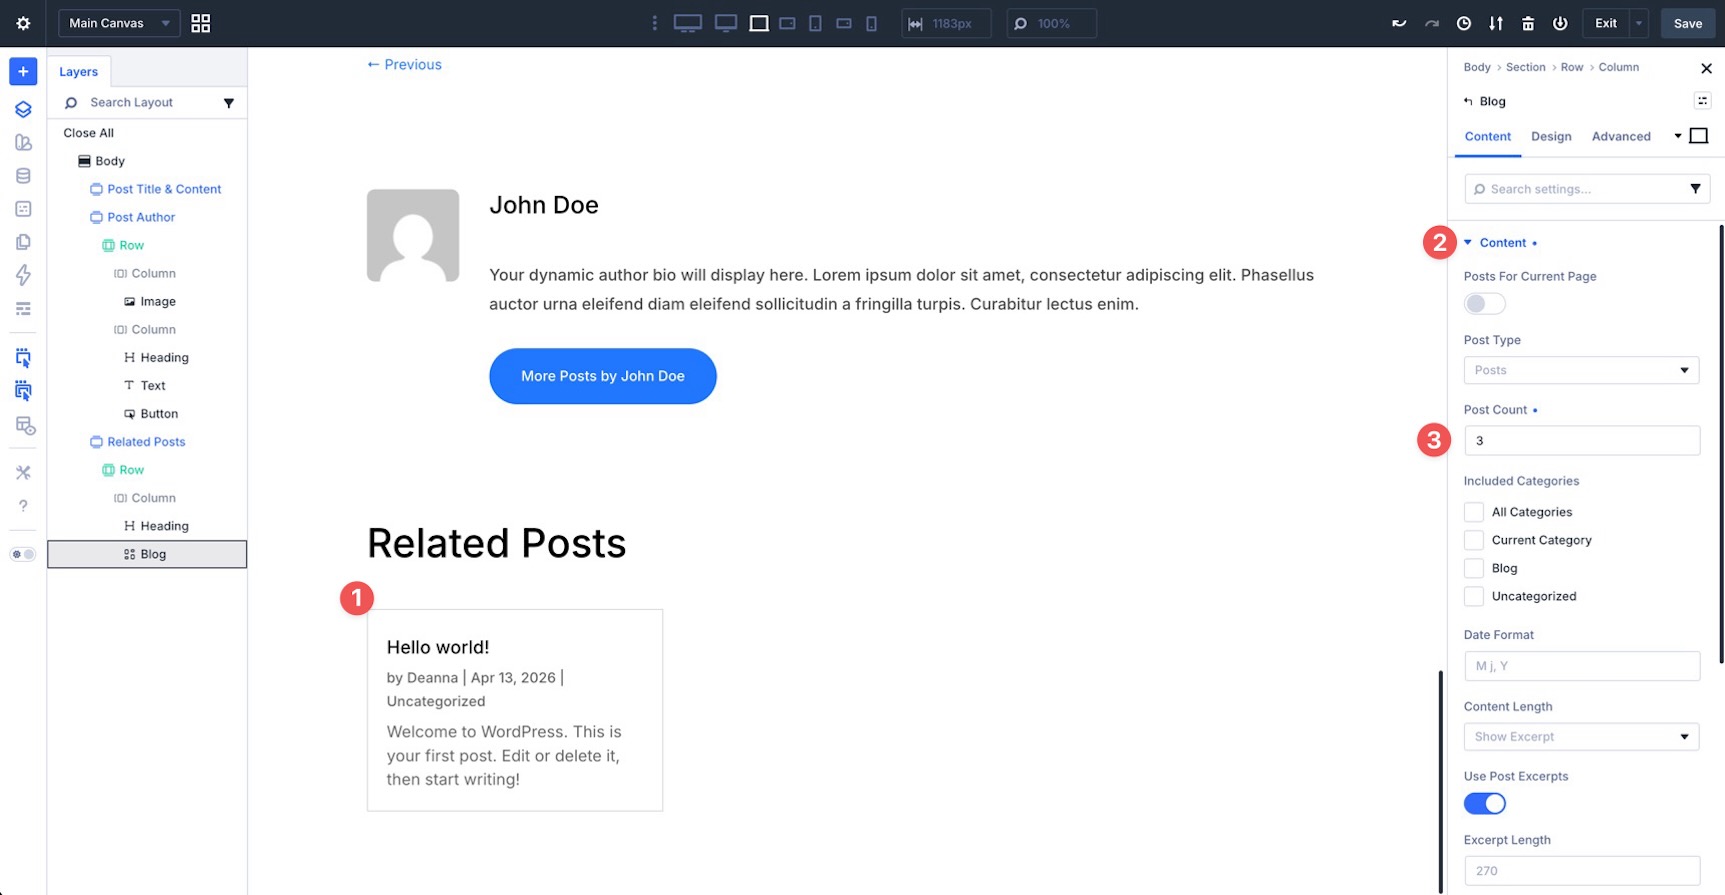
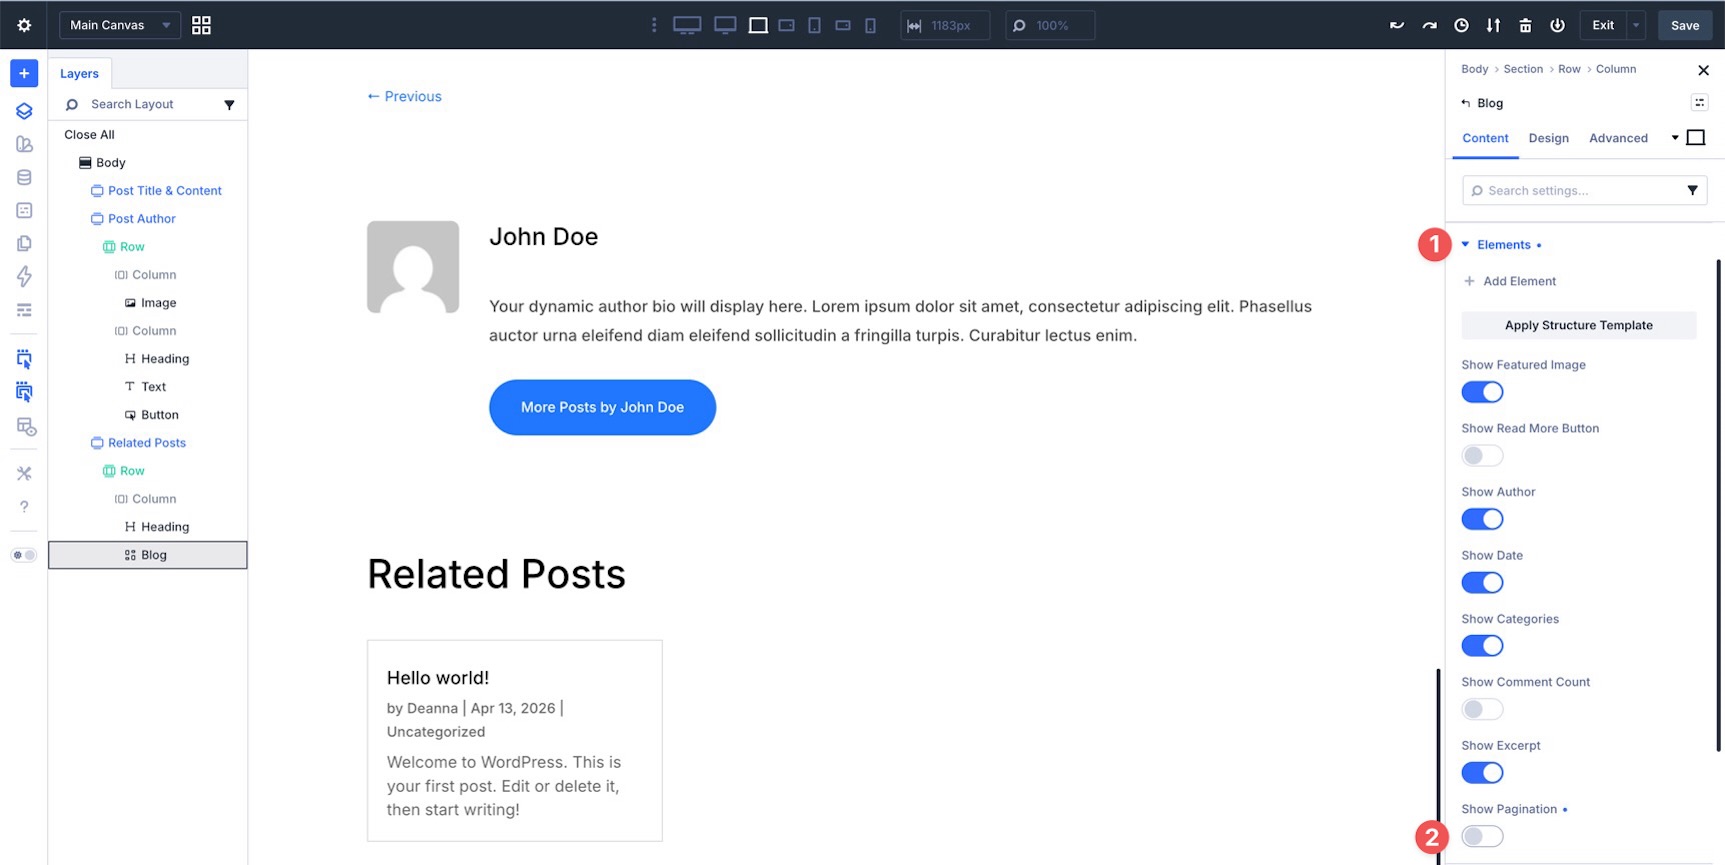
Expand the Elements option group and disable Show Pagination.
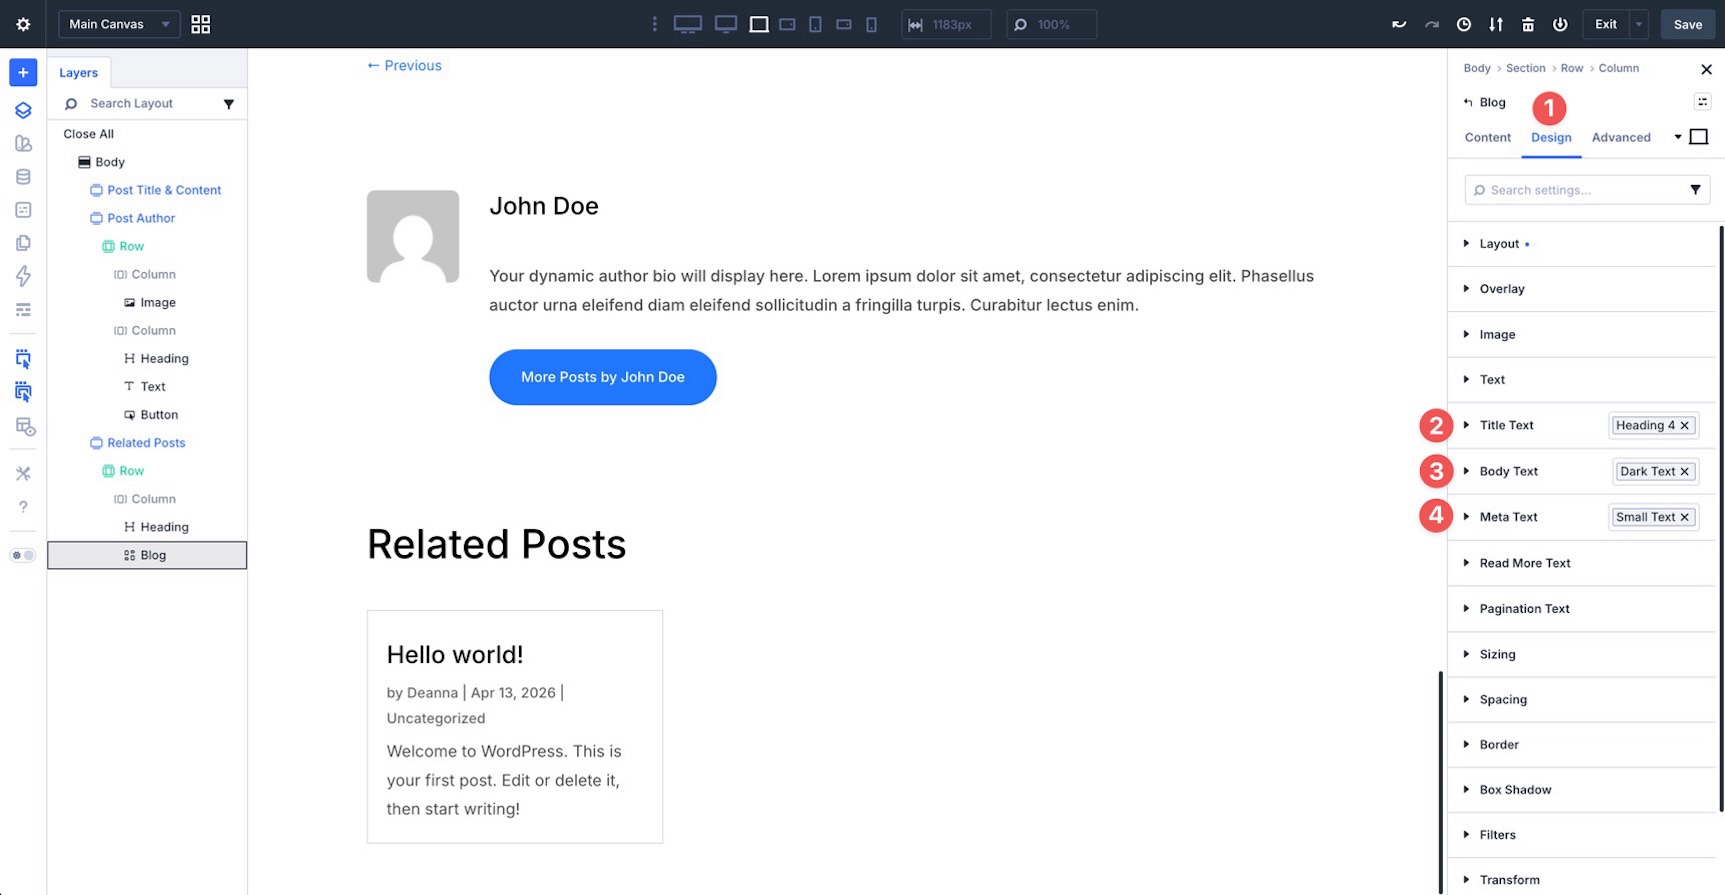
In the Design tab, apply the Heading 4 preset to the Title Text option group, the Dark Text preset to the Body Text option group, and the Small Text preset to the Meta Text option group.
Step 4: Post Comments
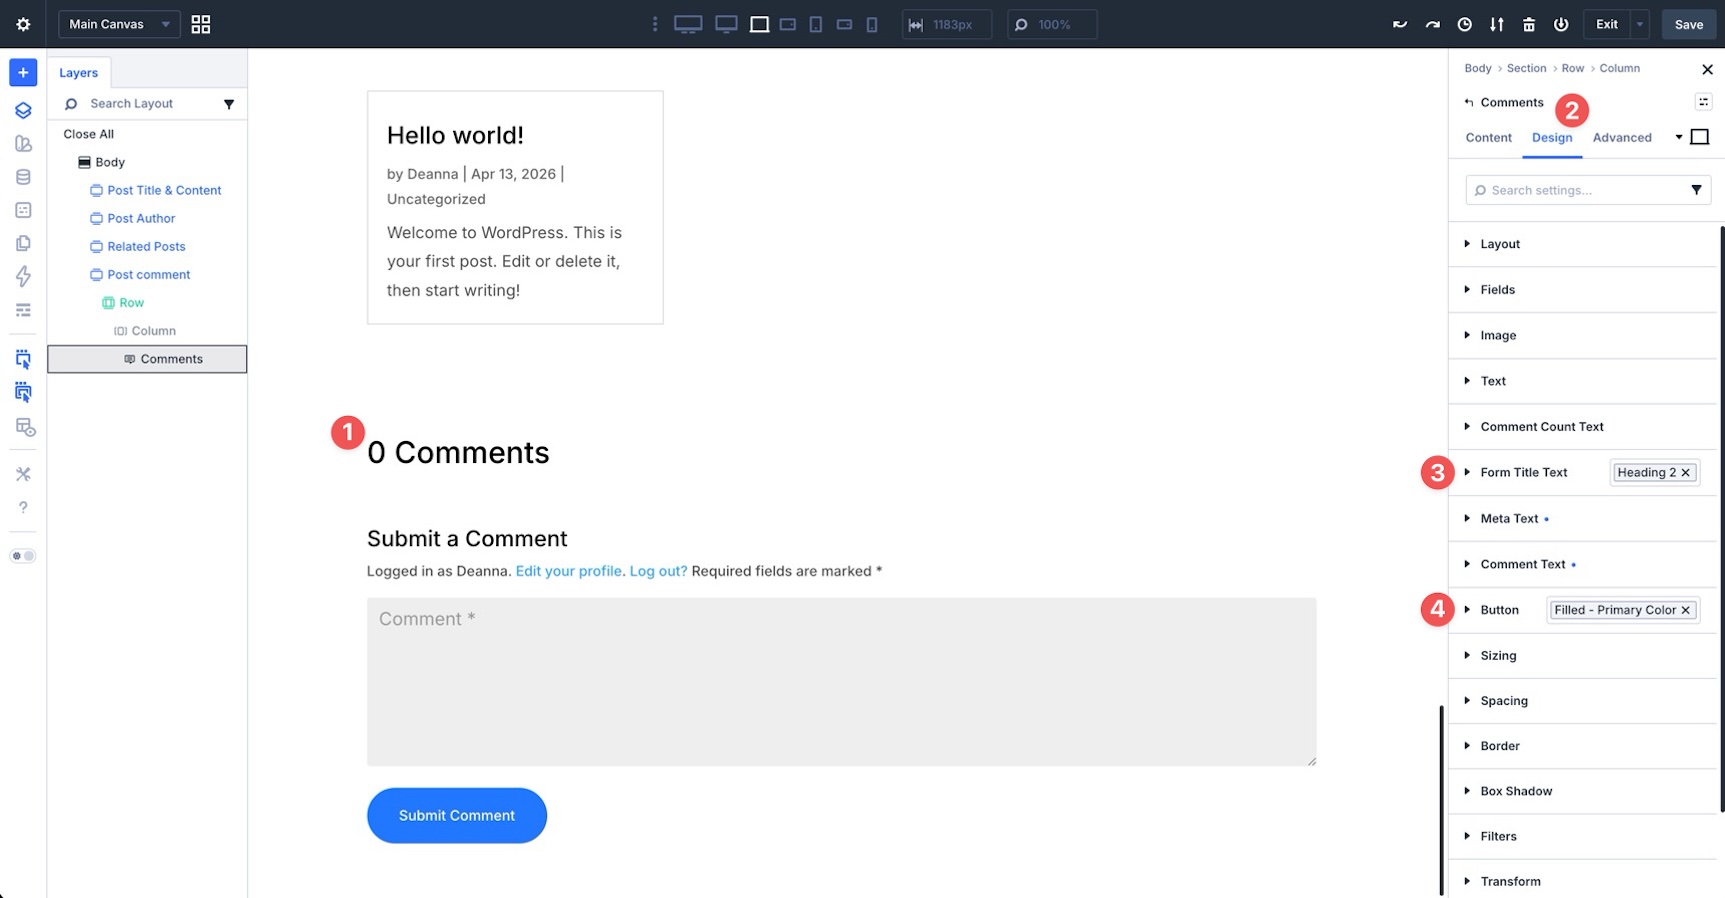
The final Section in the template will house comments. Create a new Section and name it Post Comments. Add a single-column Row, then add the Comments module.
In the Design tab, apply the Heading 2 preset to the Form Title Text option group and the Filled – Primary Color preset to the Button option group.
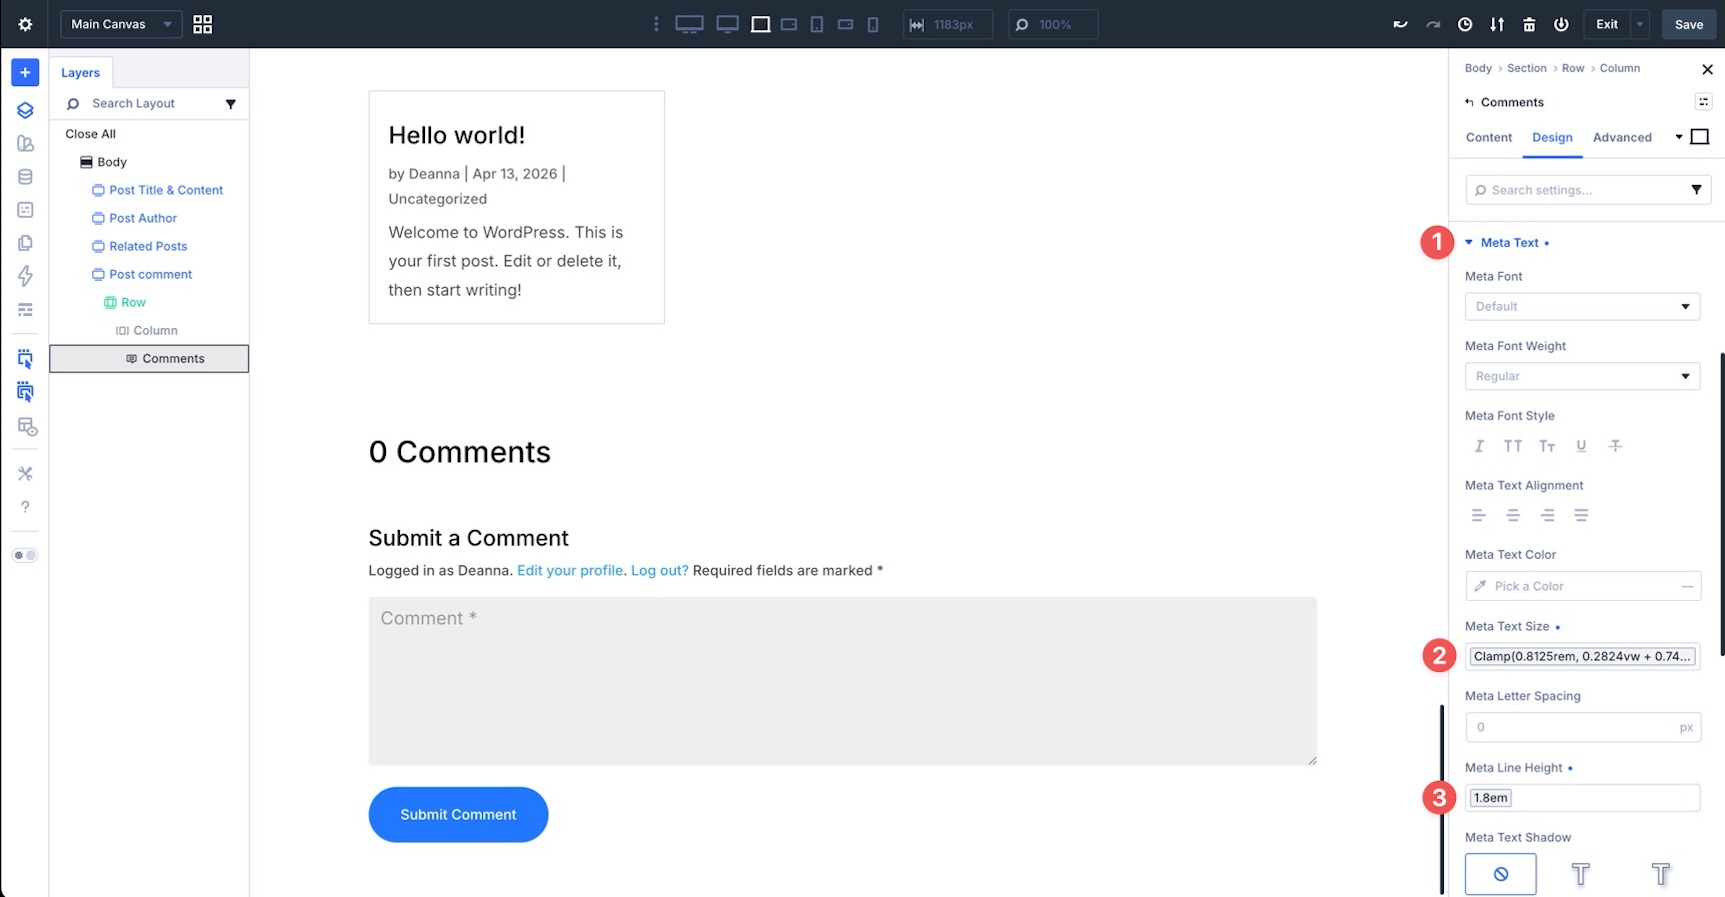
Expand the Meta Text option group. Apply the Body Small variable to the Meta Text Size field and the Line Height – Body variable to the Meta Line Height field.
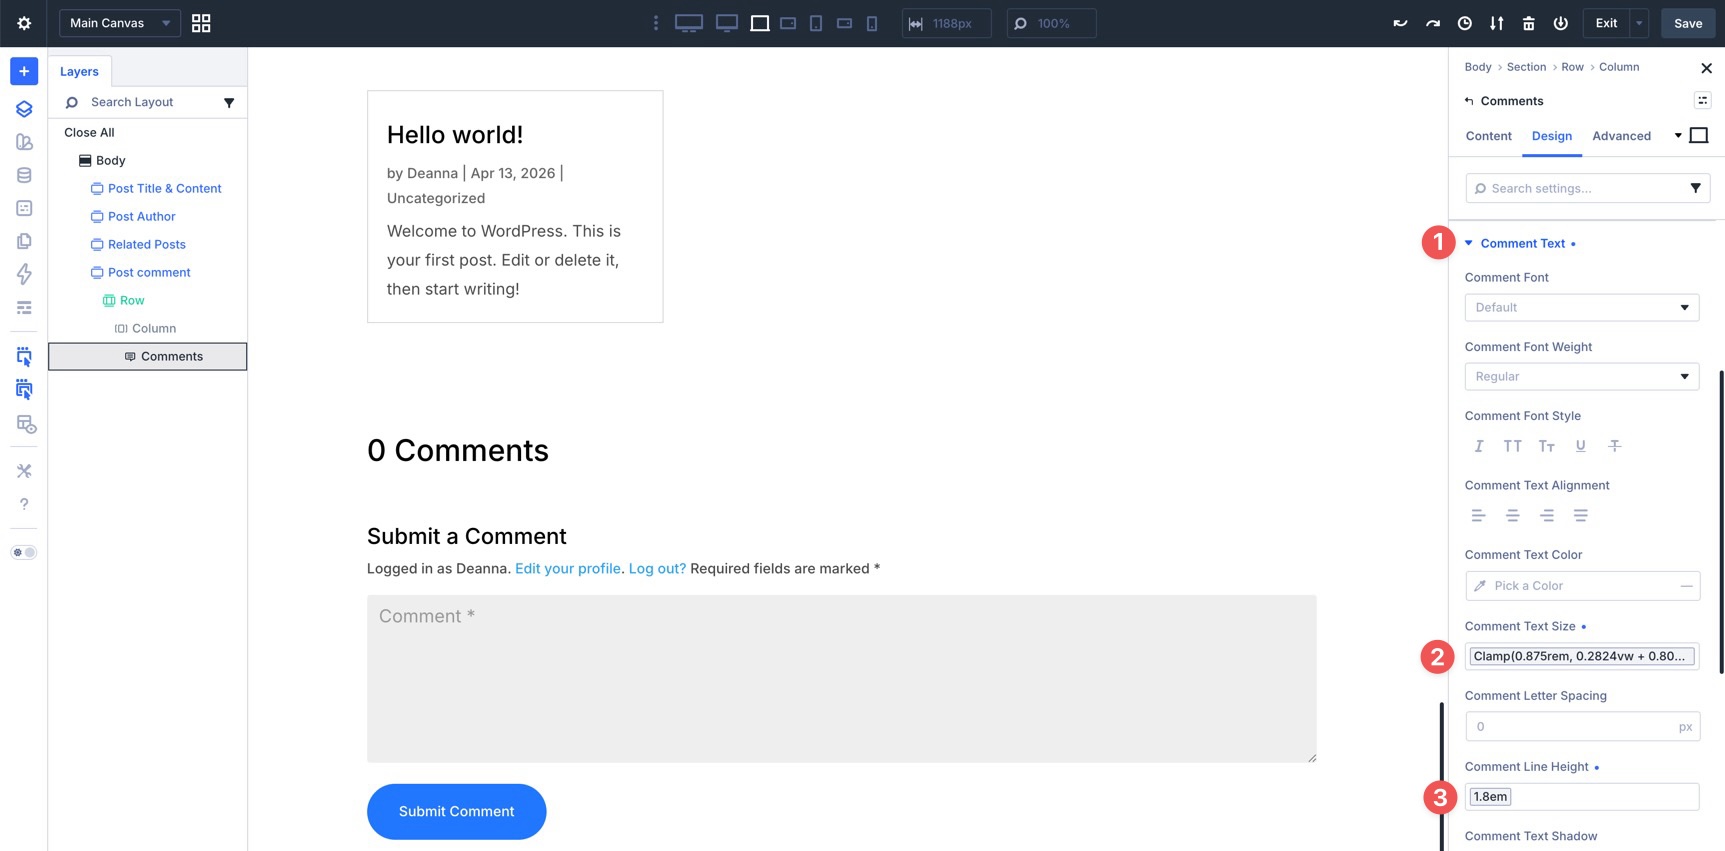
Finally, expand the Comment Text option group and apply the Body variable to the Comment Text Size field. Use the Line Height – Body variable for the Comment Line Height field.
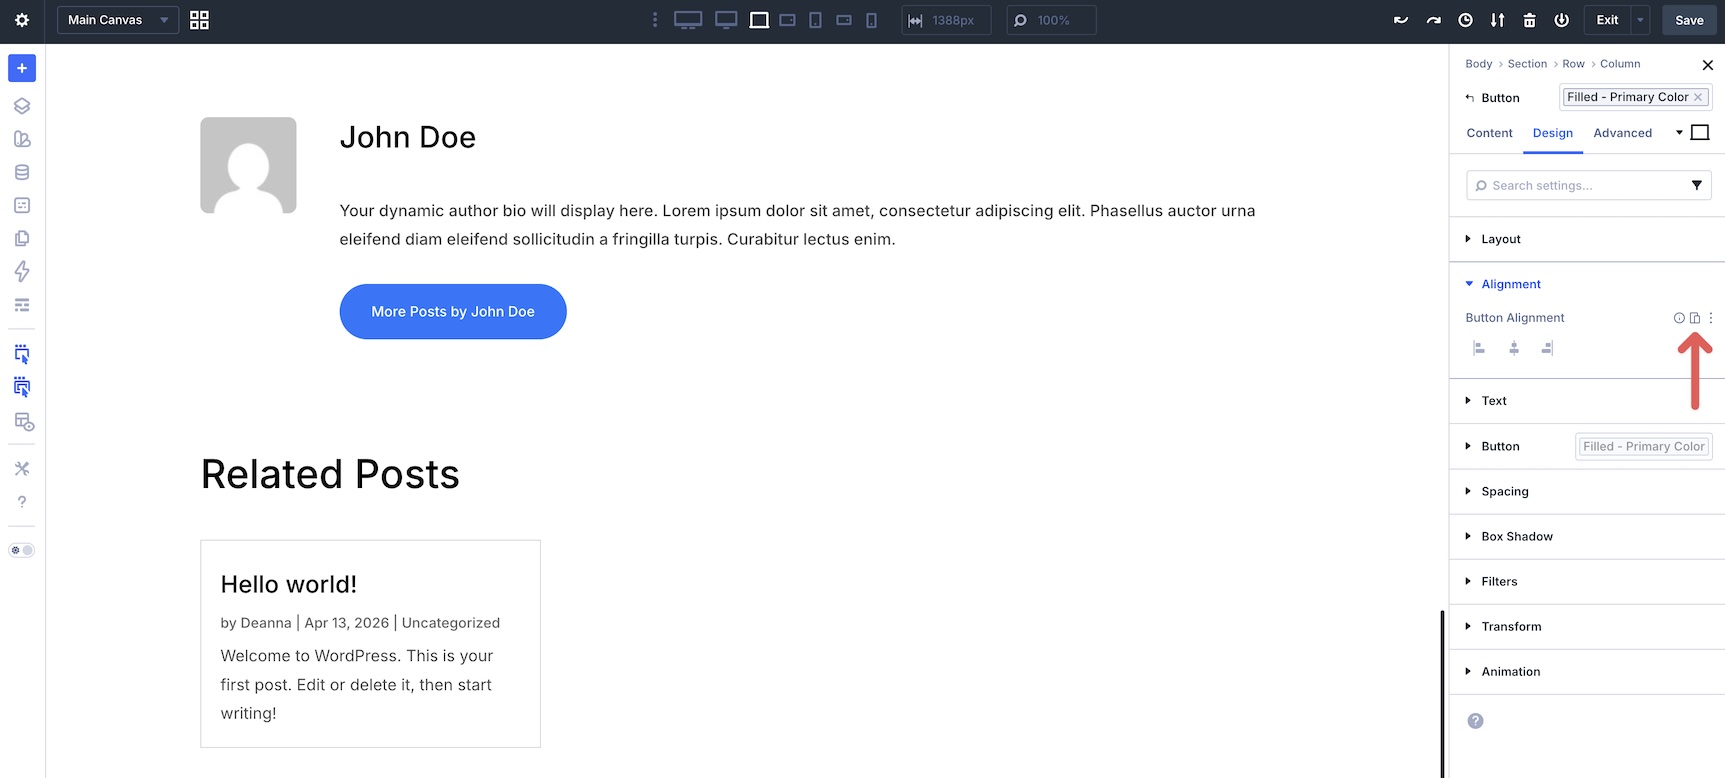
Step 5: Test For Responsiveness
Even though we built the post template with Design Variables and Presets, it is still important to test how the layout behaves across screen sizes. Divi 5 provides two useful tools for this: Customizable Responsive Breakpoints and the Responsive Editor.
Divi 5 supports up to seven customizable breakpoints in the Visual Builder’s Top Bar.
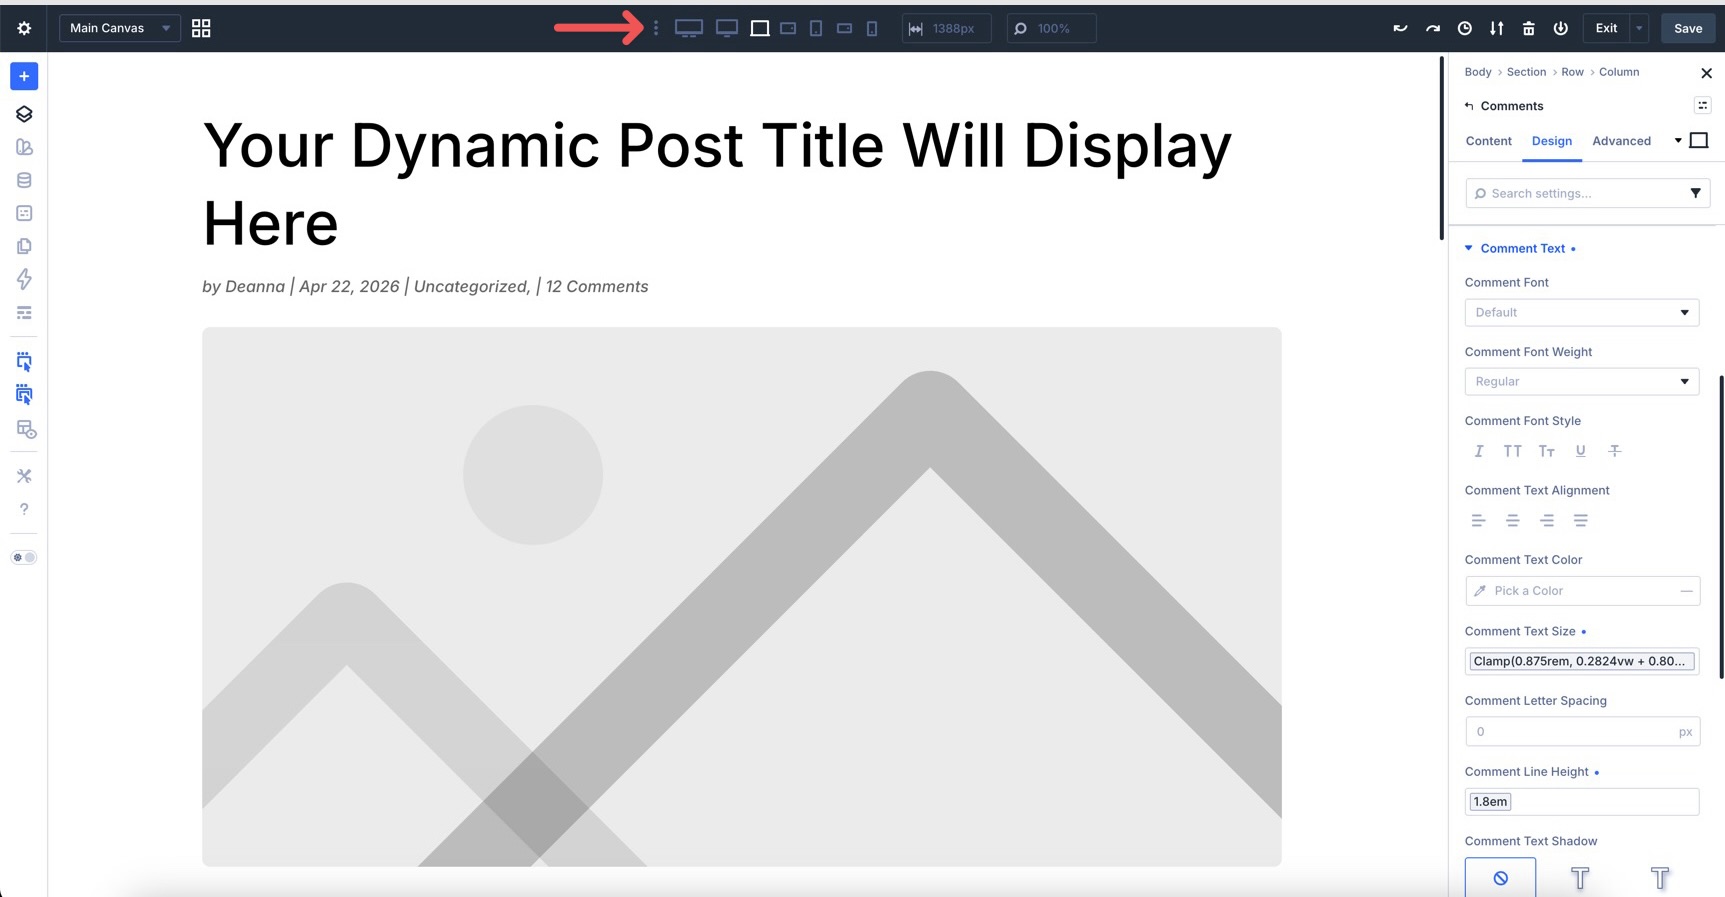
Clicking the ellipsis menu near the responsive icons opens a modal that lets you enable or disable breakpoints from smaller phones to ultra-wide desktop screens.
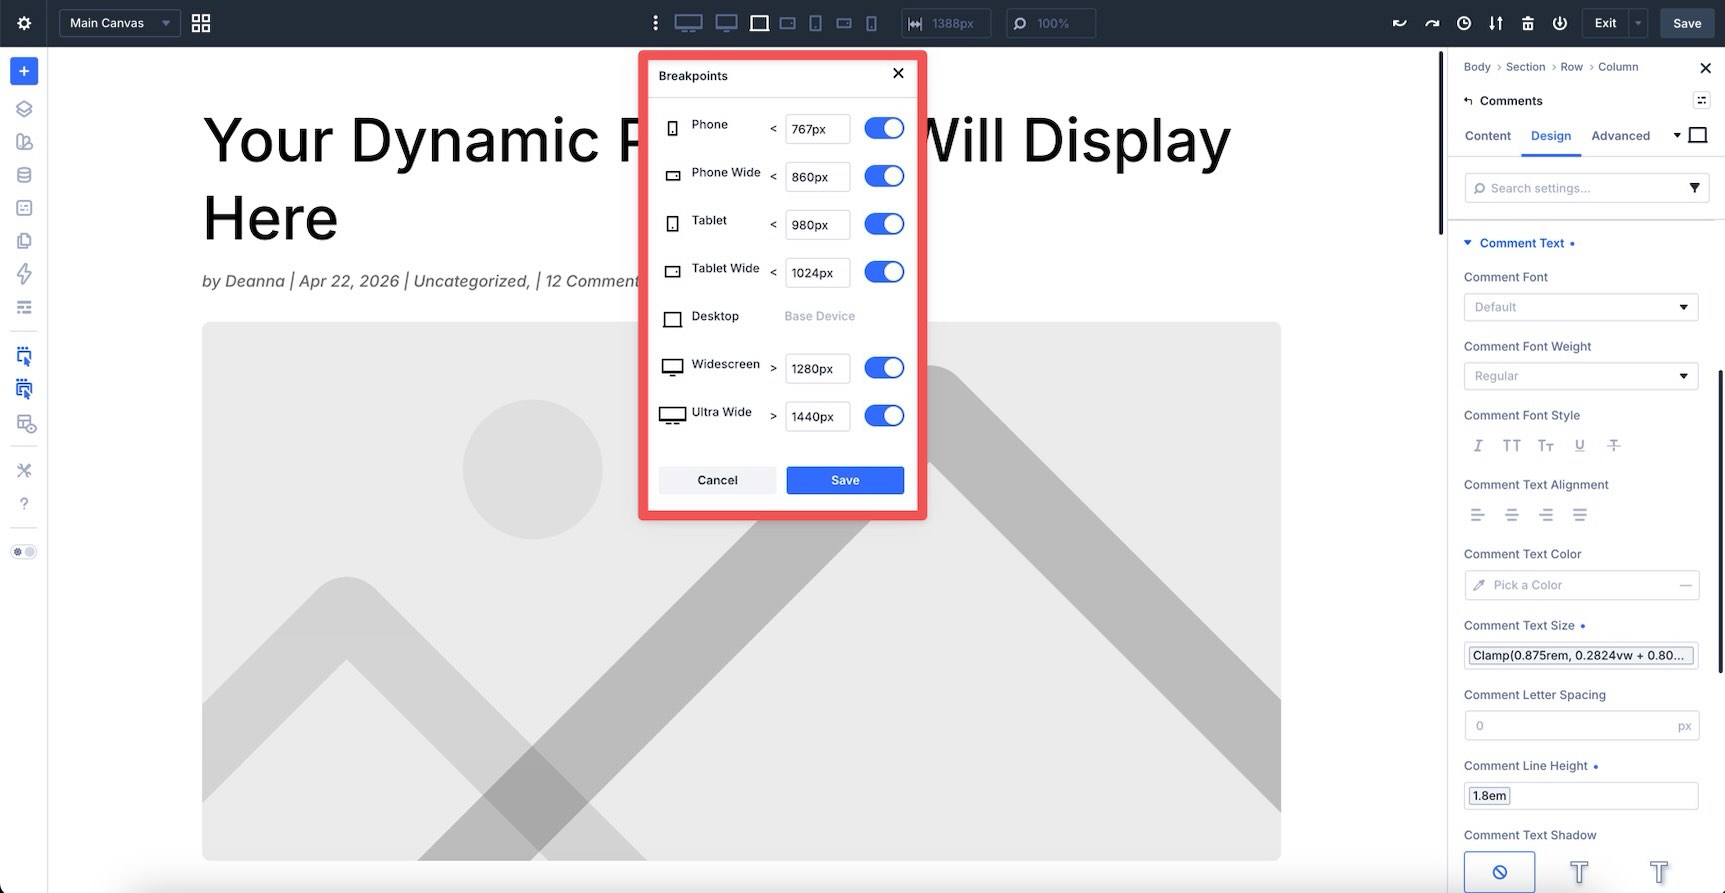
You can also use the responsive width field to enter specific preview widths and test the layout more precisely.
Alternatively, click the responsive icons to cycle through active breakpoints and preview how the template appears at each size.
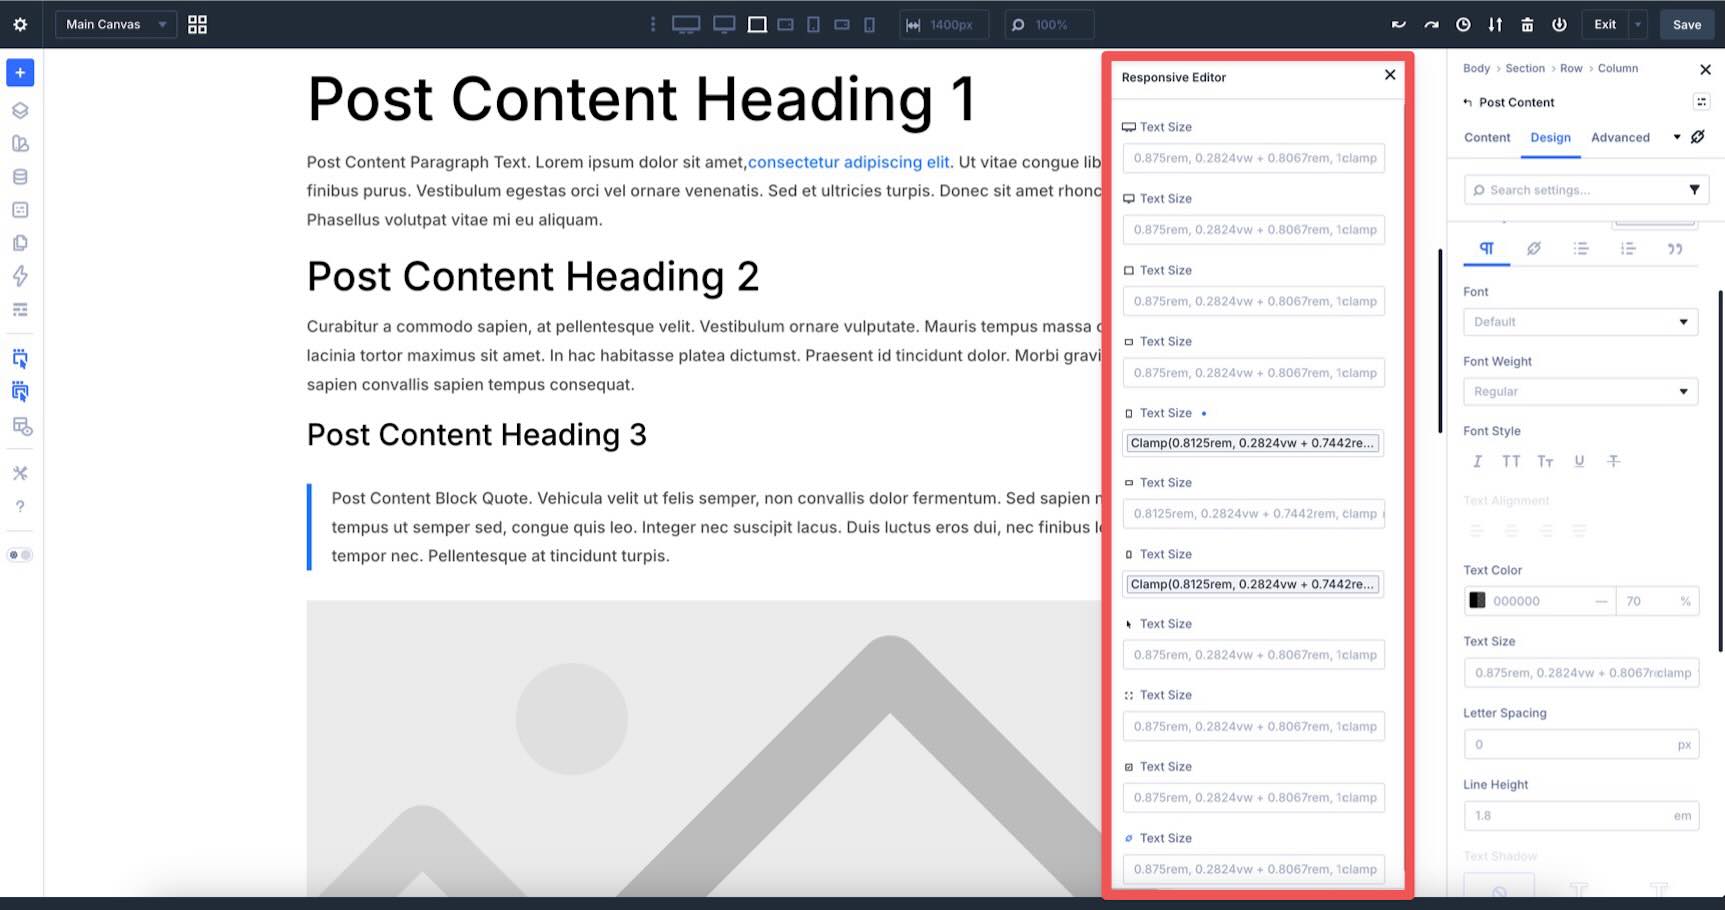
If you need to make module-level changes, use the Responsive Editor. Hover over a responsive-supported field and click the Edit Responsive Values icon.
A modal appears, allowing you to adjust values for different breakpoints in one place.
Tips And Best Practices
Here are a few ways to get more out of your Theme Builder templates and keep the workflow efficient.
Name Everything
Name sections, rows, and important modules in the Layers panel. As you saw in the single post template build, clear labels make it much easier to navigate and edit larger templates later.
Keep Designs Consistent
Use the Design Variables and Presets you created earlier in the course whenever possible. The more your templates reference shared values, the easier they are to update later. For example, changing a shared color or spacing variable can update every template area that uses it.
Use The Loop Builder For Custom Archives
For Category and Author archive pages, consider using the Loop Builder instead of the standard Blog module when you need more layout control. It lets you design the repeated post item and use Dynamic Content to populate each loop item.
Create A Backup Of Your Templates
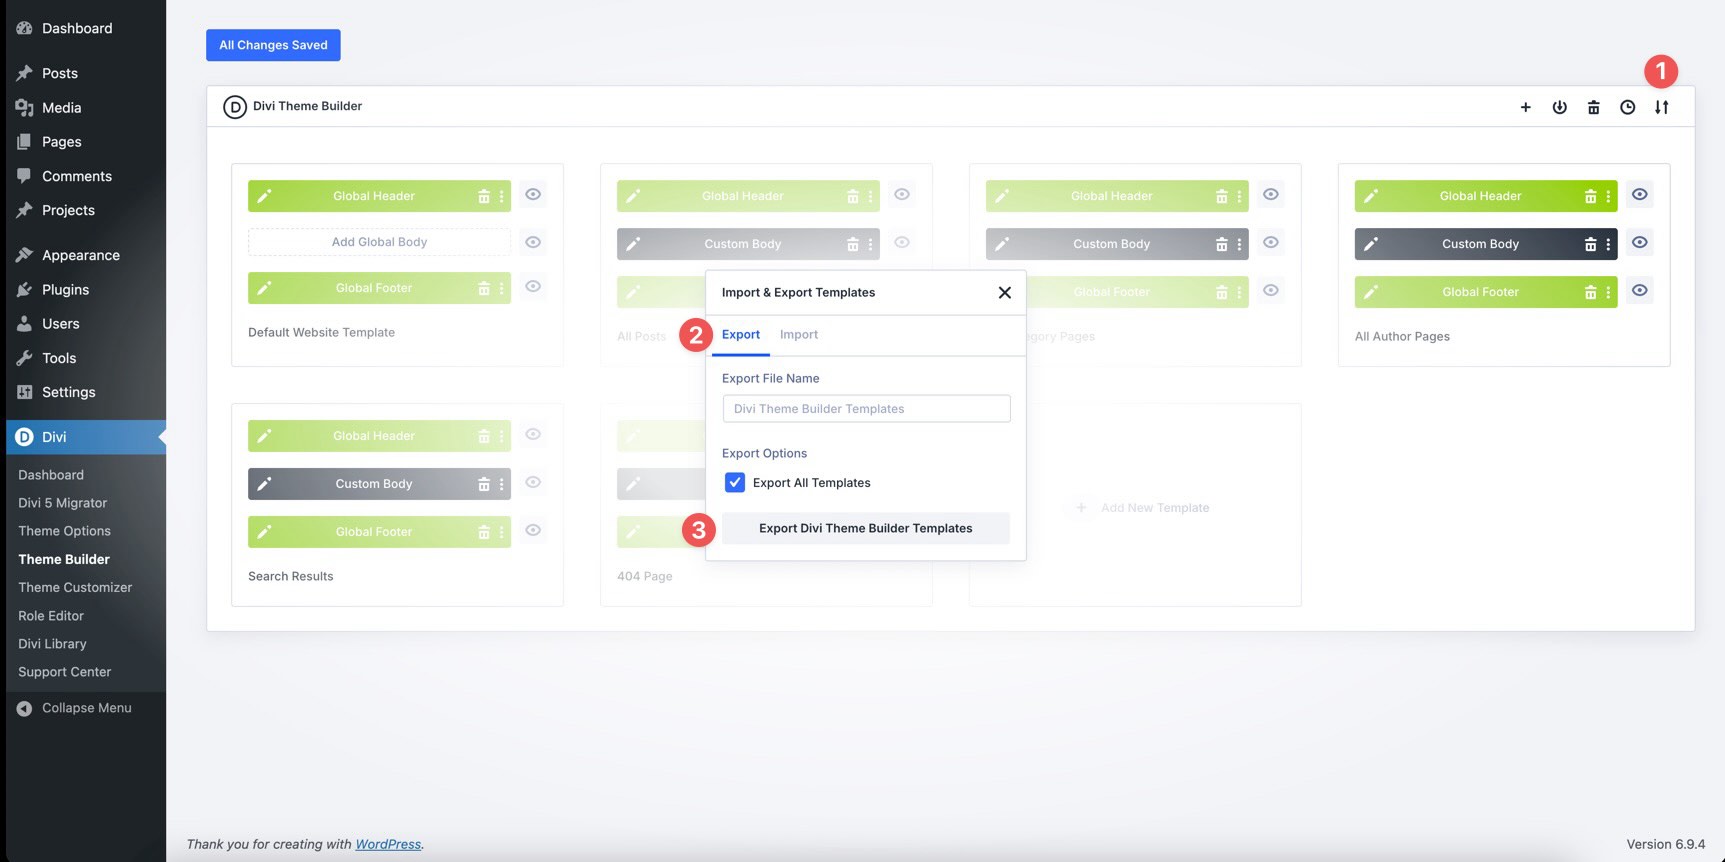
Export your templates regularly as JSON files from the Theme Builder. Exports are useful backups and make it easier to reuse or move your template system to another site.
Test Templates With Real Content
Test your templates with real or realistic content before launch. Publish a few test posts with featured images, different content lengths, multiple authors, categories, and comments. This helps you catch layout issues that may not appear when every post looks the same.
Download The Files
To help you follow along, we’ve prepared a JSON file containing the finished All Posts template, plus templates for the Header, Footer, Category Pages, Author Pages, Search Results, and 404 Page.
Before importing, make sure you have at least one blog post with a featured image. That gives the templates real content to display when you preview them.
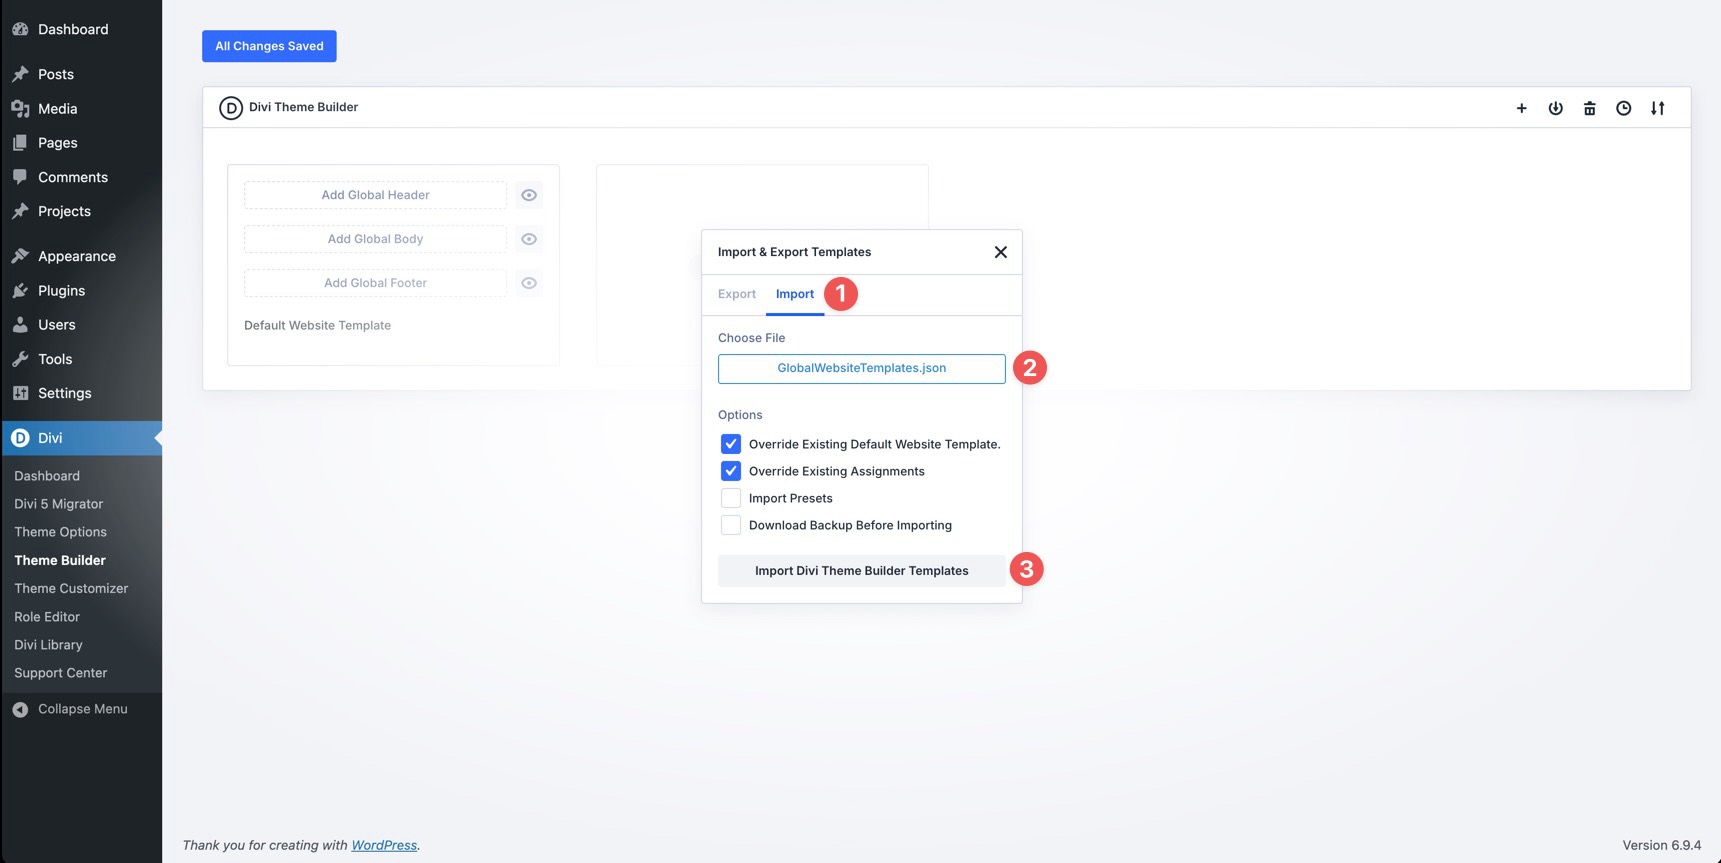
Import the JSON file by going to Divi > Theme Builder and clicking the Import & Export icon at the top right.
Select the Import tab, locate the coworking-website-global-website-templates.json file on your computer, and click Import Divi Theme Builder Templates.

What’s Coming Next
With the single post template complete and the remaining Theme Builder templates mapped out, the coworking website now has a stronger dynamic foundation. Blog posts, archives, search results, and error pages can all follow the same branded system.
In Part 9 of the Divi 5 Mastery Course, we’ll build the inner pages of the site. If you have not downloaded Divi 5 yet, now is a good time to get the latest version and apply what you’ve learned.
The post Part 8: Using Divi 5’s Theme Builder To Create Global Website Templates appeared first on Elegant Themes Blog.