The Loop Filter Modules in Divi 5 let visitors search and refine content directly on your website. Beyond categories and tags, you can connect filters to custom fields for details such as price, bedroom count, and location.
In this tutorial, we build a property directory with a Loop Builder listing grid and a filter form beside it. Visitors can search by keyword and use five ACF fields to narrow the listings by maximum price, city, property type, bedrooms, and amenities. Along the way, we cover numeric comparisons, automatically generated options, and the extra care needed when filtering multi-value fields.
How The Loop Filter Modules Work
Divi 5’s Loop Builder lets you repeat an element for each result in a query. For this directory, we design one property card, query the Properties post type, and use Dynamic Content to populate each repeated card. The loop defines the starting content and layout. The Post Filter Module gives visitors controls to refine those results without changing the card design.
Two modules work together to build the form. The Post Filter Module is the form container. It holds the controls and connects them to a target loop.
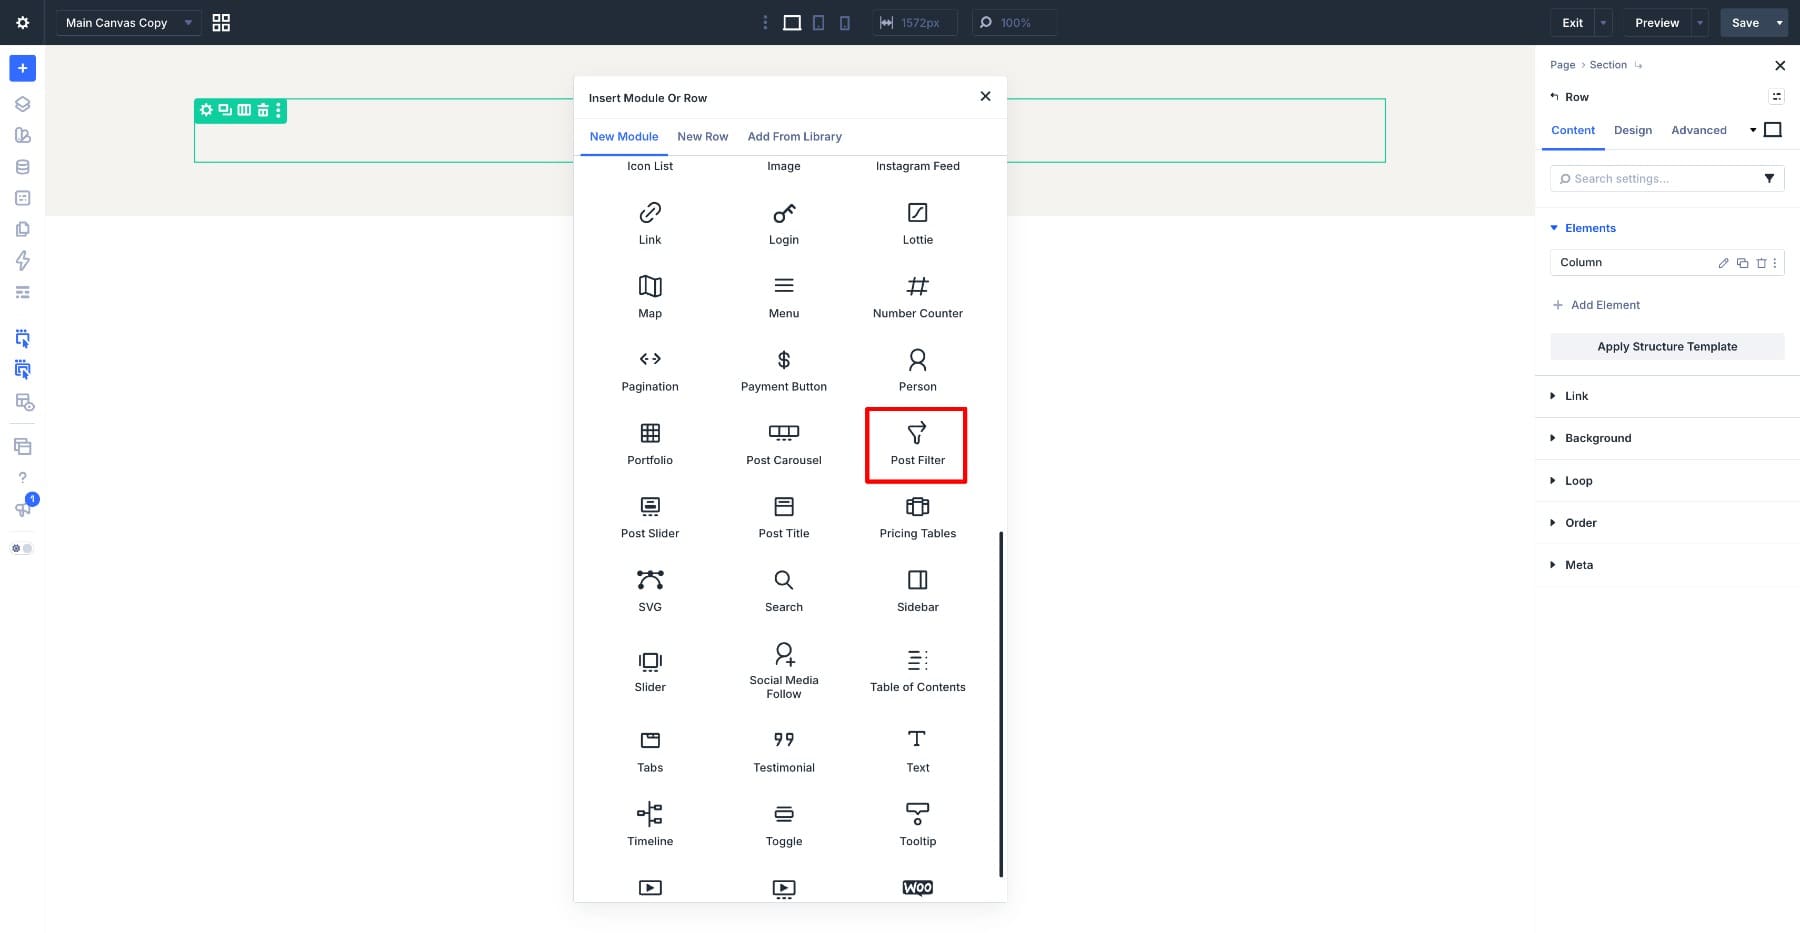
Inside it, add Post Filter Item Modules, one for each control.
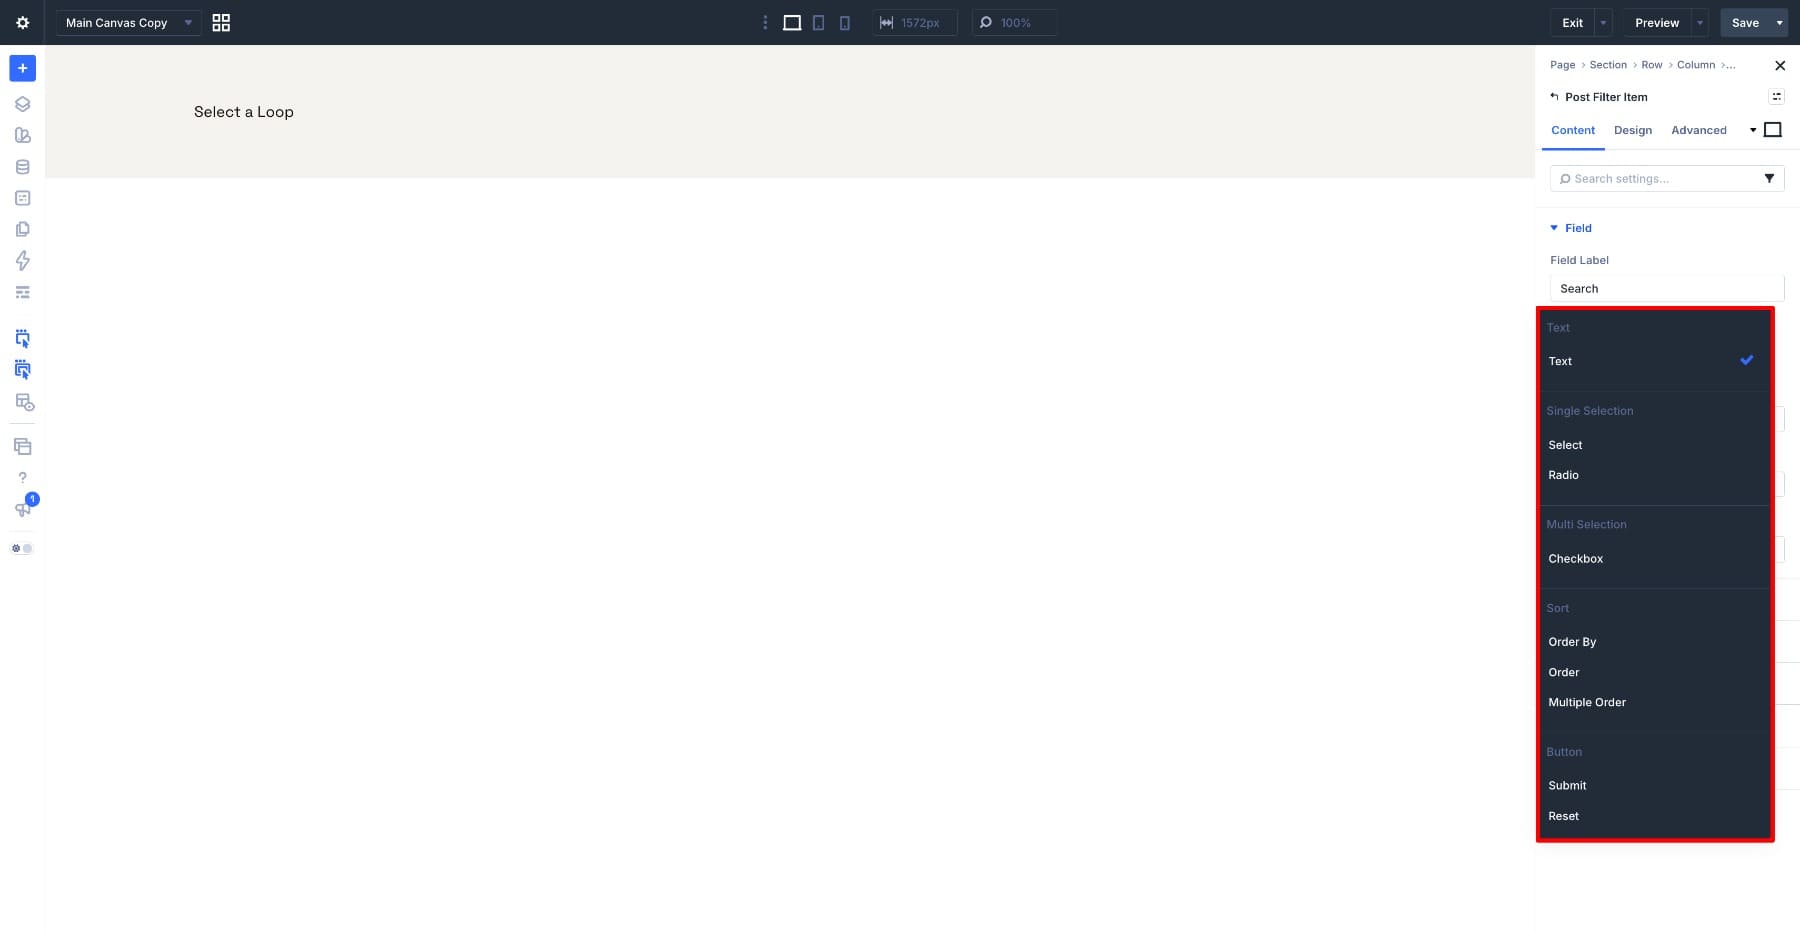
Each item’s Field Type determines how visitors interact with it:
- Text: Accepts typed input, with the value type and data source determining what it searches or compares.
- Select: Displays options in a dropdown.
- Radio: Displays a list of options with one selection allowed.
- Checkbox: Allows multiple selections.
- Order: Controls ascending or descending order.
- Order By: Chooses the value used to sort results.
- Submit And Reset: Add buttons to apply or clear the filters.
Our property directory uses six filtering controls, plus Apply and Reset buttons. A simpler form might only need a dropdown and an Apply button.
Automatic And Manual Options
Select, Radio, and Checkbox items need options to display. With Options Method set to Automatic, Divi discovers stored field values. Manual lets you define each option’s submitted value and visible label. We use Manual later to control how amenities appear in the form.
Applying The Filter
You can apply filters when visitors click a button or automatically as they change a control. With six controls, we use button-based submission so visitors can make several selections before updating the results.
What This Makes Possible
Taxonomies work well for shared classifications, such as property types or amenities. Custom fields are useful when listings also need individual values, such as a price that visitors can compare against a budget.
The same approach can support job boards filtered by salary, course catalogs filtered by level, or event listings filtered by venue. This example keeps the property details in ACF fields so we can focus on how those fields connect to Divi’s filters.
What You Need Before You Start
First, we set up the data: register a Properties post type, create five custom fields, and publish sample listings. Then we build the listing cards with Loop Builder and connect the filter form.
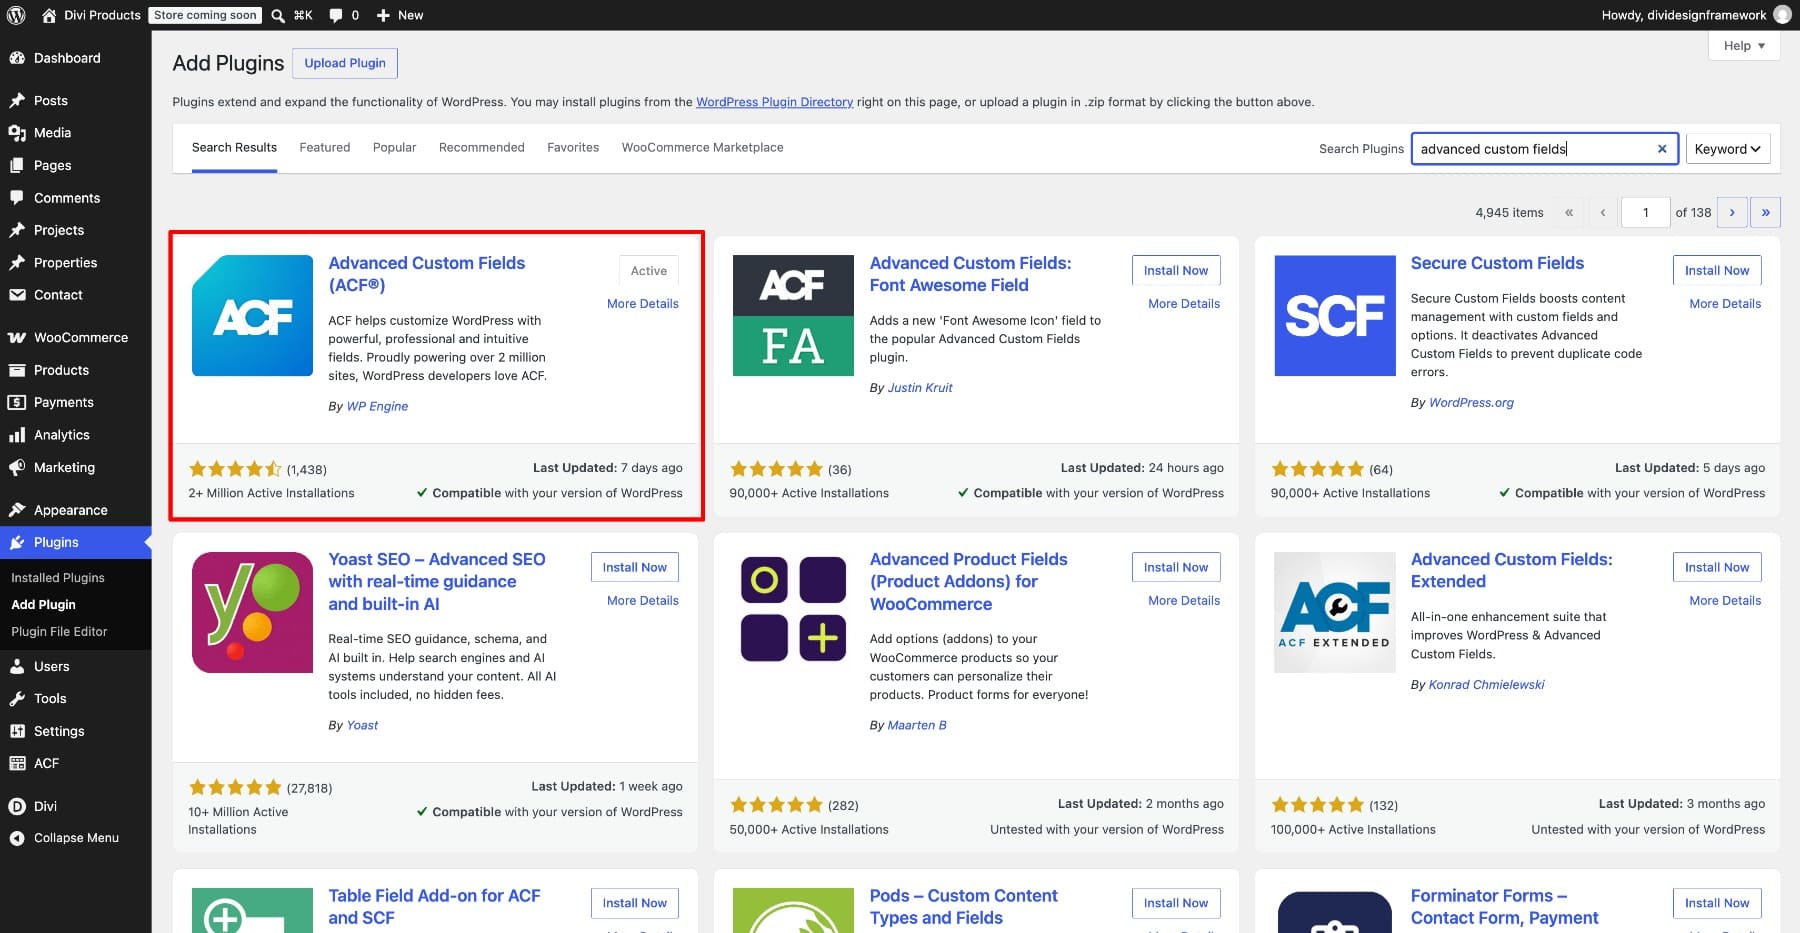
We are using Advanced Custom Fields. The free version supports the fields and post type registration needed here. You do not need ACF Pro or a separate post type registration plugin for this setup.
Install Advanced Custom Fields
Download the free plugin using ACF’s installation guide. In WordPress, go to Plugins > Add New Plugin > Upload Plugin, select the ZIP file, and click Install Now. Activate the plugin to add ACF to the admin menu.
Register The Properties Post Type
A separate post type keeps property listings organized and gives the loop a dedicated content source. Go to ACF > Post Types and click Add New.
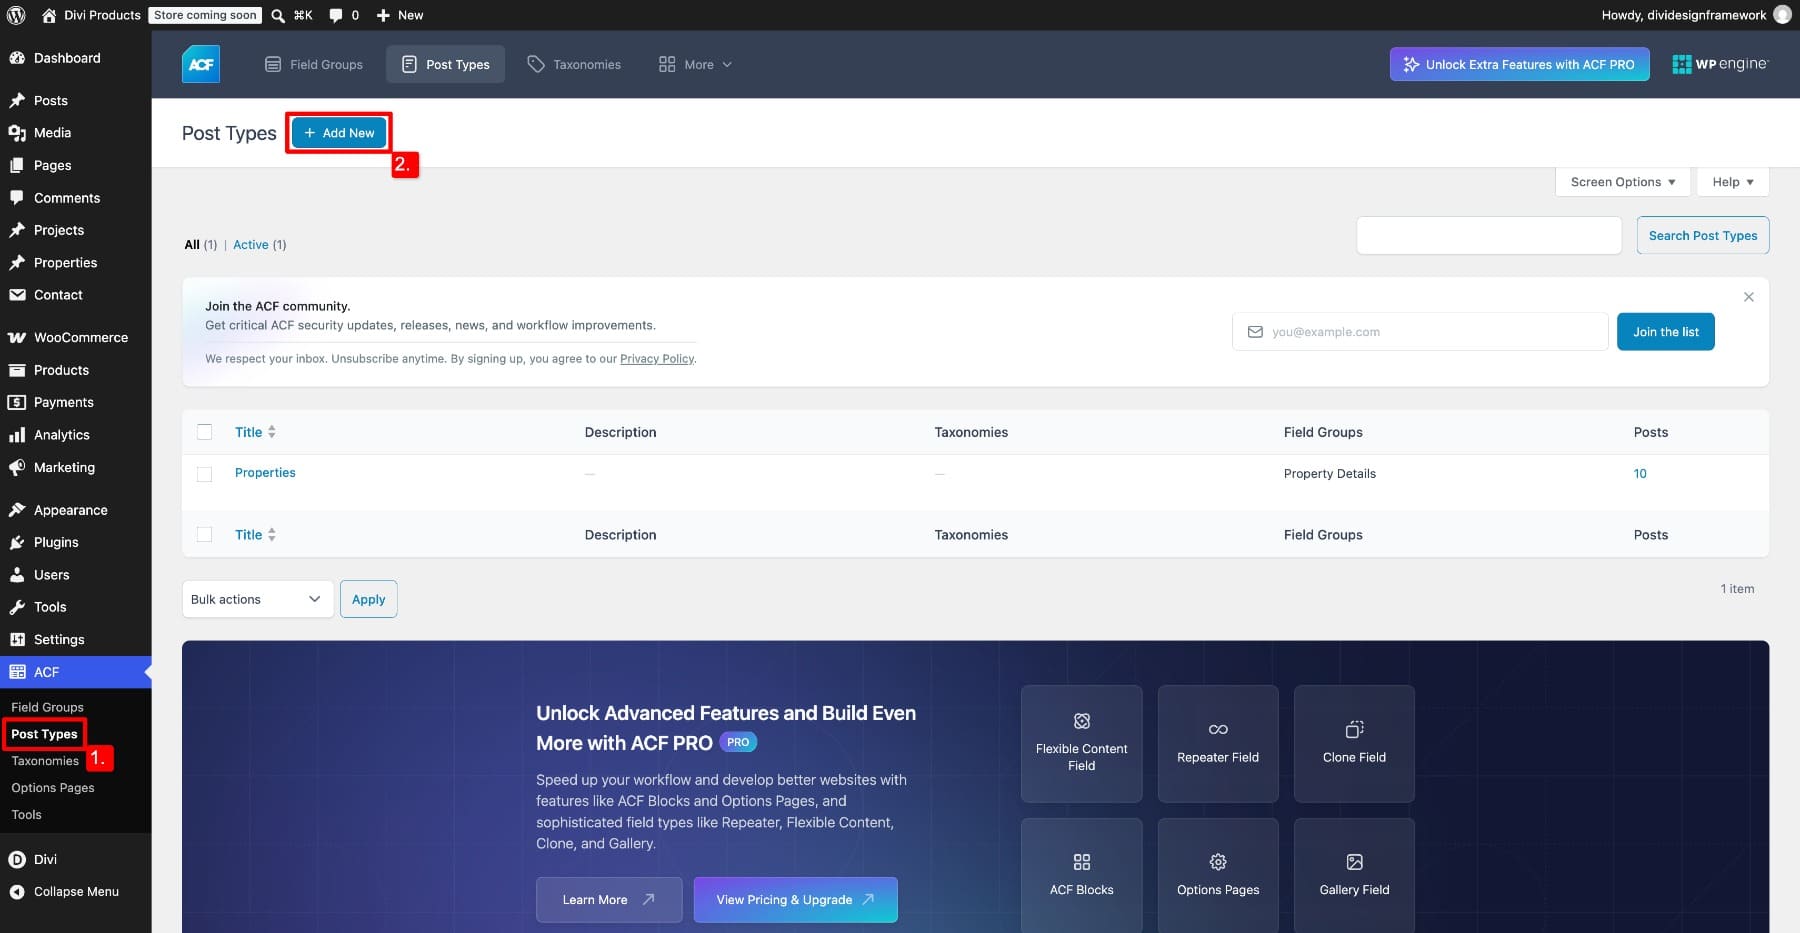
Enter:
- Plural Label: Properties
- Singular Label: Property
- Post Type Key: property
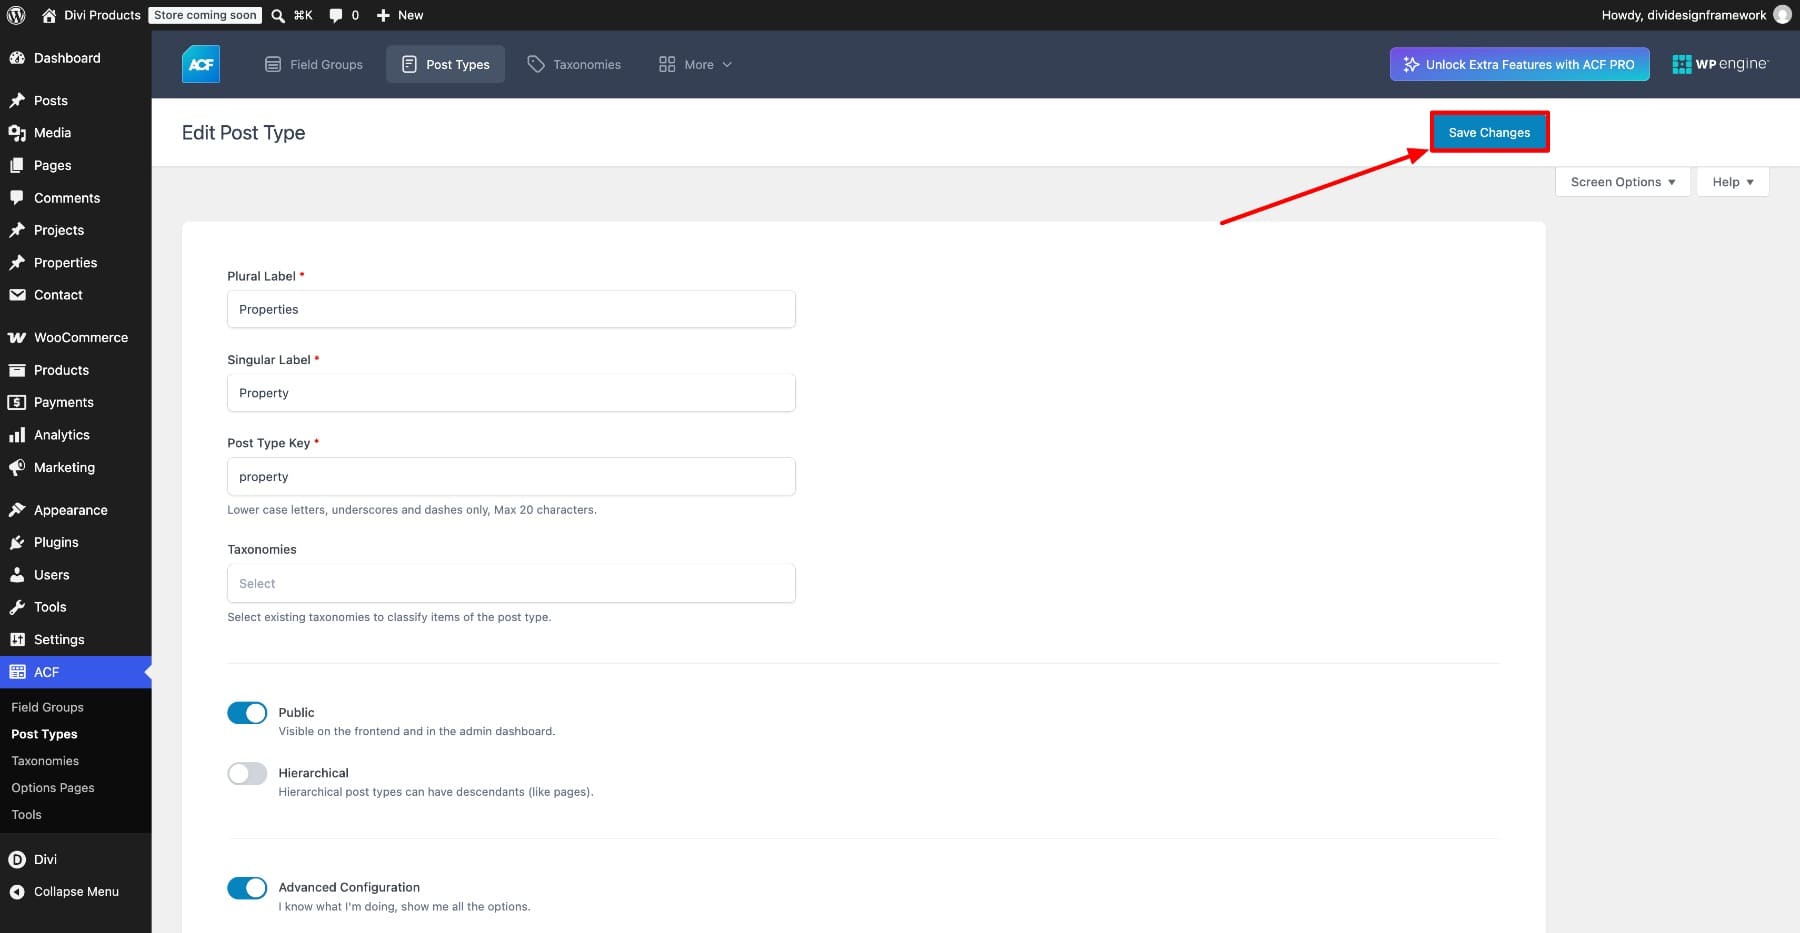
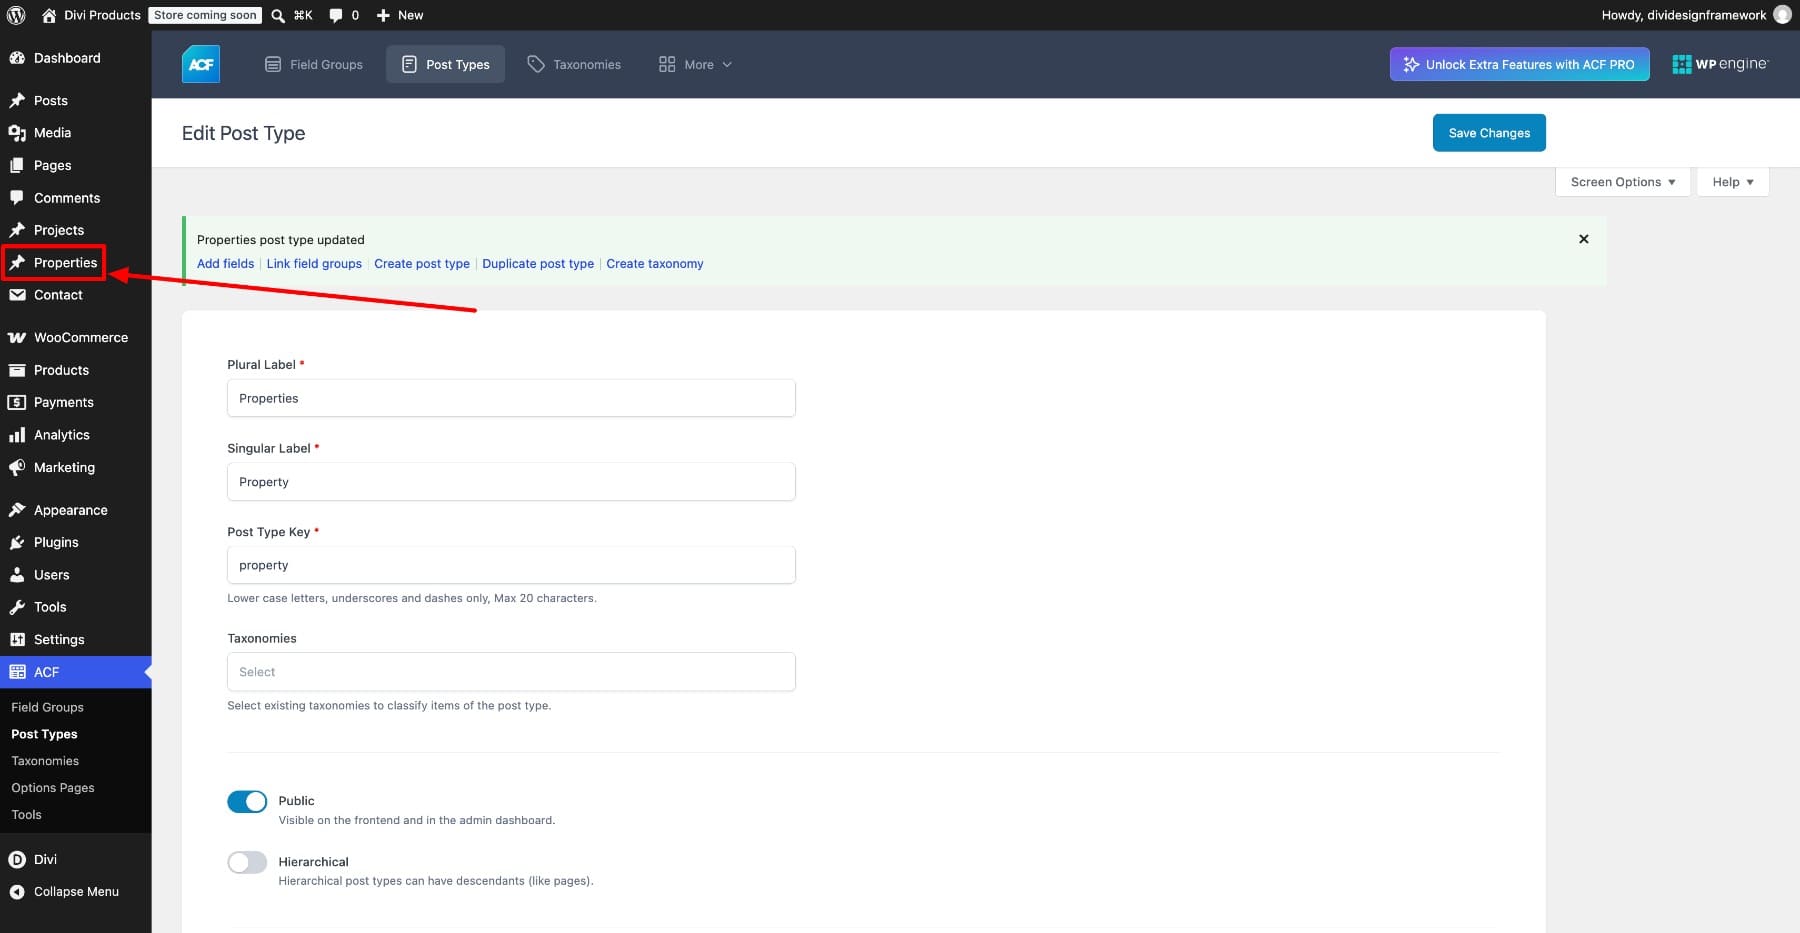
Save the post type. Properties now appears in the admin sidebar alongside Posts and Pages. Make sure the post type supports a title, editor content, and featured image, since we use these in the directory.
Create The Field Group
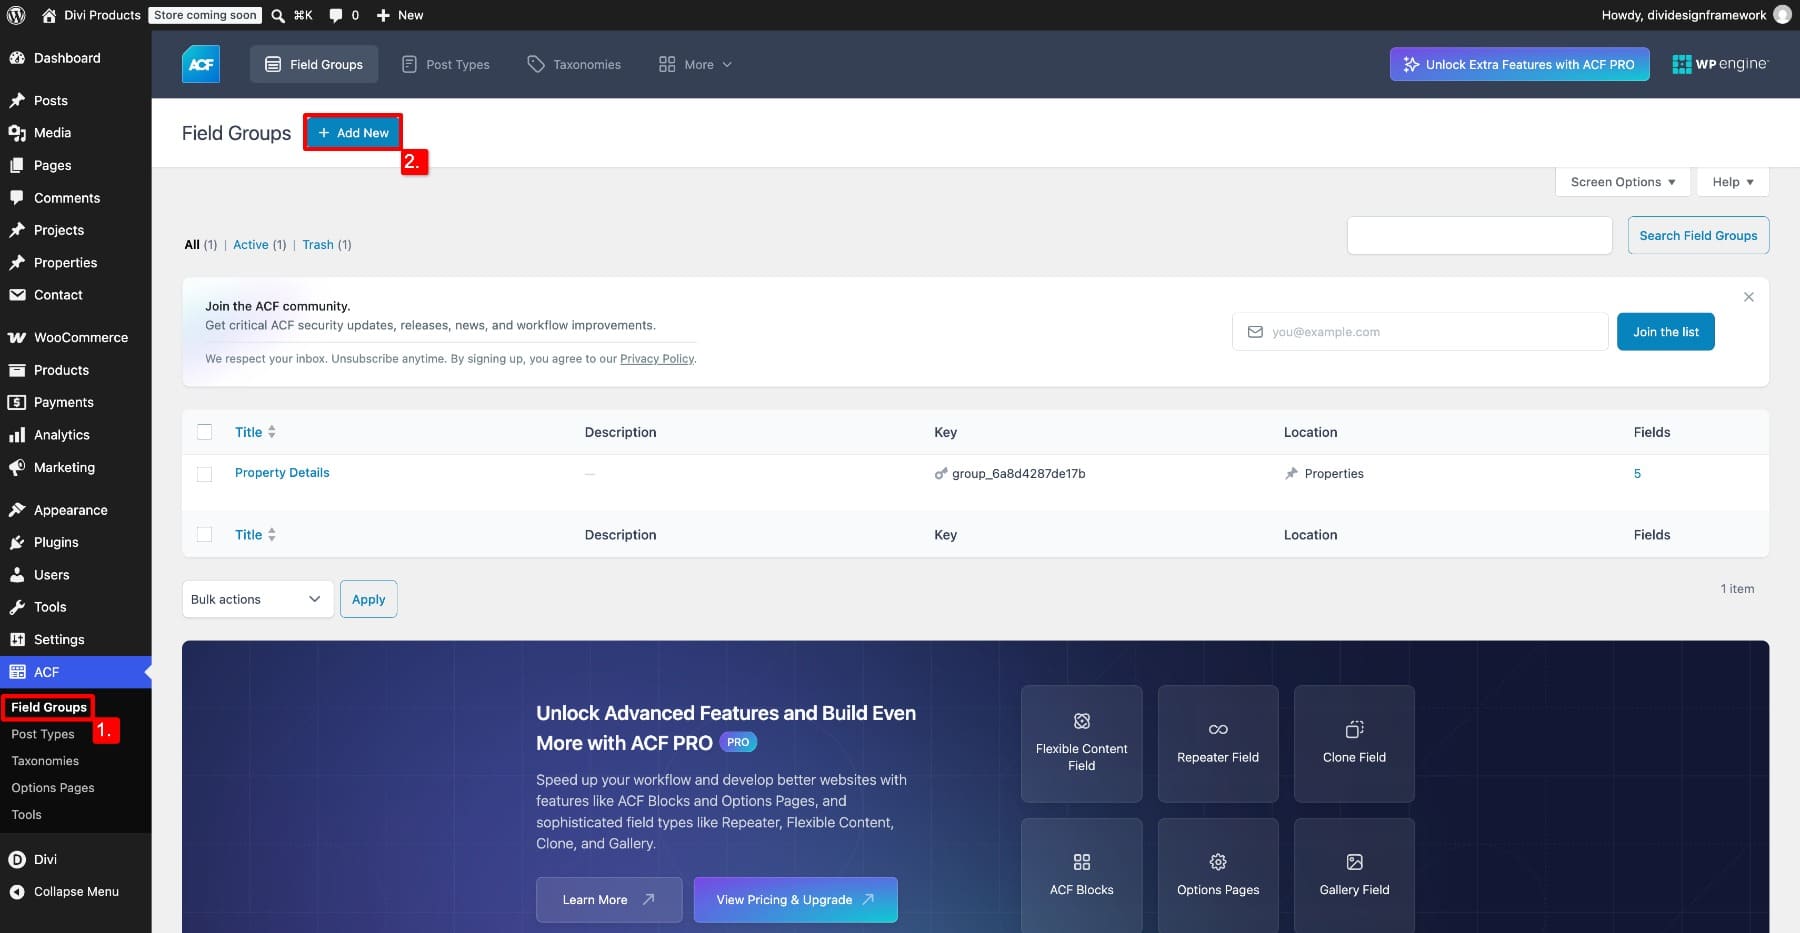
A field group contains the five fields and determines where they appear. Go to ACF > Field Groups, click Add New, and name the group Property Details.
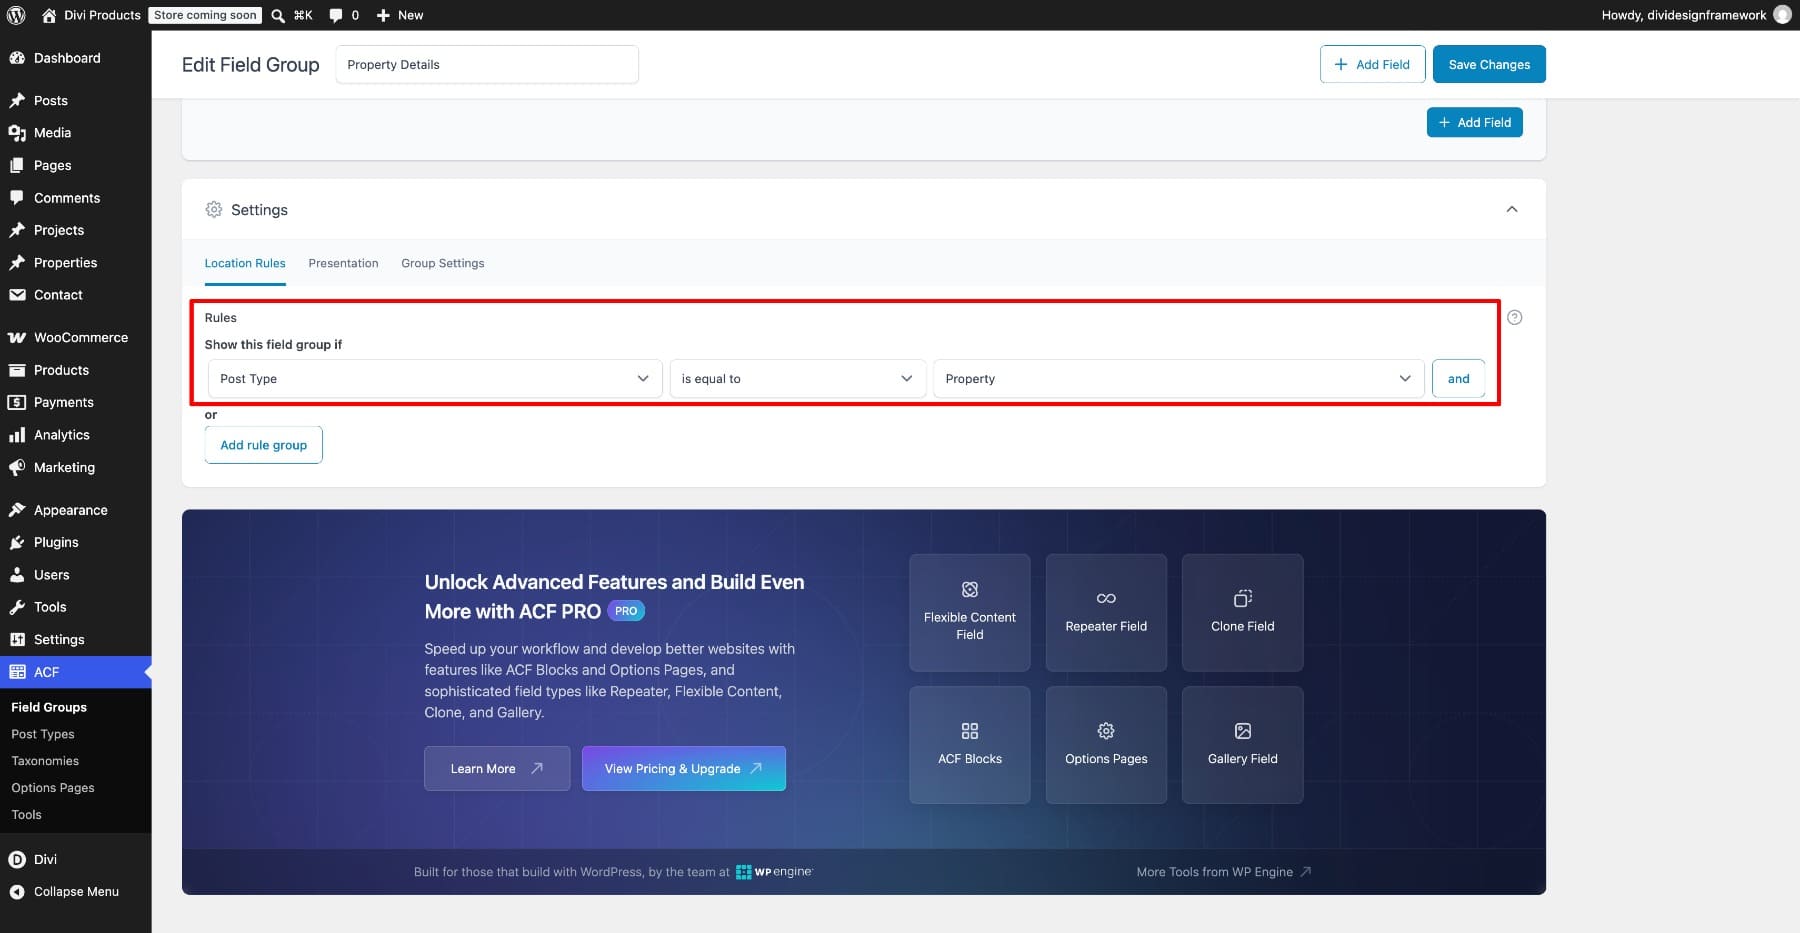
Under Location Rules, set Post Type to is equal to Property. This displays the fields when editing a property listing.
Add the following five fields. Keep their field names consistent so you can identify the correct data sources in Divi.
1. Price
- Field Label: Price
- Field Name: property_price
- Field Type: Number
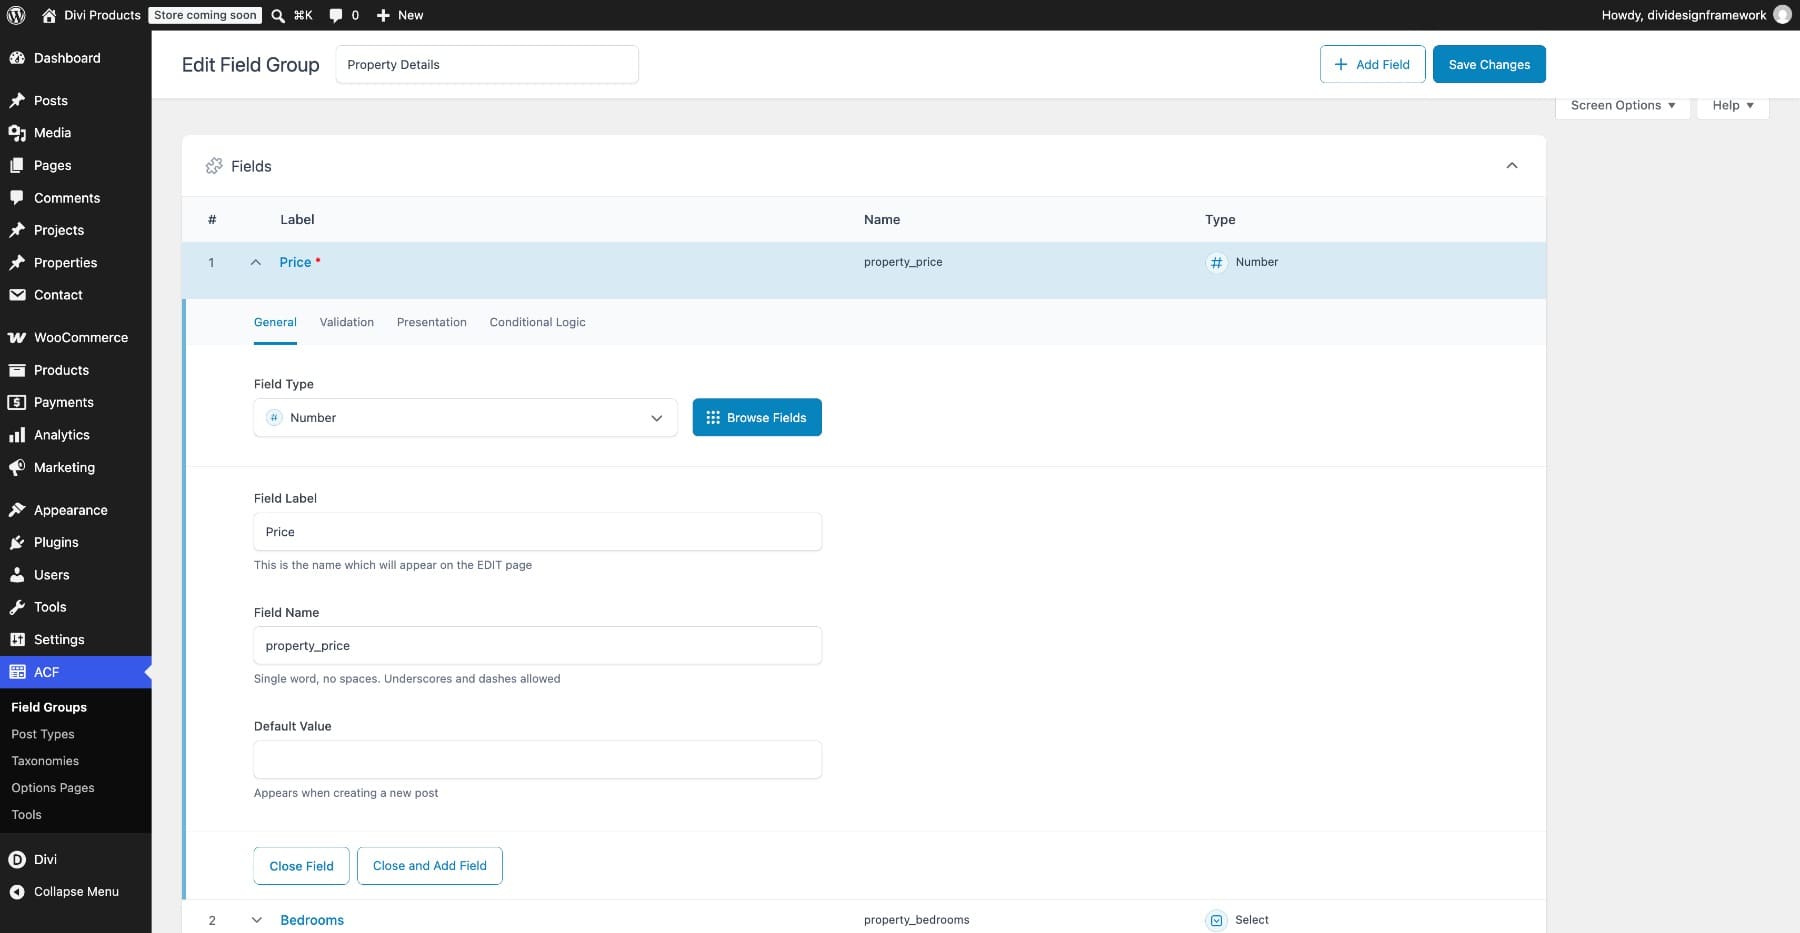
Store prices as numbers without currency symbols or thousands separators. For this example, enter 530000, not $530,000. We add the currency symbol when displaying the price, keeping the stored value suitable for numeric comparisons.
2. Bedrooms
- Field Label: Bedrooms
- Field Name: property_bedrooms
- Field Type: Select
- Choices: 1, 2, 3, 4, 5, each on a separate line
- Return Format: Value
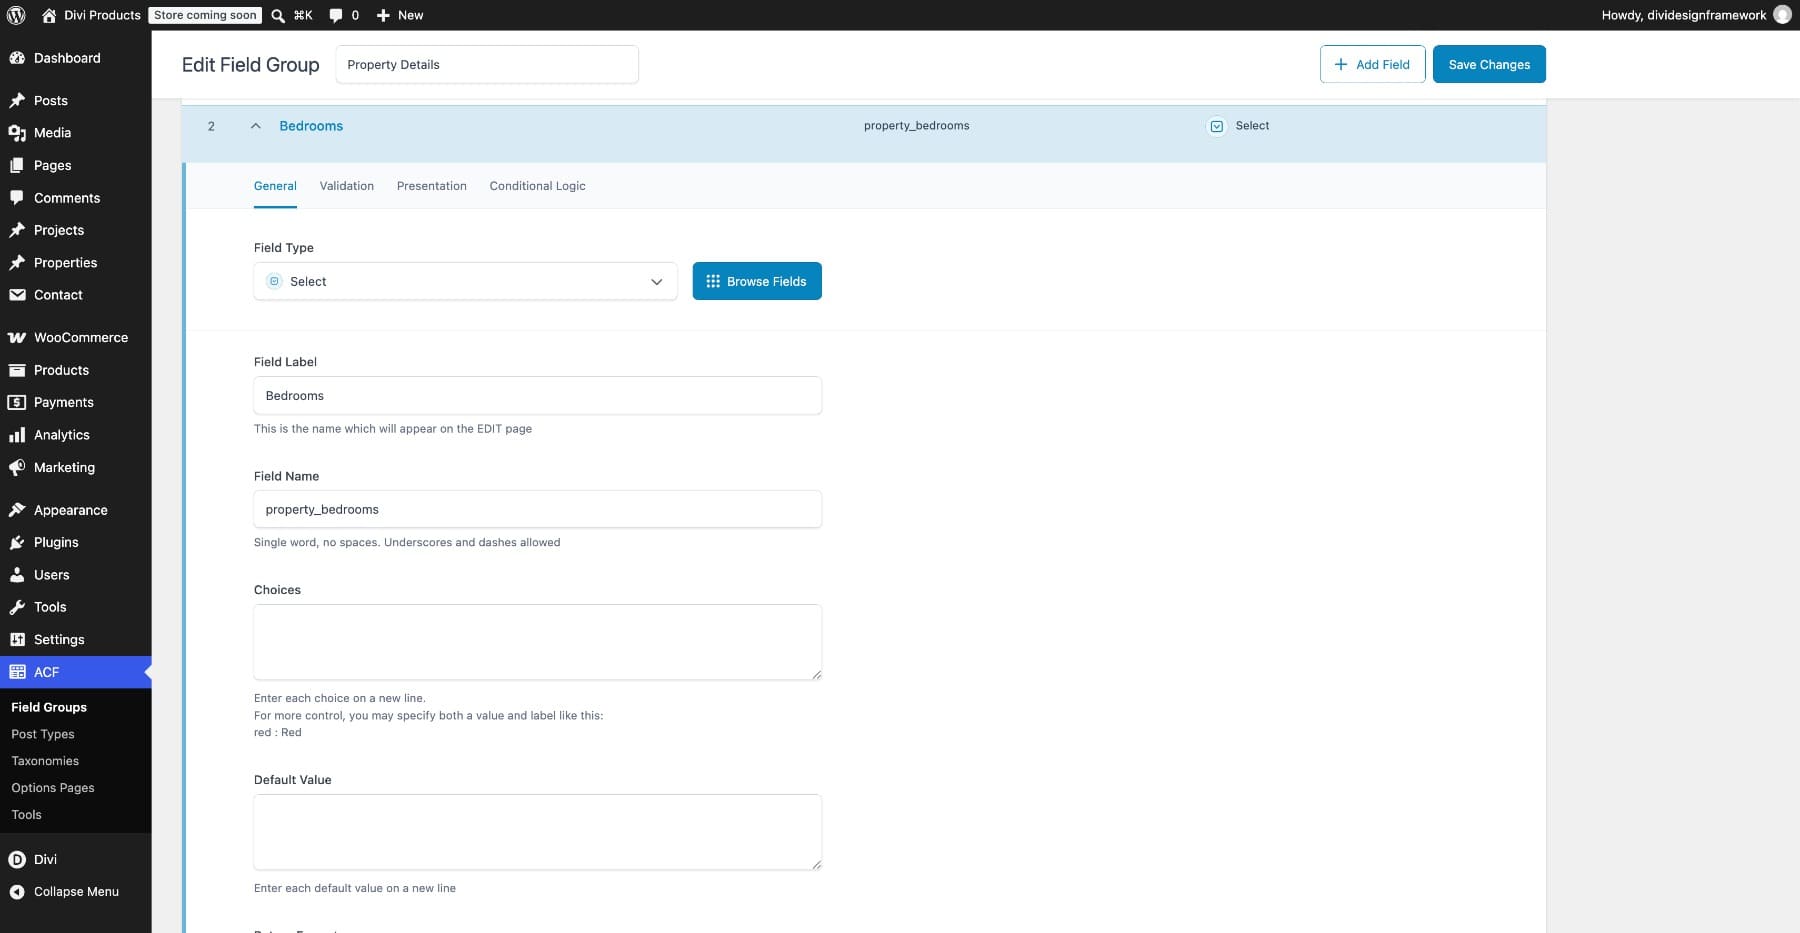
Leave multiple selection disabled. A Select field gives contributors a consistent set of bedroom counts. Extend the choices if your directory needs studios or properties with more than five bedrooms.
3. Property Type
- Field Label: Property Type
- Field Name: property_type
- Field Type: Select
- Choices: Apartment, House, Villa, Townhouse, each on a separate line
- Return Format: Value
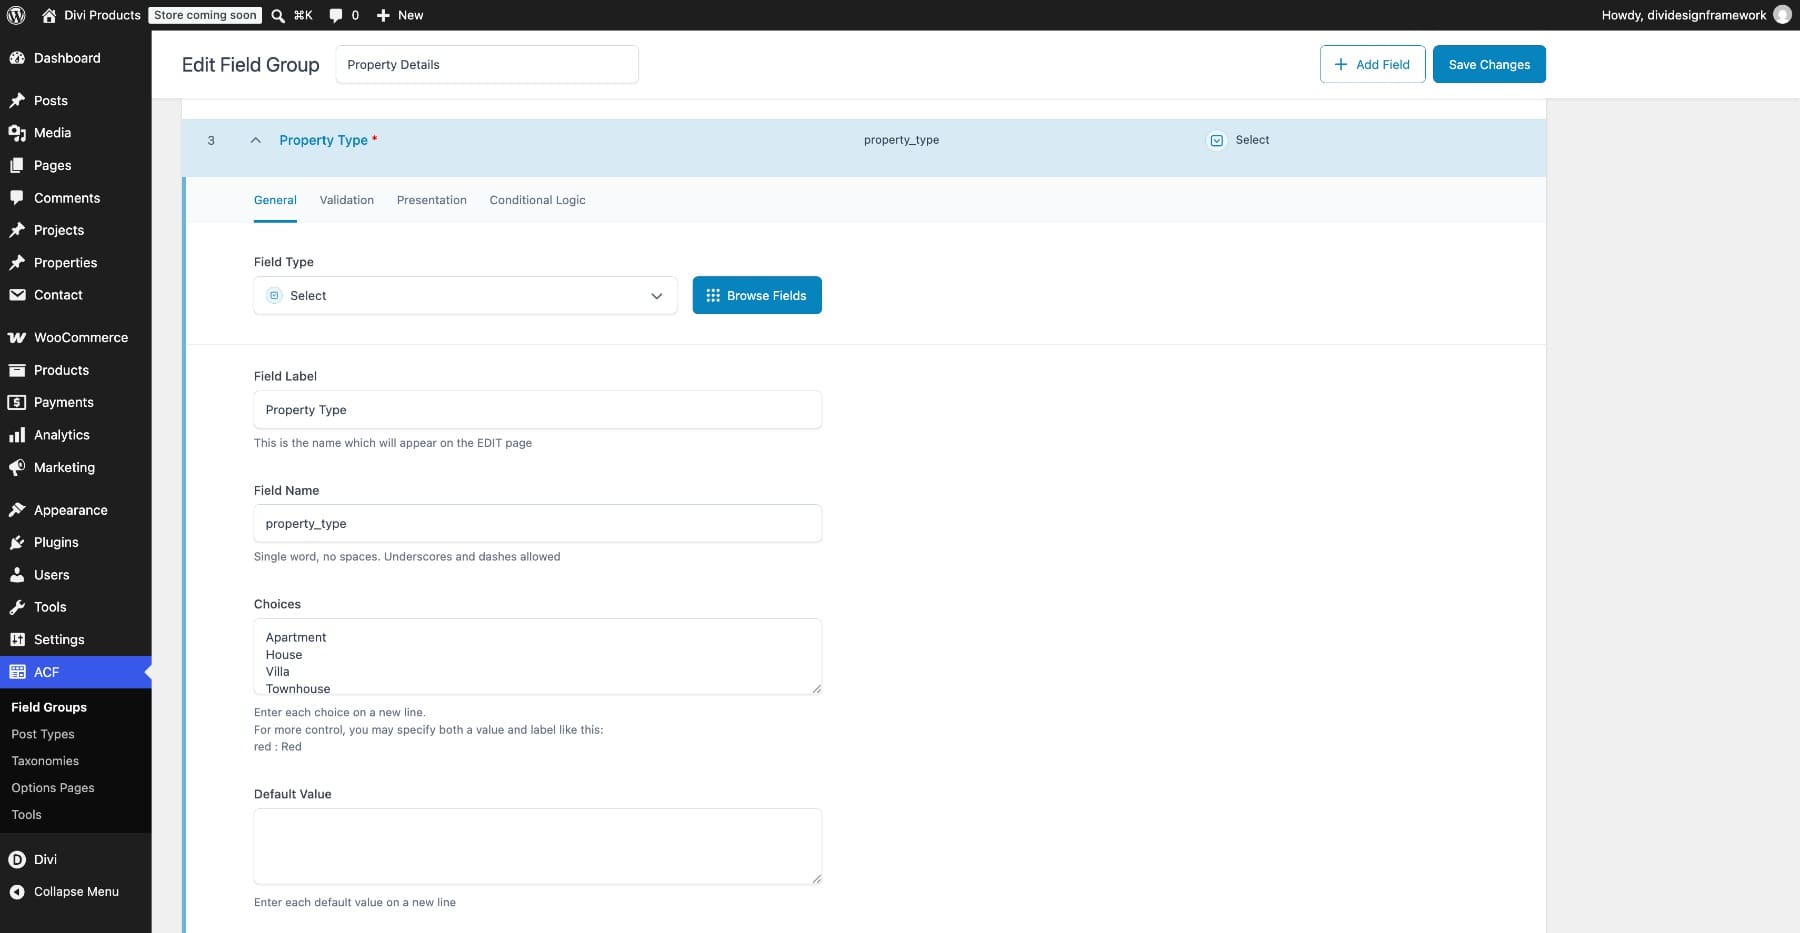
Leave multiple selection disabled so each listing has one property type.
4. Amenities
- Field Label: Amenities
- Field Name: property_amenities
- Field Type: Checkbox
- Choices: Parking, Pool, Garden, Balcony, Gym, each on a separate line
- Return Format: Value
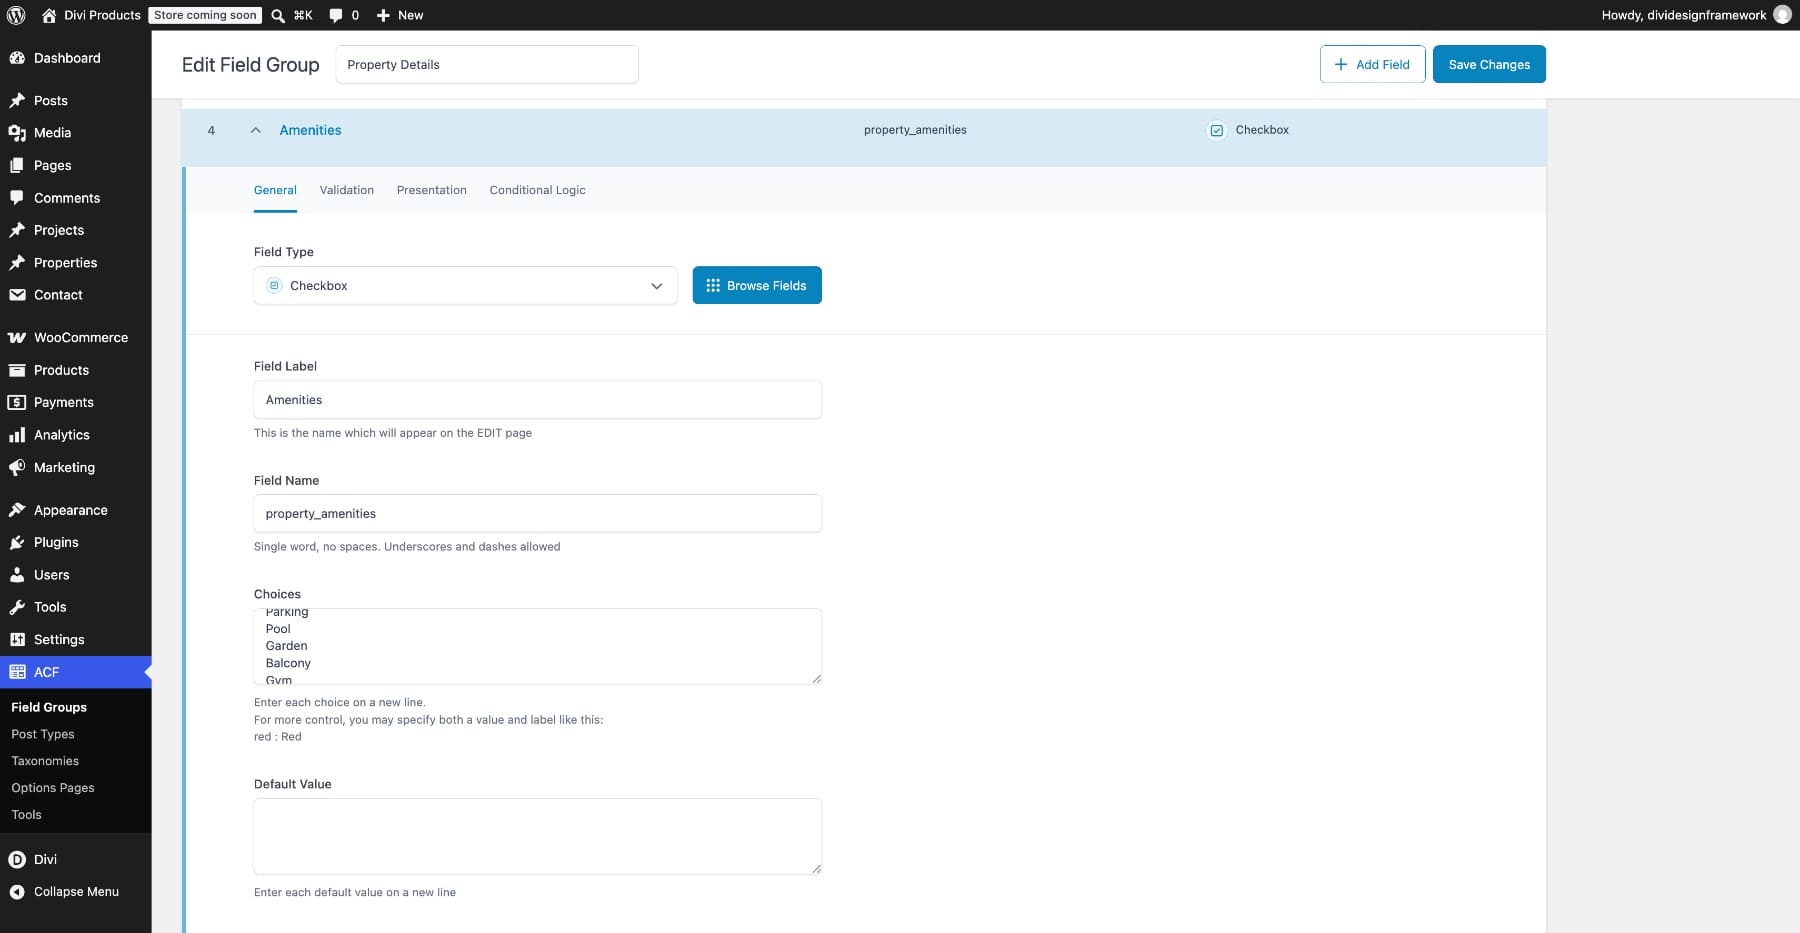
A property can have several amenities, so this field needs to store multiple selections. Entering each choice without a separate label makes its value and label identical, which simplifies the manual filter options later.
5. City
- Field Label: City
- Field Name: property_city
- Field Type: Text
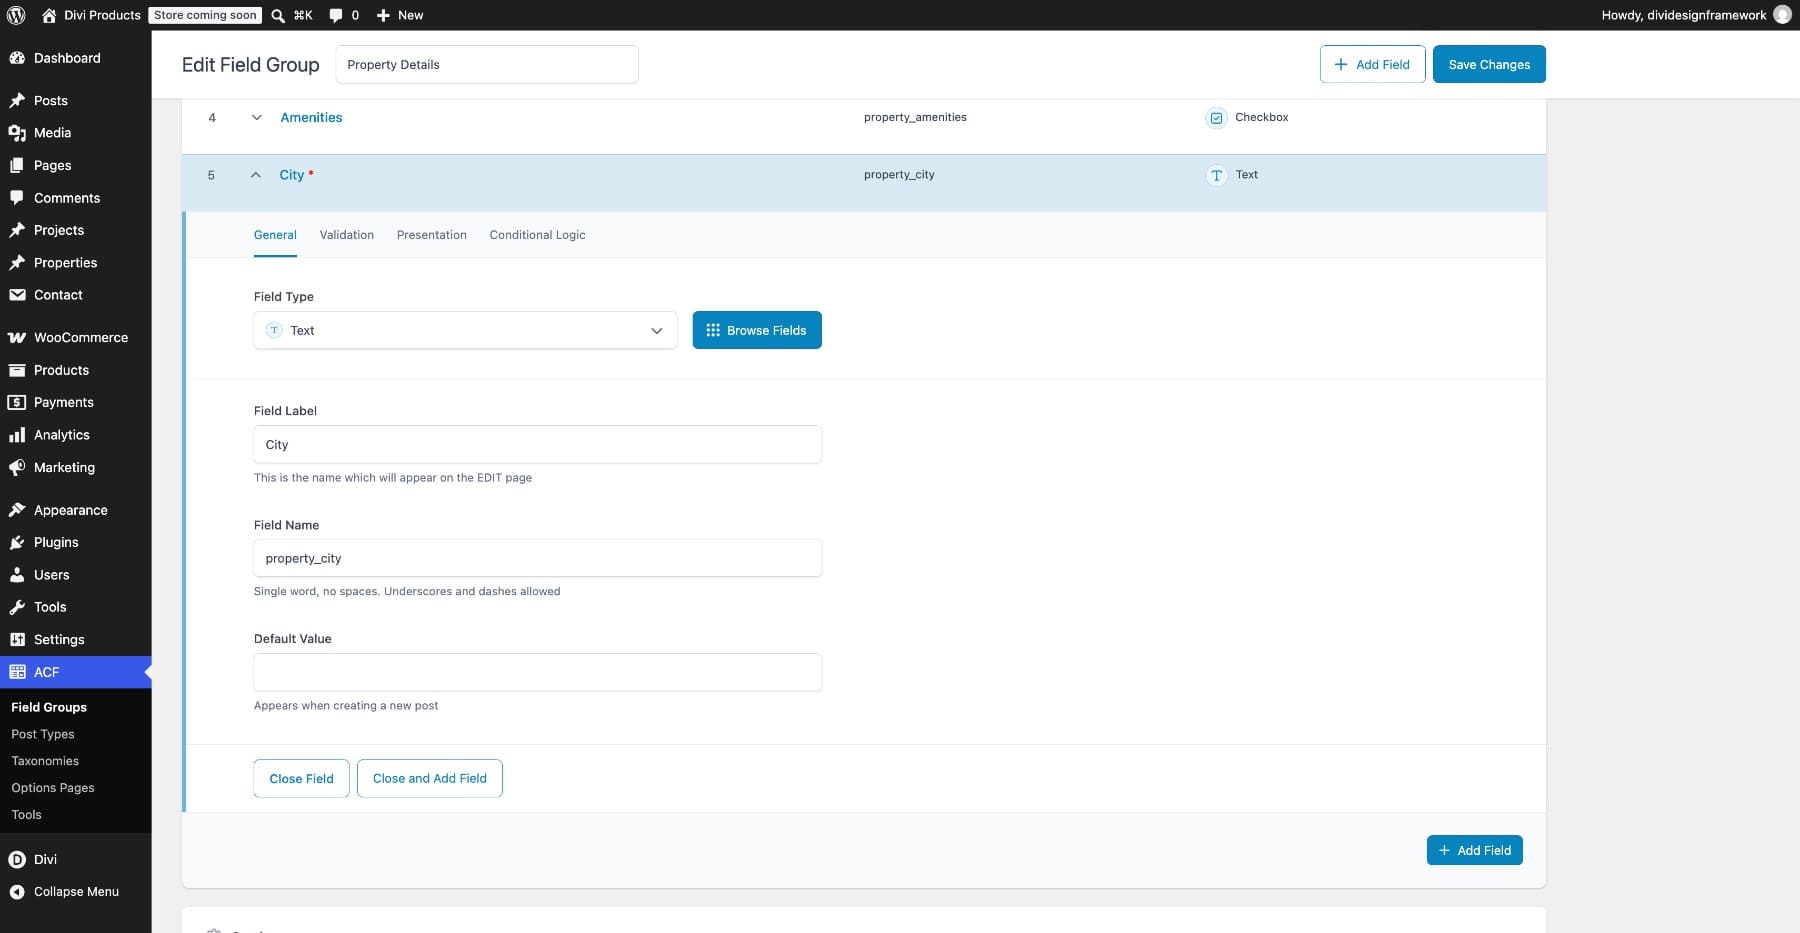
Use consistent city names across listings rather than mixing names and abbreviations. Save the field group.
Add Your Property Listings
Go to Properties > Add New. Add a title, featured image, and a short description, then complete all five custom fields below the editor.
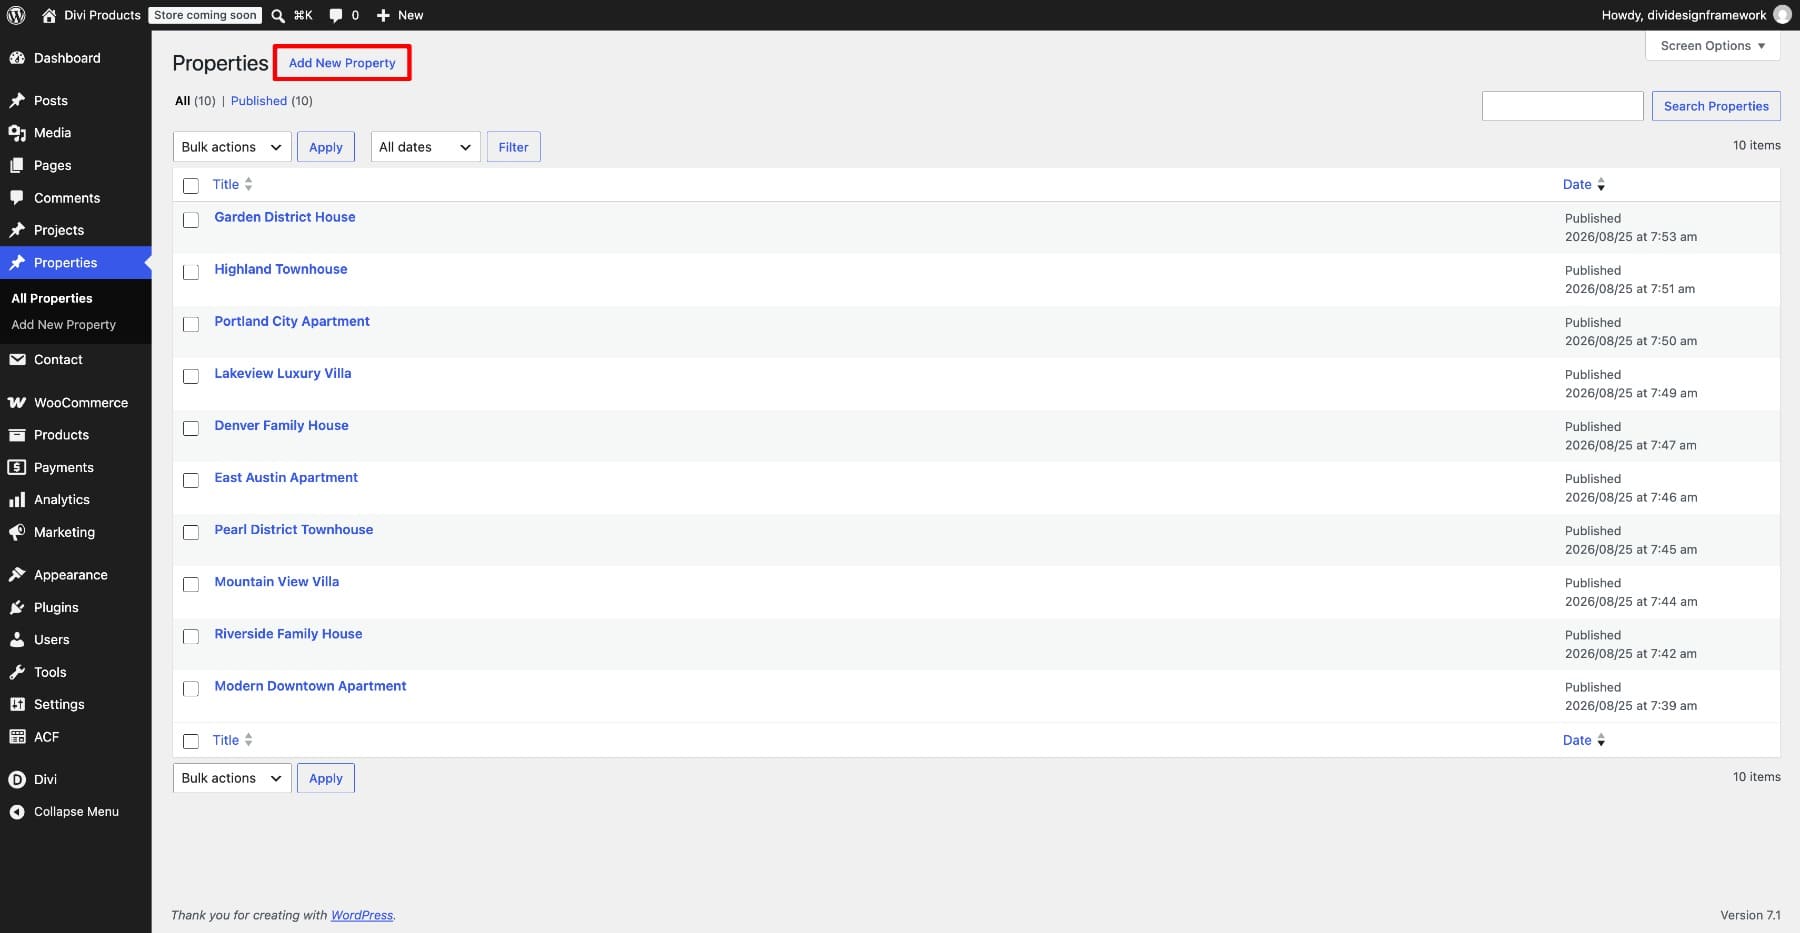
Publish several listings with different prices, cities, bedroom counts, and amenities. Include properties with multiple amenities so you can test that field properly. Once the sample listings are published, move into the Visual Builder.
What We Are Building
The finished page has a filter sidebar on the left and a property grid on the right. Each card displays a featured image, title, price, city, bedroom count, amenities, and a contact button.
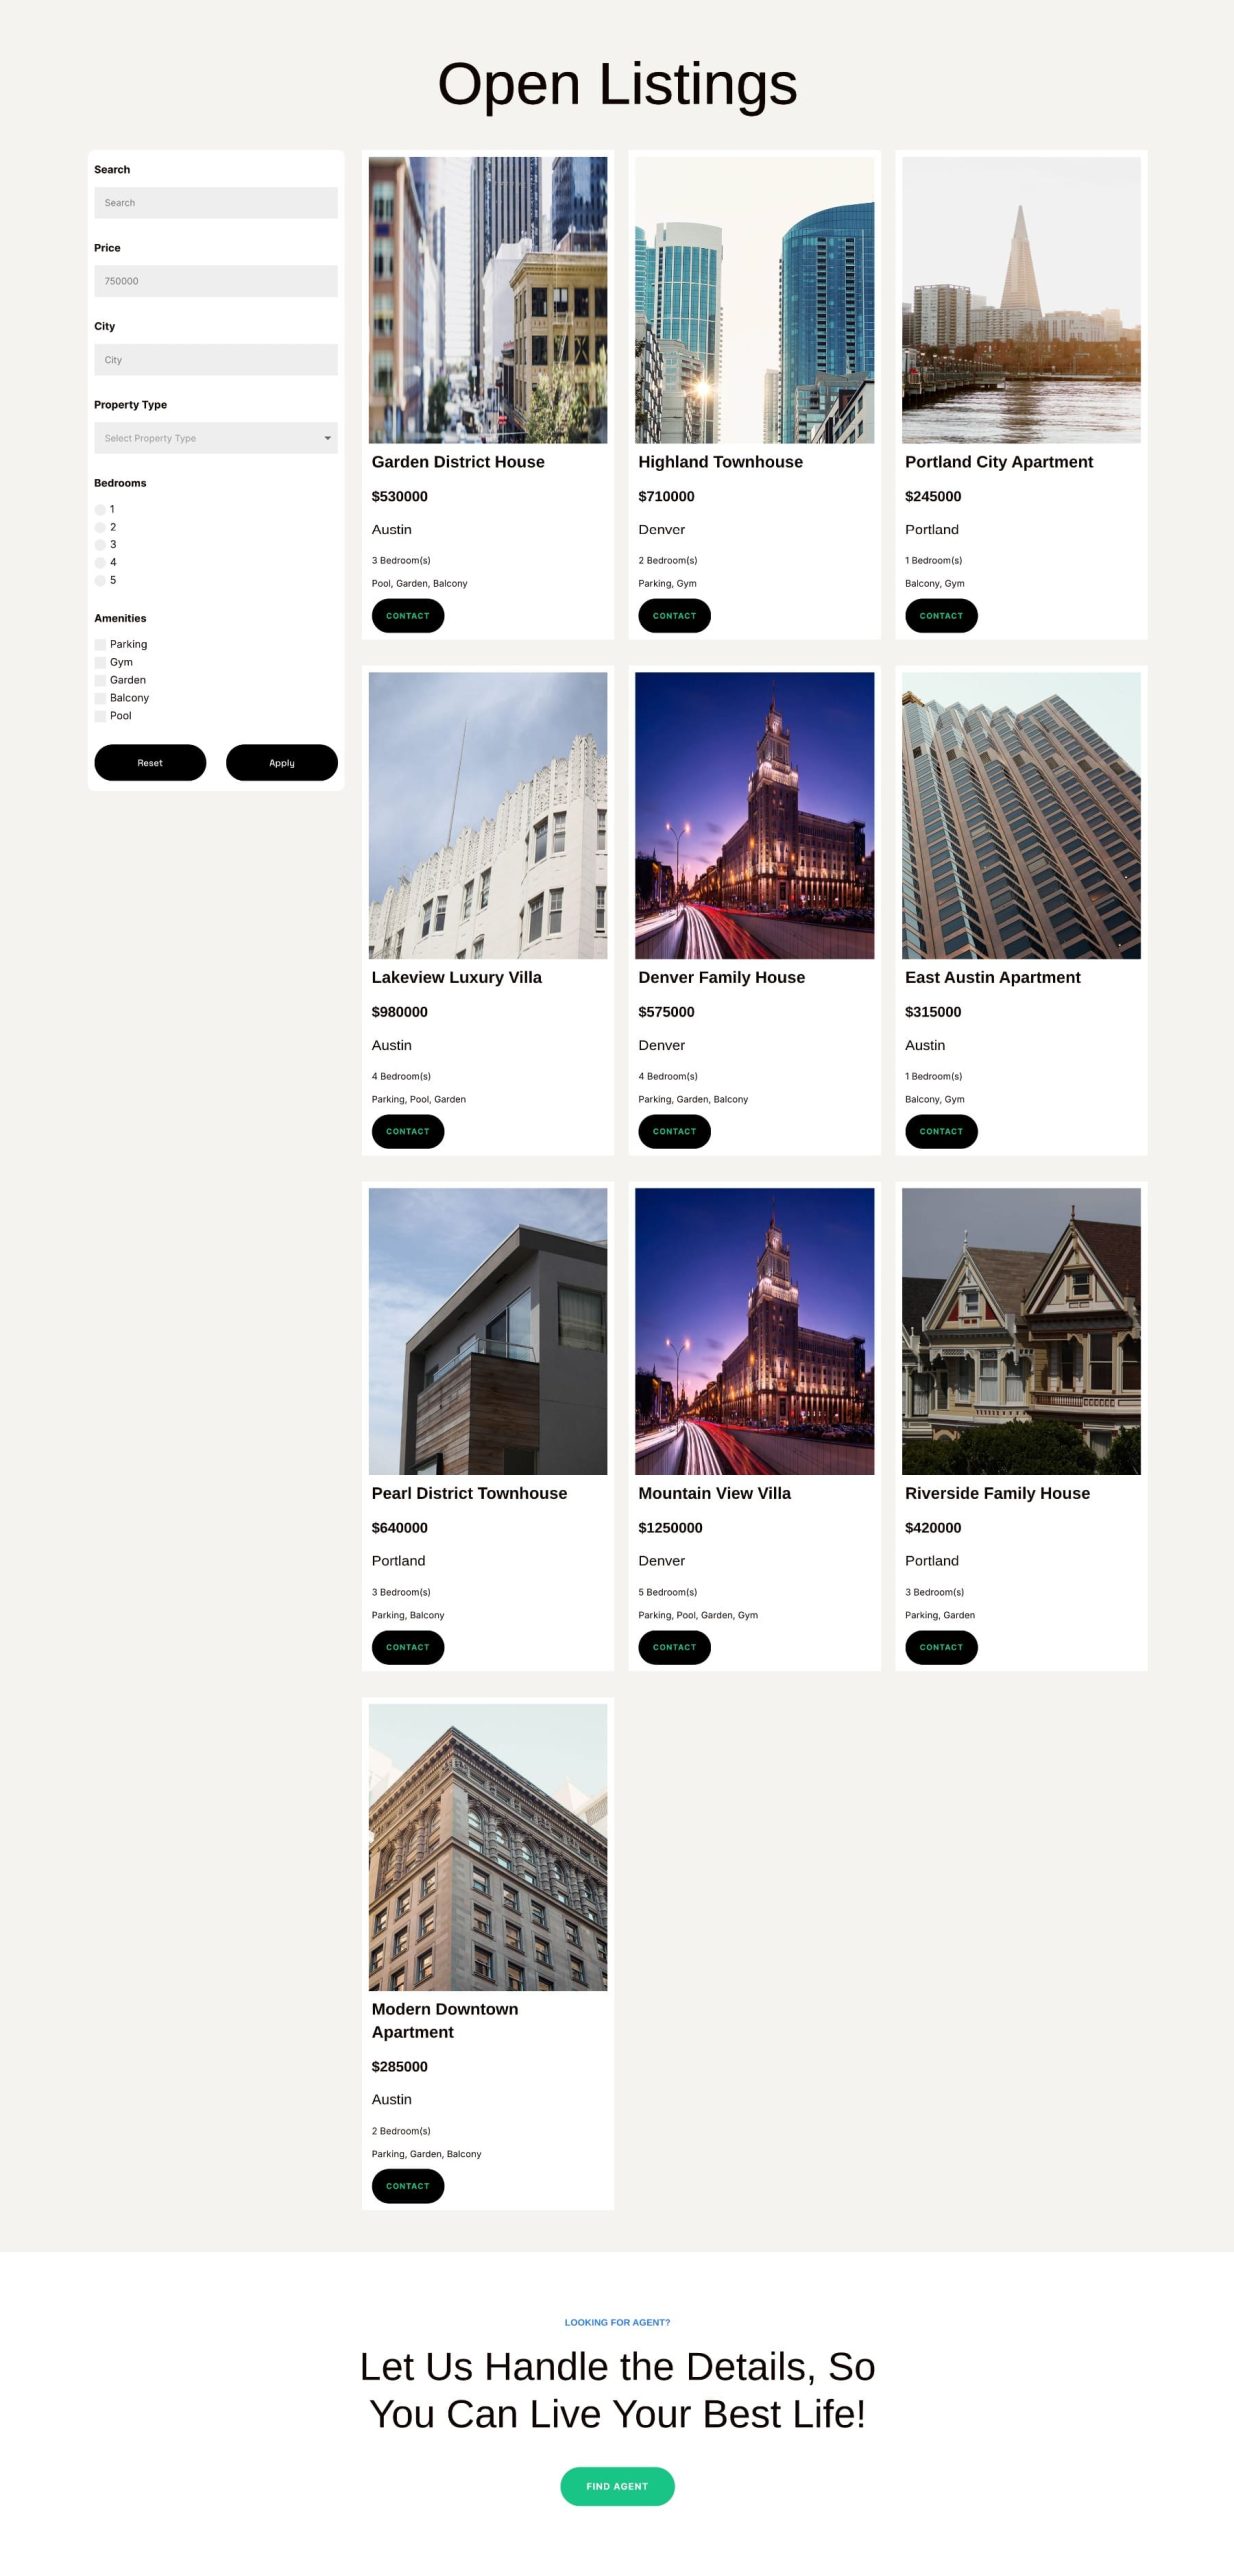
The sidebar contains keyword search, maximum price, city, property type, bedrooms, and amenities, with Reset and Apply buttons underneath. Keyword search targets post titles and content; the other five controls target the ACF fields.
The steps below focus on the query, Dynamic Content connections, and filter configuration. You can adapt the card styling to suit your website.
1. Set Up The Two-Column Page Structure
Add a row with a narrow left column for the filter and a wider right column for the listings.
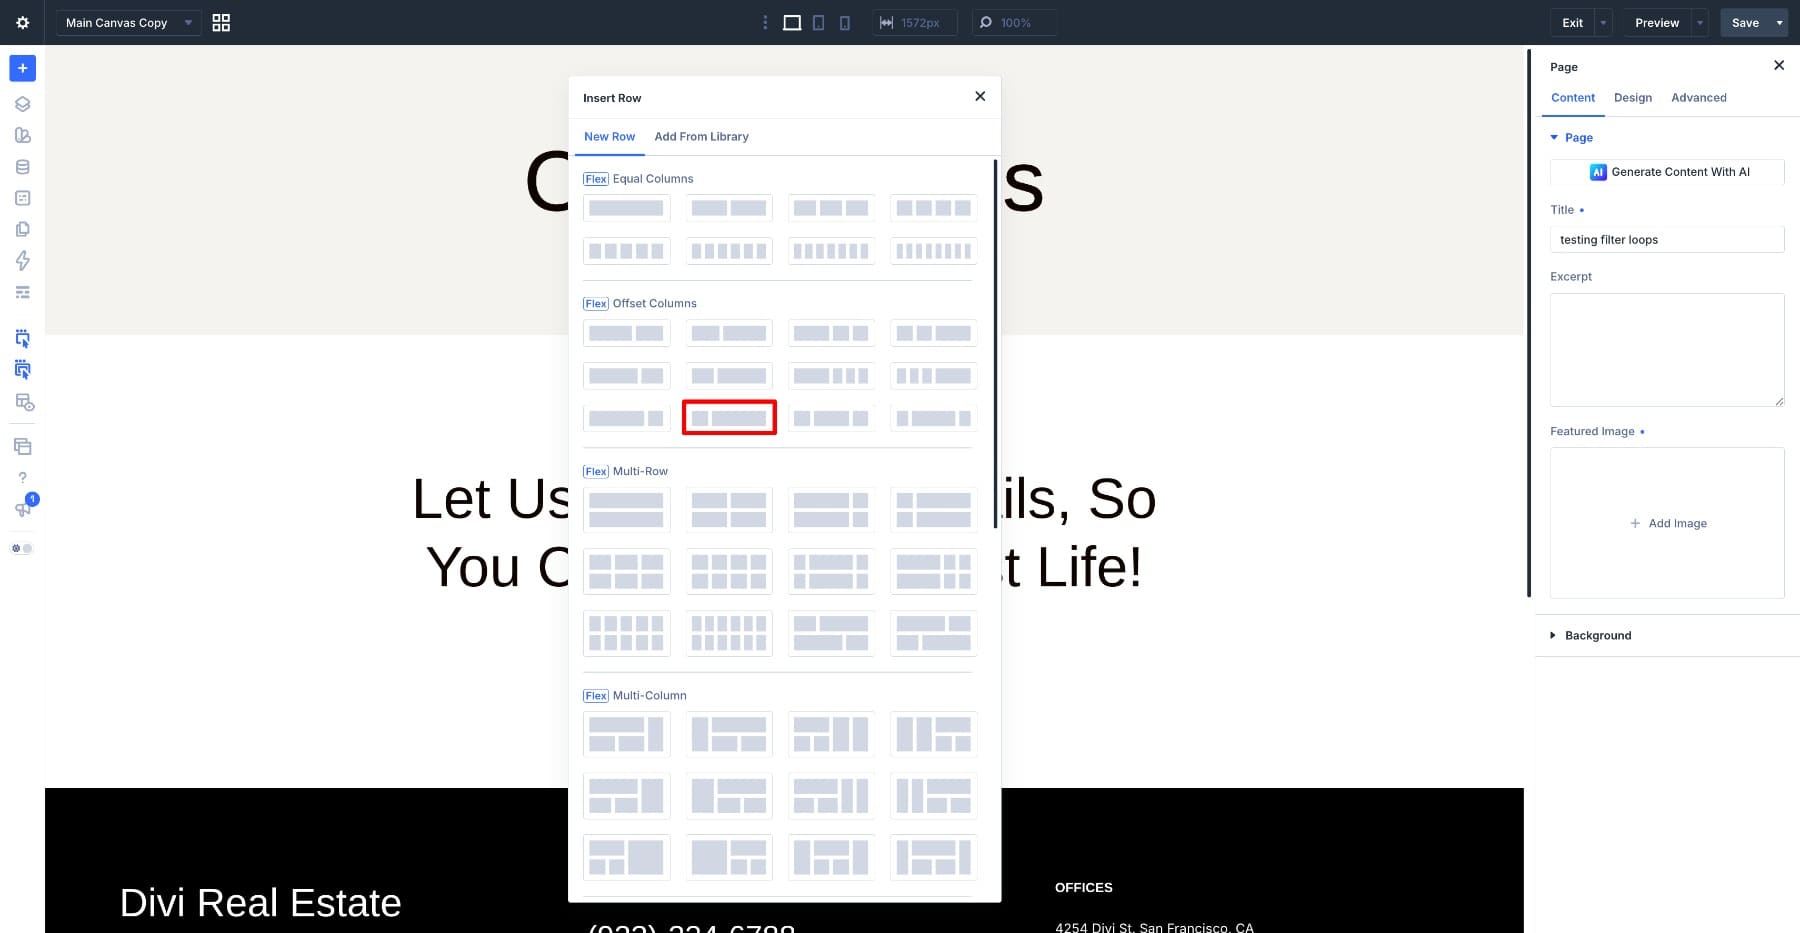
Open the row settings and go to Design > Sizing. Set:
- Width: 85%
- Max Width: None
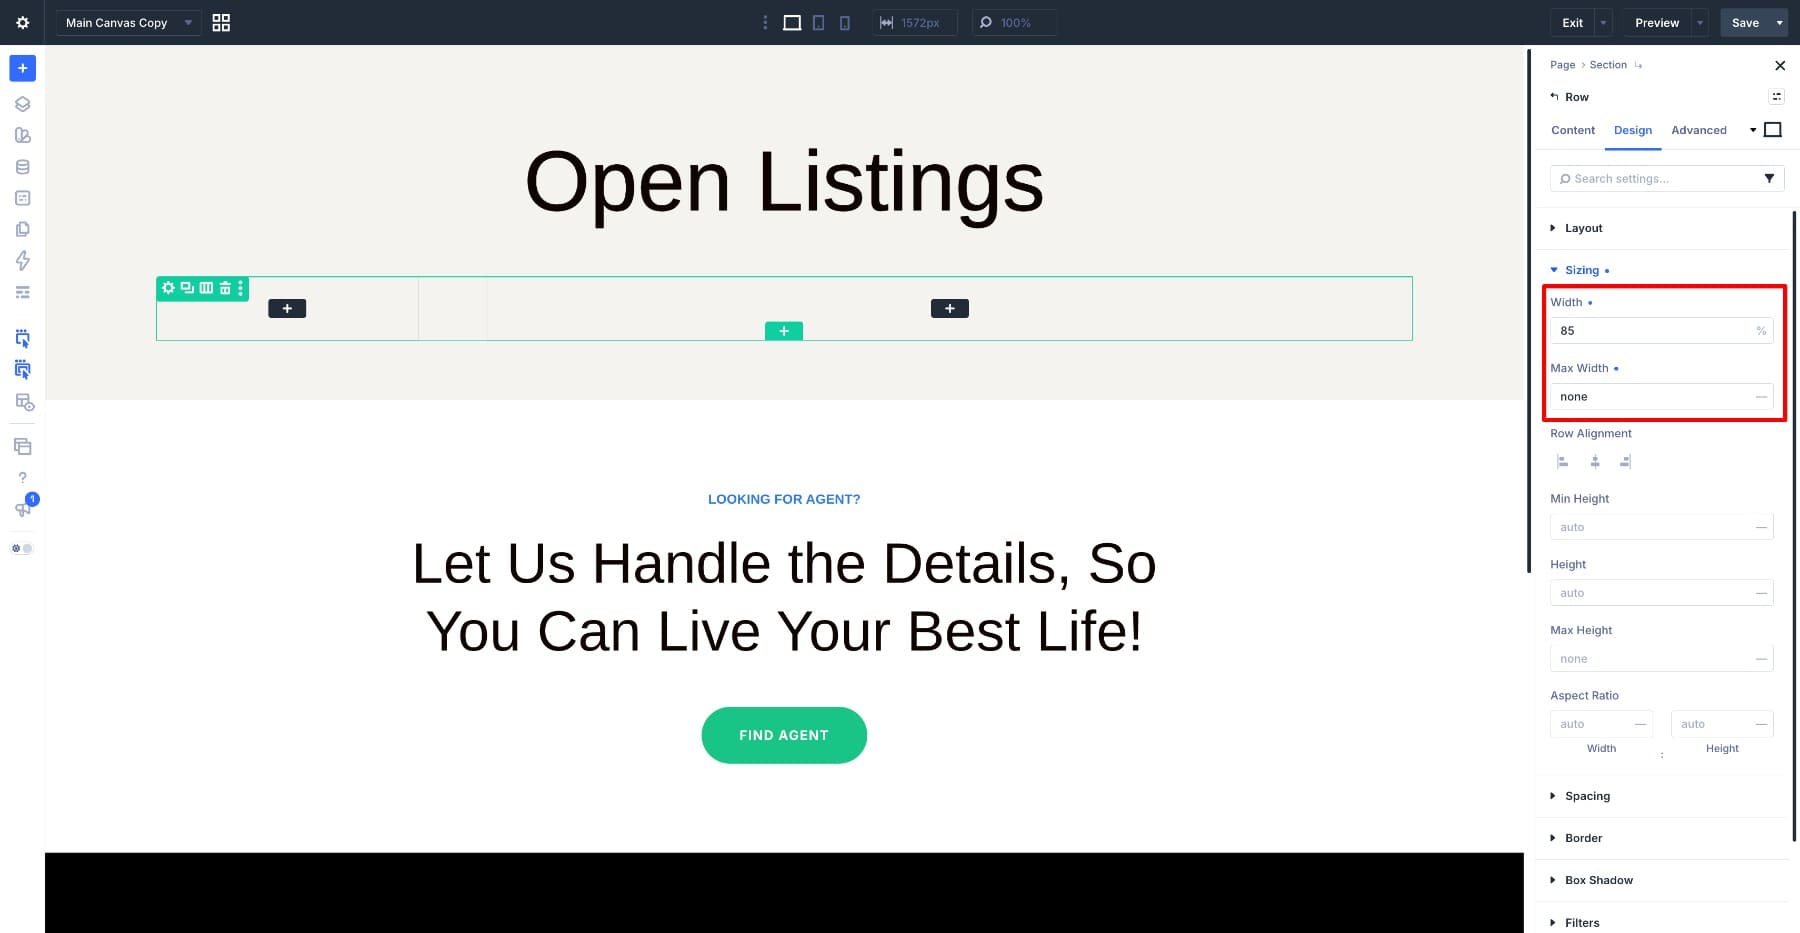
This gives the listing grid more room on desktop. In the row’s Layout settings, set Horizontal Gap to 1%.
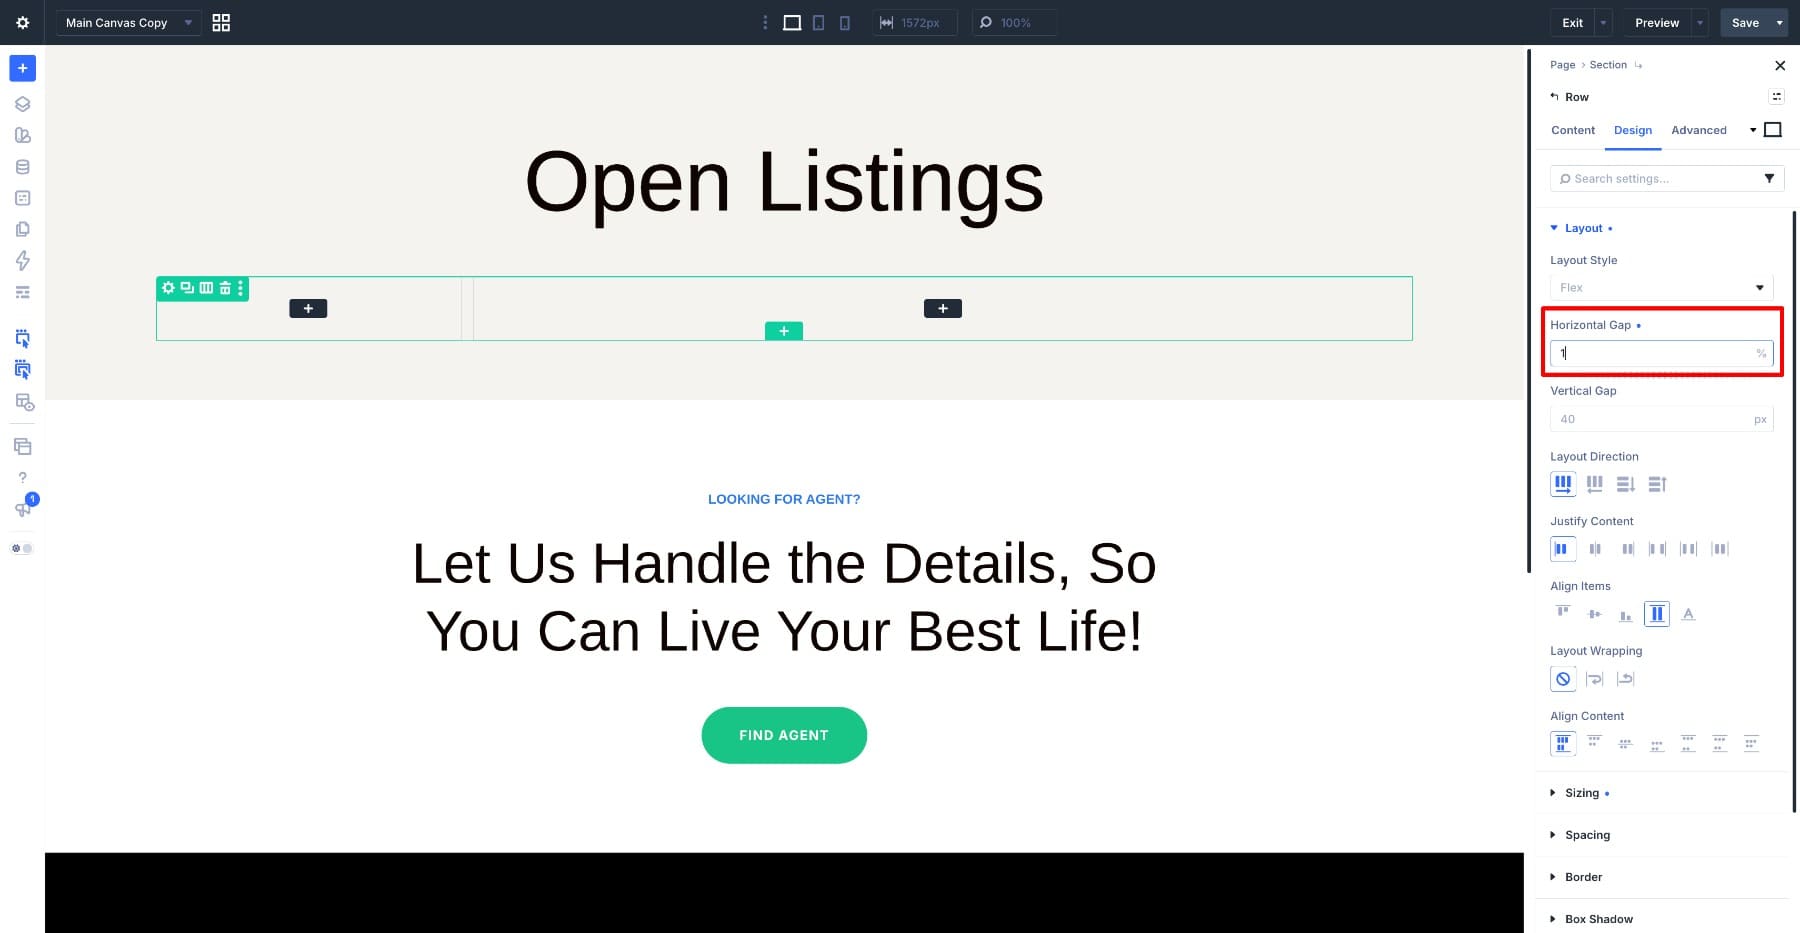
Inside the right column, add a nested row with three equal columns. Set its Horizontal Gap to 1% as well.
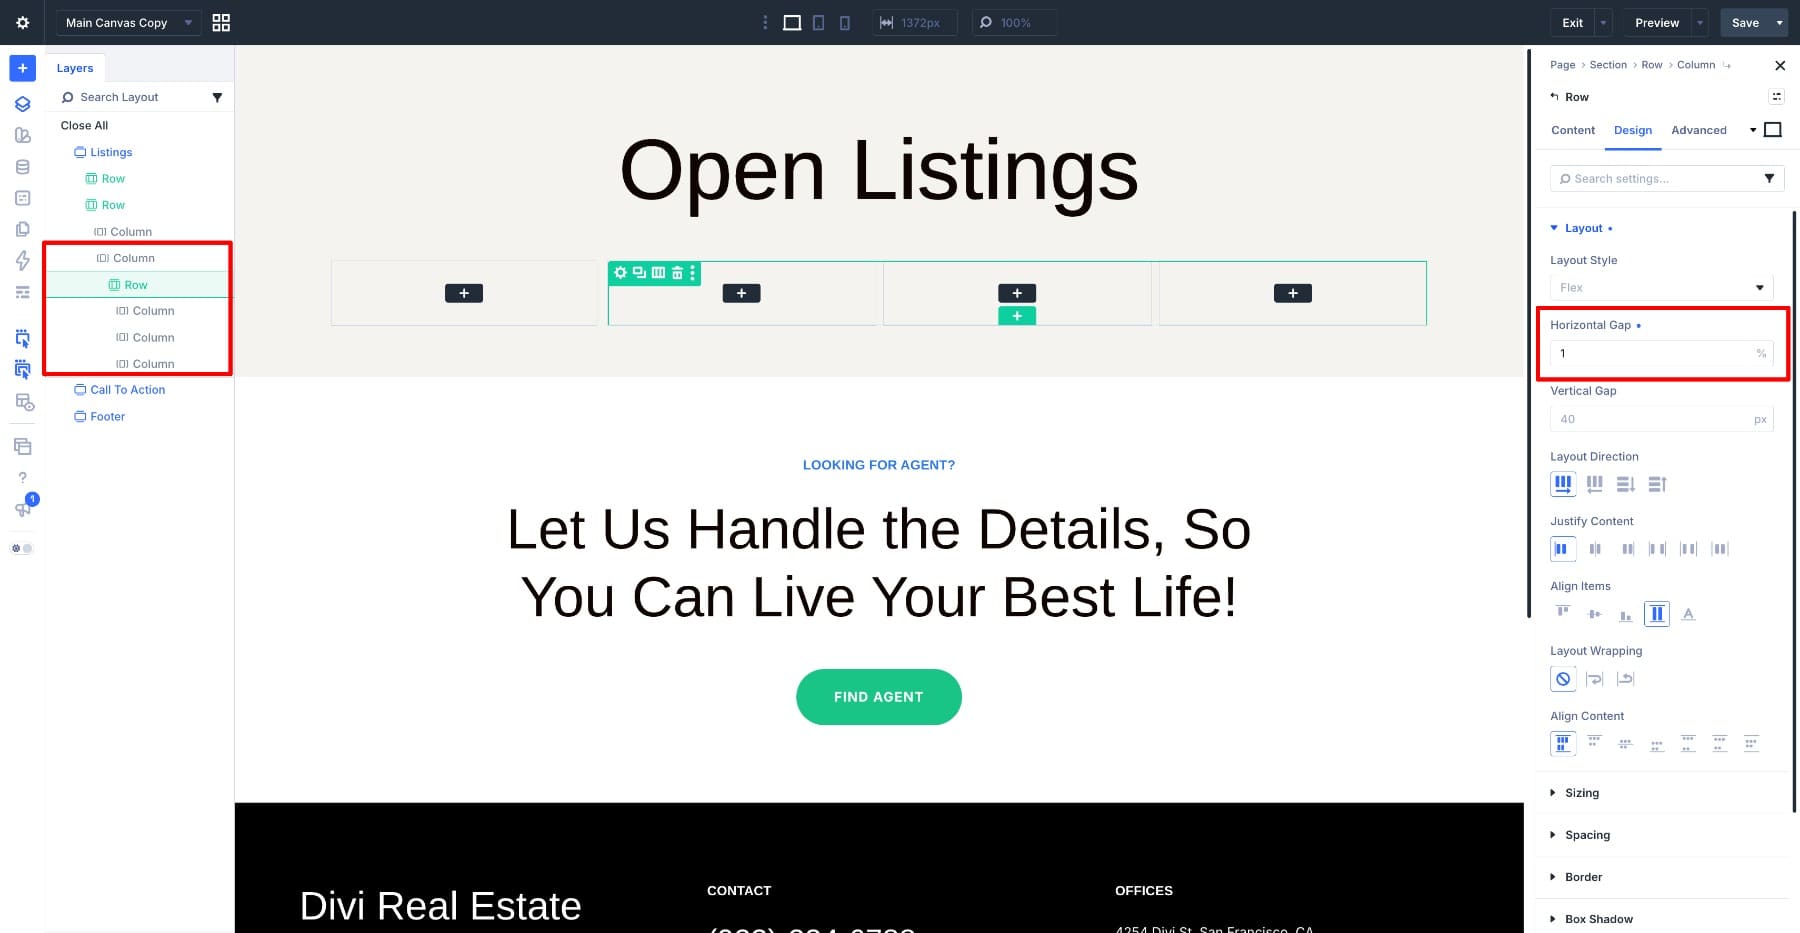
Leave the filter column empty until the loop is ready.
2. Turn The Column Into A Property Loop
Delete the second and third columns from the nested row. The remaining column becomes the property card that Divi repeats. Keep the nested row configured for three cards across on desktop, with wrapping enabled for additional listings.
Open the remaining column’s settings, go to Content > Loop, and turn on Enable Loop. Use a post-based query and set Post Type to Properties.
The column repeats for the properties returned by the query, subject to its post count and other settings. Check Posts Per Page so the query includes enough listings for your test. Give the looped column a clear label, such as Property Listings, to make it easy to identify when connecting the filter.
3. Design The Listing Card Once
Everything inside the looped column repeats for each listing. Add:
- An Image Module for the featured image.
- Three Heading Modules for the property title, price, and city.
- Two Text Modules for the bedroom count and amenities.
- A Button Module linked to your contact page or intended enquiry destination.
Our card uses a white background, a bold title, and a smaller price underneath. Use Divi’s background, border, Box Shadow, spacing, and typography controls to style yours. Editing this source card updates the repeated cards; Presets are useful if you also want to reuse those styles elsewhere.
4. Pull ACF Data Into The Card With Dynamic Content
Dynamic Content replaces each module’s placeholder content with data from the current property in the loop.
In the Image Module, click the Dynamic Content icon in the image field and select Featured Image. In the property title Heading Module, select Post Title. Connect the remaining headings and text to their matching ACF fields:
- Price: Price
- City: City
- Bedrooms: Bedrooms
- Amenities: Amenities
Use the Dynamic Content Before and After settings to add display text. Add $ before Price and Bedroom(s) after Bedrooms. The stored values remain 530000 and 3, while the card displays $530000 and 3 Bedroom(s). The prefix adds a currency symbol, not thousands separators.
Check that Amenities displays the selected values as a readable list, such as Pool, Garden, and Balcony. Save the page and check the front end to confirm that each card uses its own property’s data.
For images with different dimensions, set the Image Module’s Aspect Ratio to 1:1.2 and Framing to Cover. This gives them a consistent shape while cropping to fill the frame.
5. Add The Post Filter Module And Connect The Loop
Add a Post Filter Module to the left column. Open Content > Target and set:
- Target Loop: Property Listings, the looped column created earlier
- Apply Mode: Submit
- Relation: And
If your version labels these settings Filter and Interaction Mode, choose the equivalent Manual mode. The intention is the same: wait for the visitor to click Apply.
Target Loop connects the form to the listings. And requires all active filter controls to match; Or allows a match from any one of them.
Keep the default Search, Apply, and Reset items. Remove Category because this example uses custom fields for its property criteria. Search targets property titles and content, not all of the custom fields displayed in the cards.
If the buttons are missing, add separate Post Filter Items with Field Type set to Submit and Reset. Use Apply and Reset as their button text.
Add the five custom-field controls below as Post Filter Items. In Text items, the data-source selector may be labeled Field Value rather than Field Option.
6. Set A Maximum Price With A Numeric Comparison
Add an item and set:
- Field Label: Maximum Price
- Field Type: Text
- Field Value Type: Number
- Field Value / Field Option: Price, the ACF field named property_price
- Field Comparison: Less Than Or Equal To
- Placeholder: 750000
Entering 750000 keeps listings priced at or below that amount. The placeholder is only a hint; it does not set a default maximum.
This is filtering, not sorting. Order By changes the sequence of results rather than removing listings above a budget. Its built-in Price option is for WooCommerce product prices, not this ACF field. Use a Text item with a Number value type to compare the ACF price with the visitor’s limit.
Keep currency symbols and thousands separators out of both the stored value and the filter input.
7. Search City Names
Add an item and set:
- Field Label: City
- Field Type: Text
- Field Value Type: Text
- Field Value / Field Option: City, the ACF field named property_city
- Placeholder: Enter A City
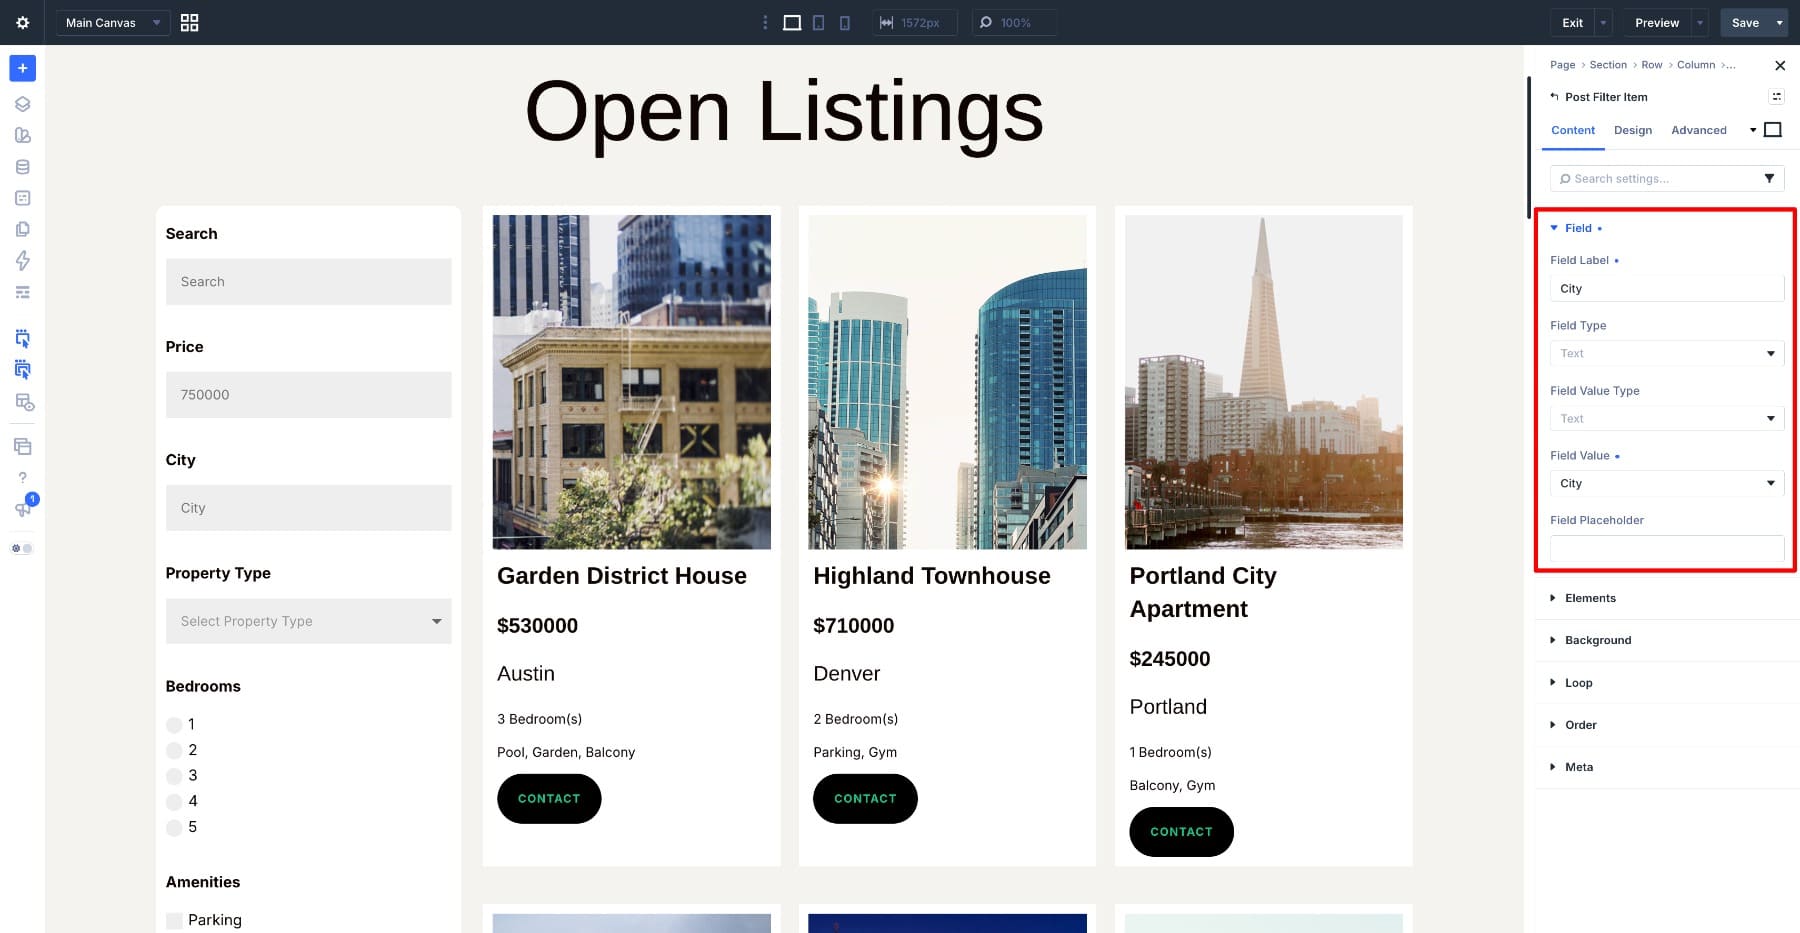
This control searches the stored City field independently of the general keyword search. Test it with city names that appear in your published listings.
8. Build The Property Type Dropdown From Stored Values
Add an item and set:
- Field Label: Property Type
- Field Type: Select
- Field Option: Property Type
- Options Method: Automatic
- Placeholder: Select Property Type
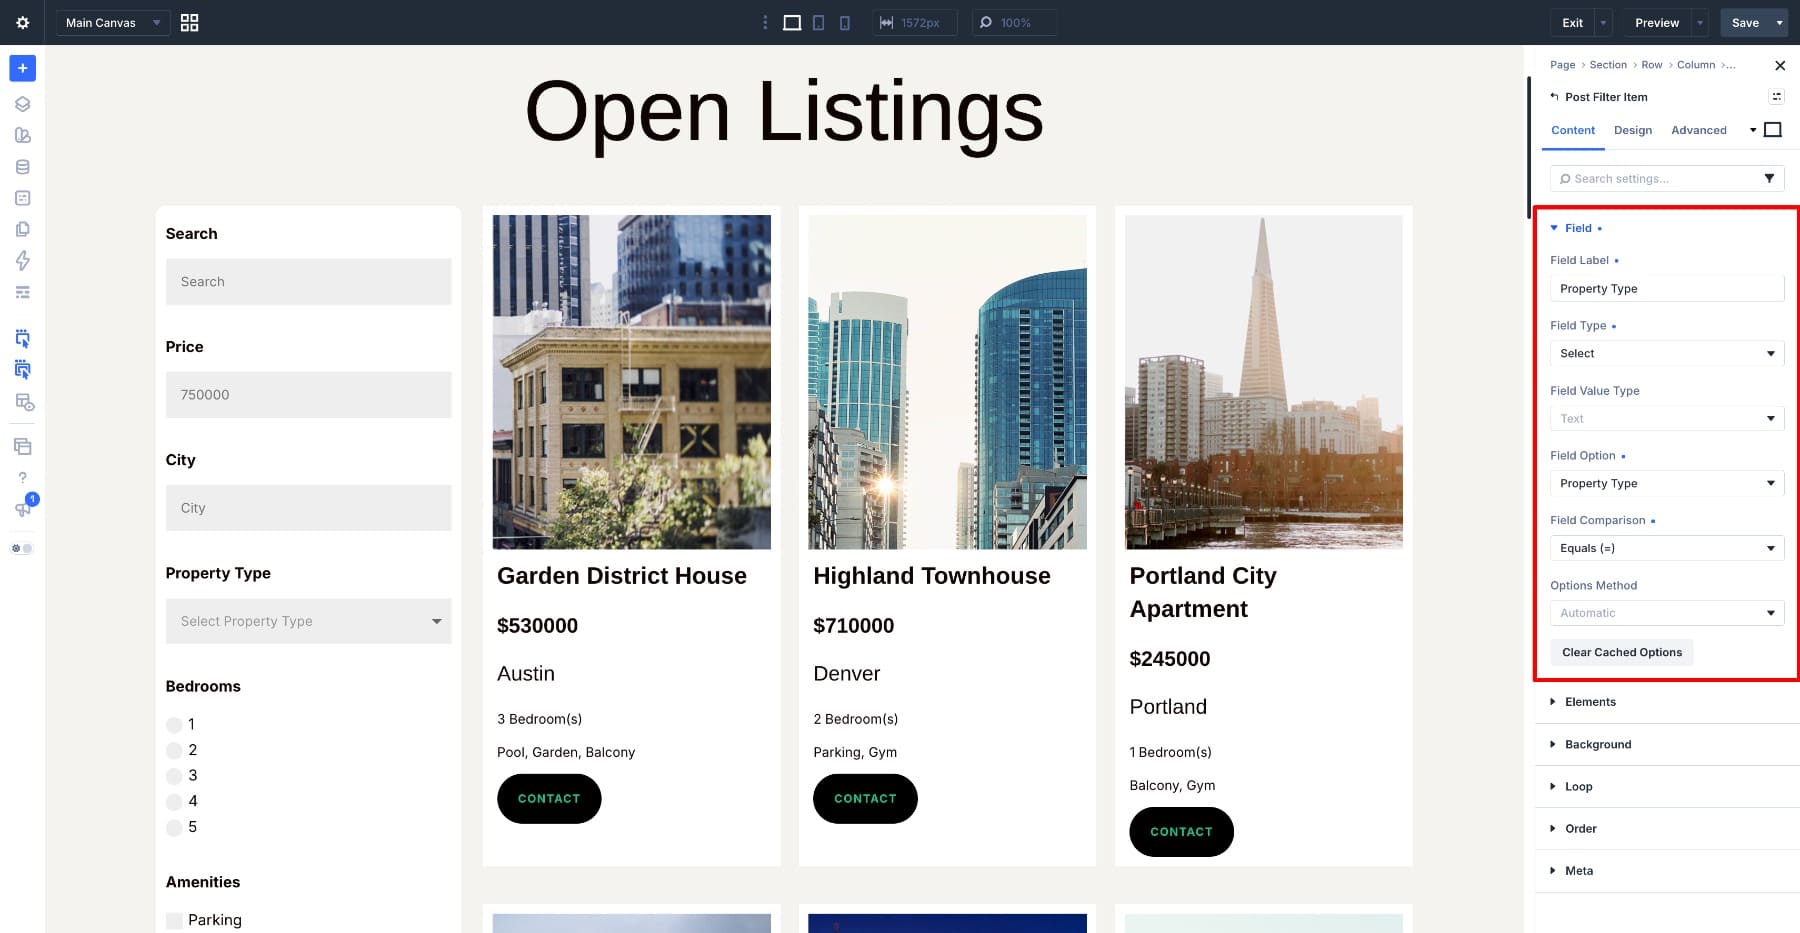
Automatic discovers values saved on listings, not simply every choice defined in ACF. An unused property type may therefore be absent. If saved values are missing, use Clear Cached Options and reload the page.
9. Display Bedroom Counts As Radio Buttons
Add an item and set:
- Field Label: Bedrooms
- Field Type: Radio
- Field Option: Bedrooms
- Options Method: Automatic
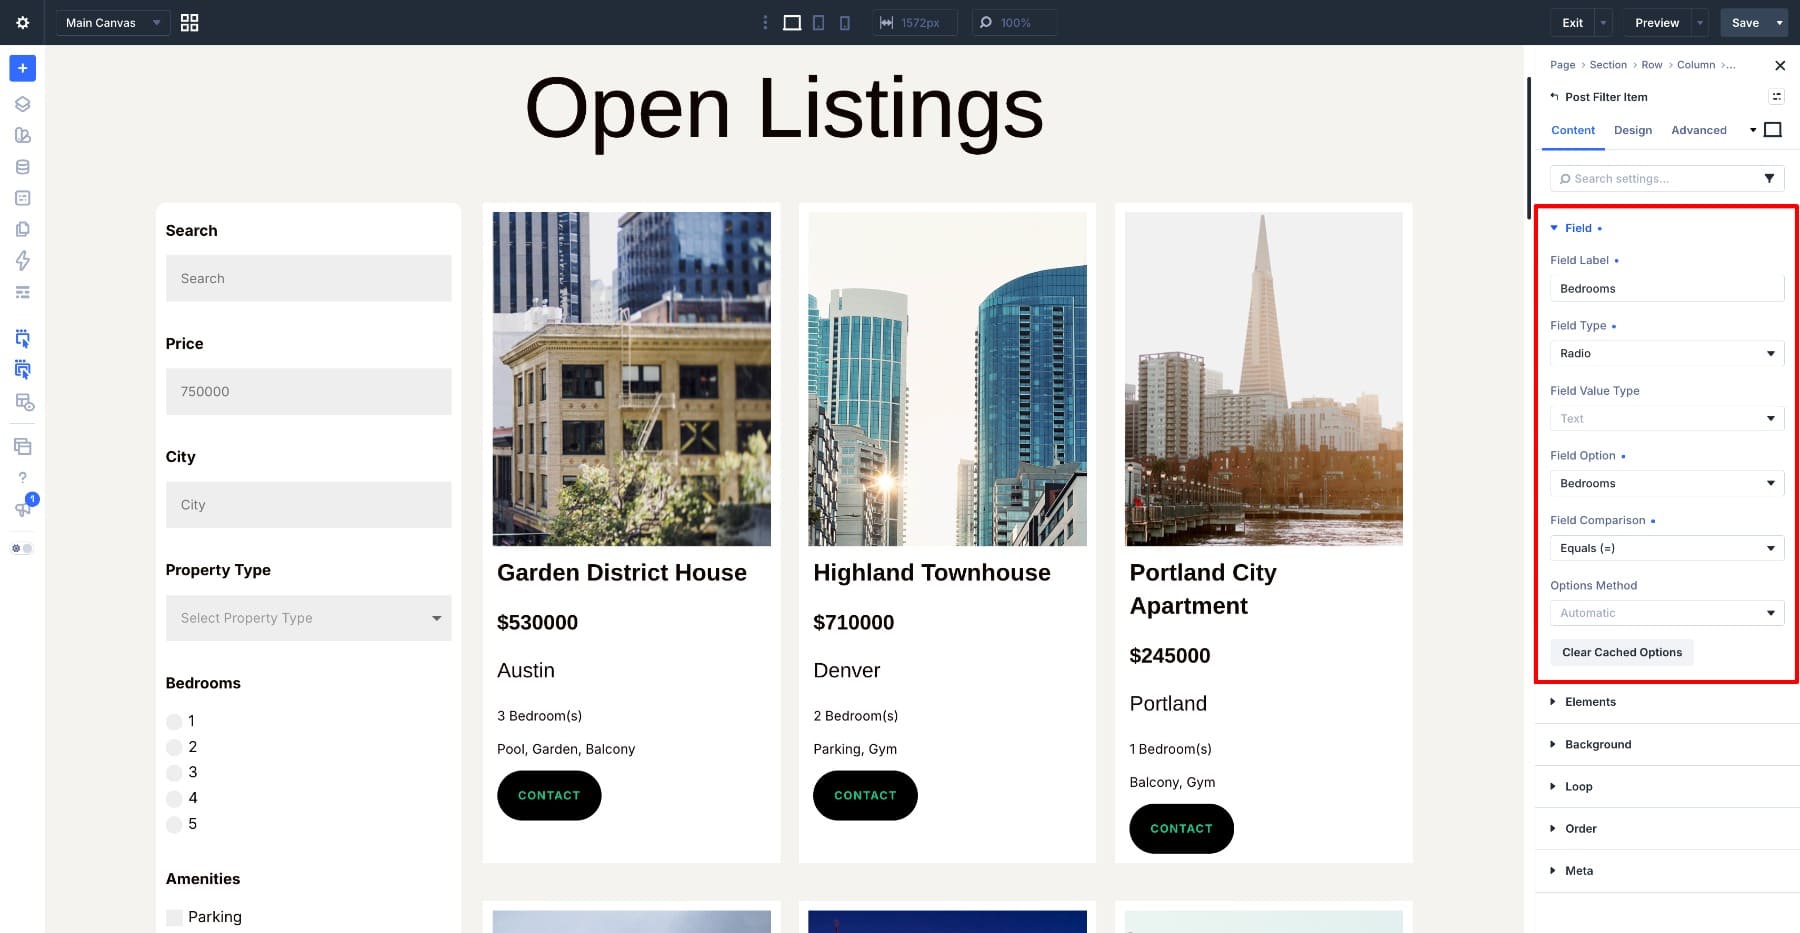
Radio allows one bedroom count at a time. Use an equality comparison to match the selected count, rather than treating it as a minimum.
If options are missing, confirm that the field is populated on published listings and clear the cached options. You can also switch to Manual and enter 1 through 5, using matching values and labels. Keep these aligned with your ACF choices.
10. Create Readable Amenities Options
Add a Post Filter Item and set:
- Field Label: Amenities
- Field Type: Checkbox
- Field Option: Amenities
- Options Method: Manual
Use Manual to enter each amenity as a separate option.
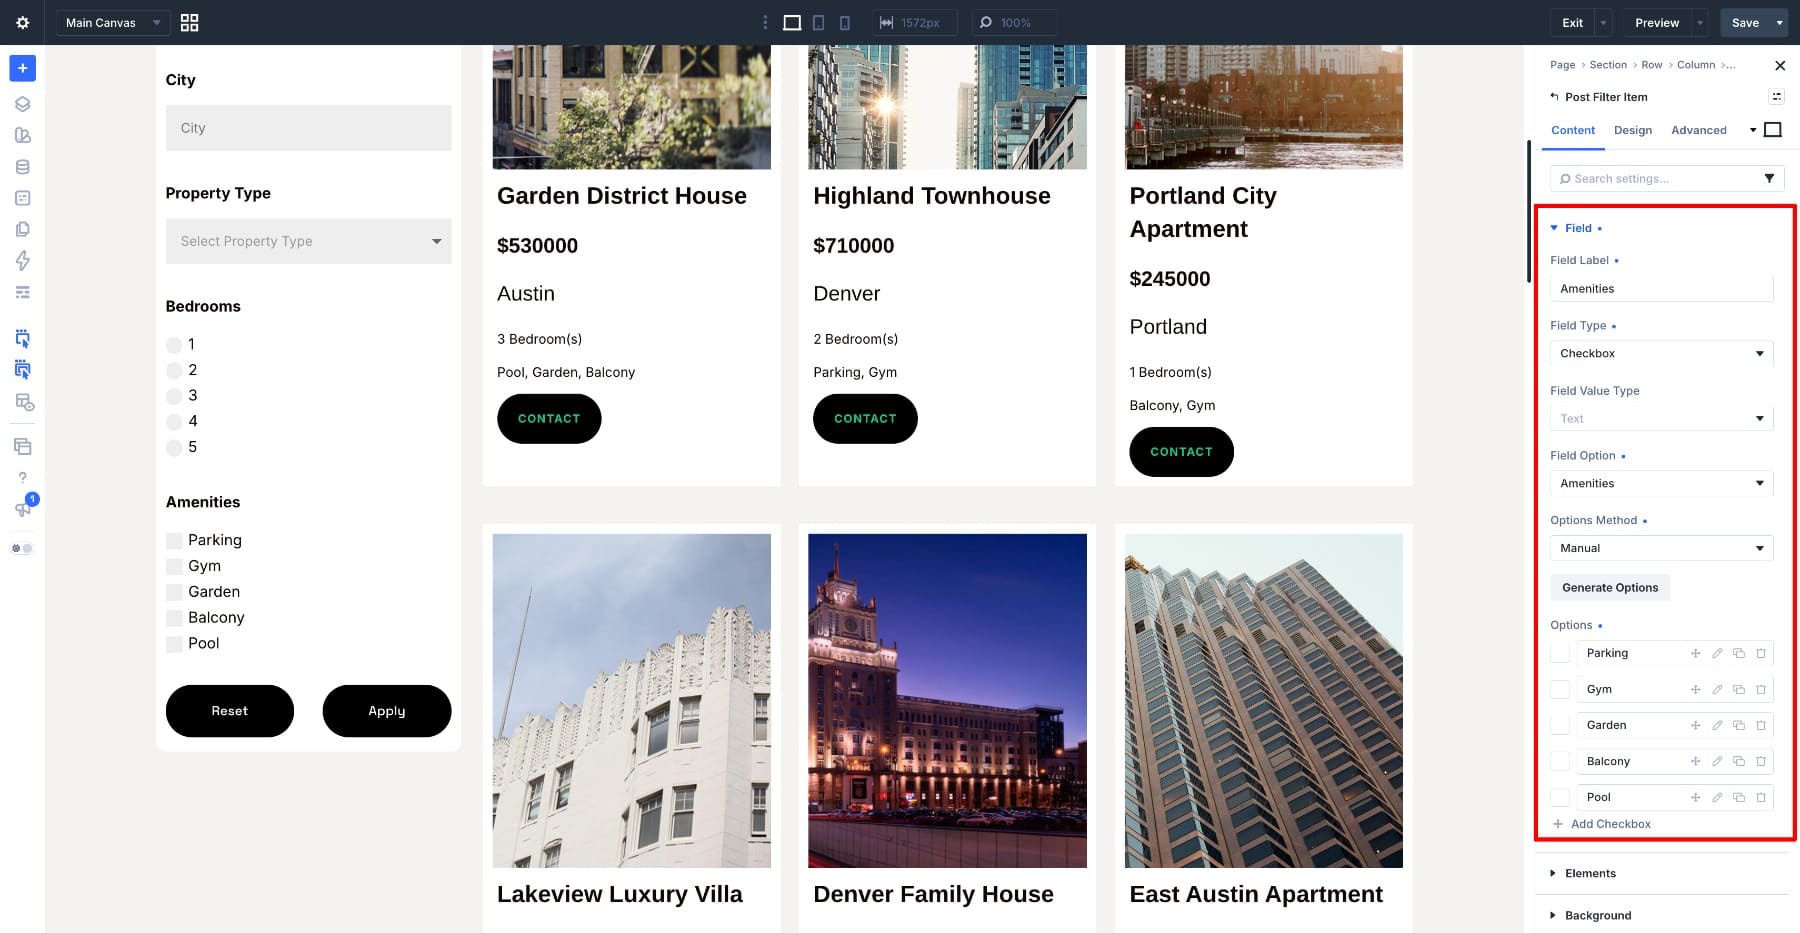
Under Options, click Add Checkbox for each amenity below. Enter the same text in both the Value and Label fields:
- Parking
- Pool
- Garden
- Balcony
- Gym
These values must match the choices entered in your ACF Amenities field earlier. Add them individually without using Generate Options.
Save the page and test the filter on the front end. Select Parking, click Apply, and check that properties with Parking appear, including those with other amenities. Test multiple selections as well.
Once filtering works correctly, use the Design tab to style the labels, inputs, spacing, and buttons. You can reuse these styles with Option Group Presets.
11. Test The Filters And Adjust Smaller Screens
Save the page and test it on the front end. Start with a combination that matches a known listing. For example, enter Portland, select 1 bedroom, and enter a maximum price of 300000, then click Apply. Use different values if your sample data does not contain that combination.
With Relation set to And, results should satisfy all active controls. Test each control separately before combining them so you can identify any field that produces unexpected results.
Also check:
- Price boundaries: A listing priced exactly at the maximum should remain visible.
- Amenities: Verify both single- and multiple-selection behavior using known listings.
- No matches: Try a combination no listing satisfies and confirm the page handles an empty result.
- Reset: Confirm that it clears your selections and restores the starting results.
On tablet and phone, check that the filter sits above the listings. Adjust the column widths, gaps, and cards per row with responsive settings as needed. Keep the Amenities list compact enough that visitors can reach the listings without excessive scrolling.
Build Useful Filters Directly Inside Divi 5
Reliable filtering starts with the data. Store prices as numbers, use consistent choices for fields such as Property Type and Bedrooms, and test multi-value fields separately.
With the field structure, loop query, and filter controls connected in Divi 5, visitors can narrow a directory using the details that matter to them. The same workflow can be adapted to other listings, from job boards to course catalogs, while keeping the layout and filter design inside Divi 5.
The post Filtering Loops With Custom Fields In Divi 5 appeared first on Elegant Themes Blog.