WordPress can show posts on a blog page automatically, but the default output rarely gives you full control over the actual card structure. The image position, meta layout, excerpt placement, and read more link all follow a preset pattern unless you start customizing the theme or working around the module.
The Loop Builder in Divi 5 takes a different approach. You design one post card with normal Divi elements, connect each part of that card to live post data, and Divi repeats it automatically for every item in your query.
In this tutorial, we’ll build a horizontal blog loop with one post card per row. Each card will have a featured image on the left, post content on the right, dynamic title, publish date, excerpt, and a linked arrow, plus pagination so visitors can move through the rest of your posts.
Why Build A Horizontal Blog Loop With The Loop Builder?
The Blog Module is useful when you need a blog feed quickly. For many sites, that is enough. But when you want to decide exactly how each post card is structured, where the image sits, how the meta line reads, how much space the excerpt gets, or what the read more element looks like, a fixed blog layout can start to feel limiting.
The Loop Builder is built for that situation. You choose the element that should repeat, turn on the loop option, define the query, and then build the card inside that looped element. Divi handles the repetition and swaps in the correct post data for each result.
Nothing inside the card has to follow a preset blog module structure. The image, title, date, excerpt, and arrow link are all regular Divi elements, which means you can style them the same way you would style the rest of your page.
This is especially useful for horizontal blog layouts. Instead of showing two or three compact cards per row, each post gets its own full row inside the content container. The result feels more editorial and gives every post enough space to stand on its own.
Learn Everything About Divi 5’s Loop Builder
What We’re Building
Before we get into the steps, here’s a quick look at the finished layout.
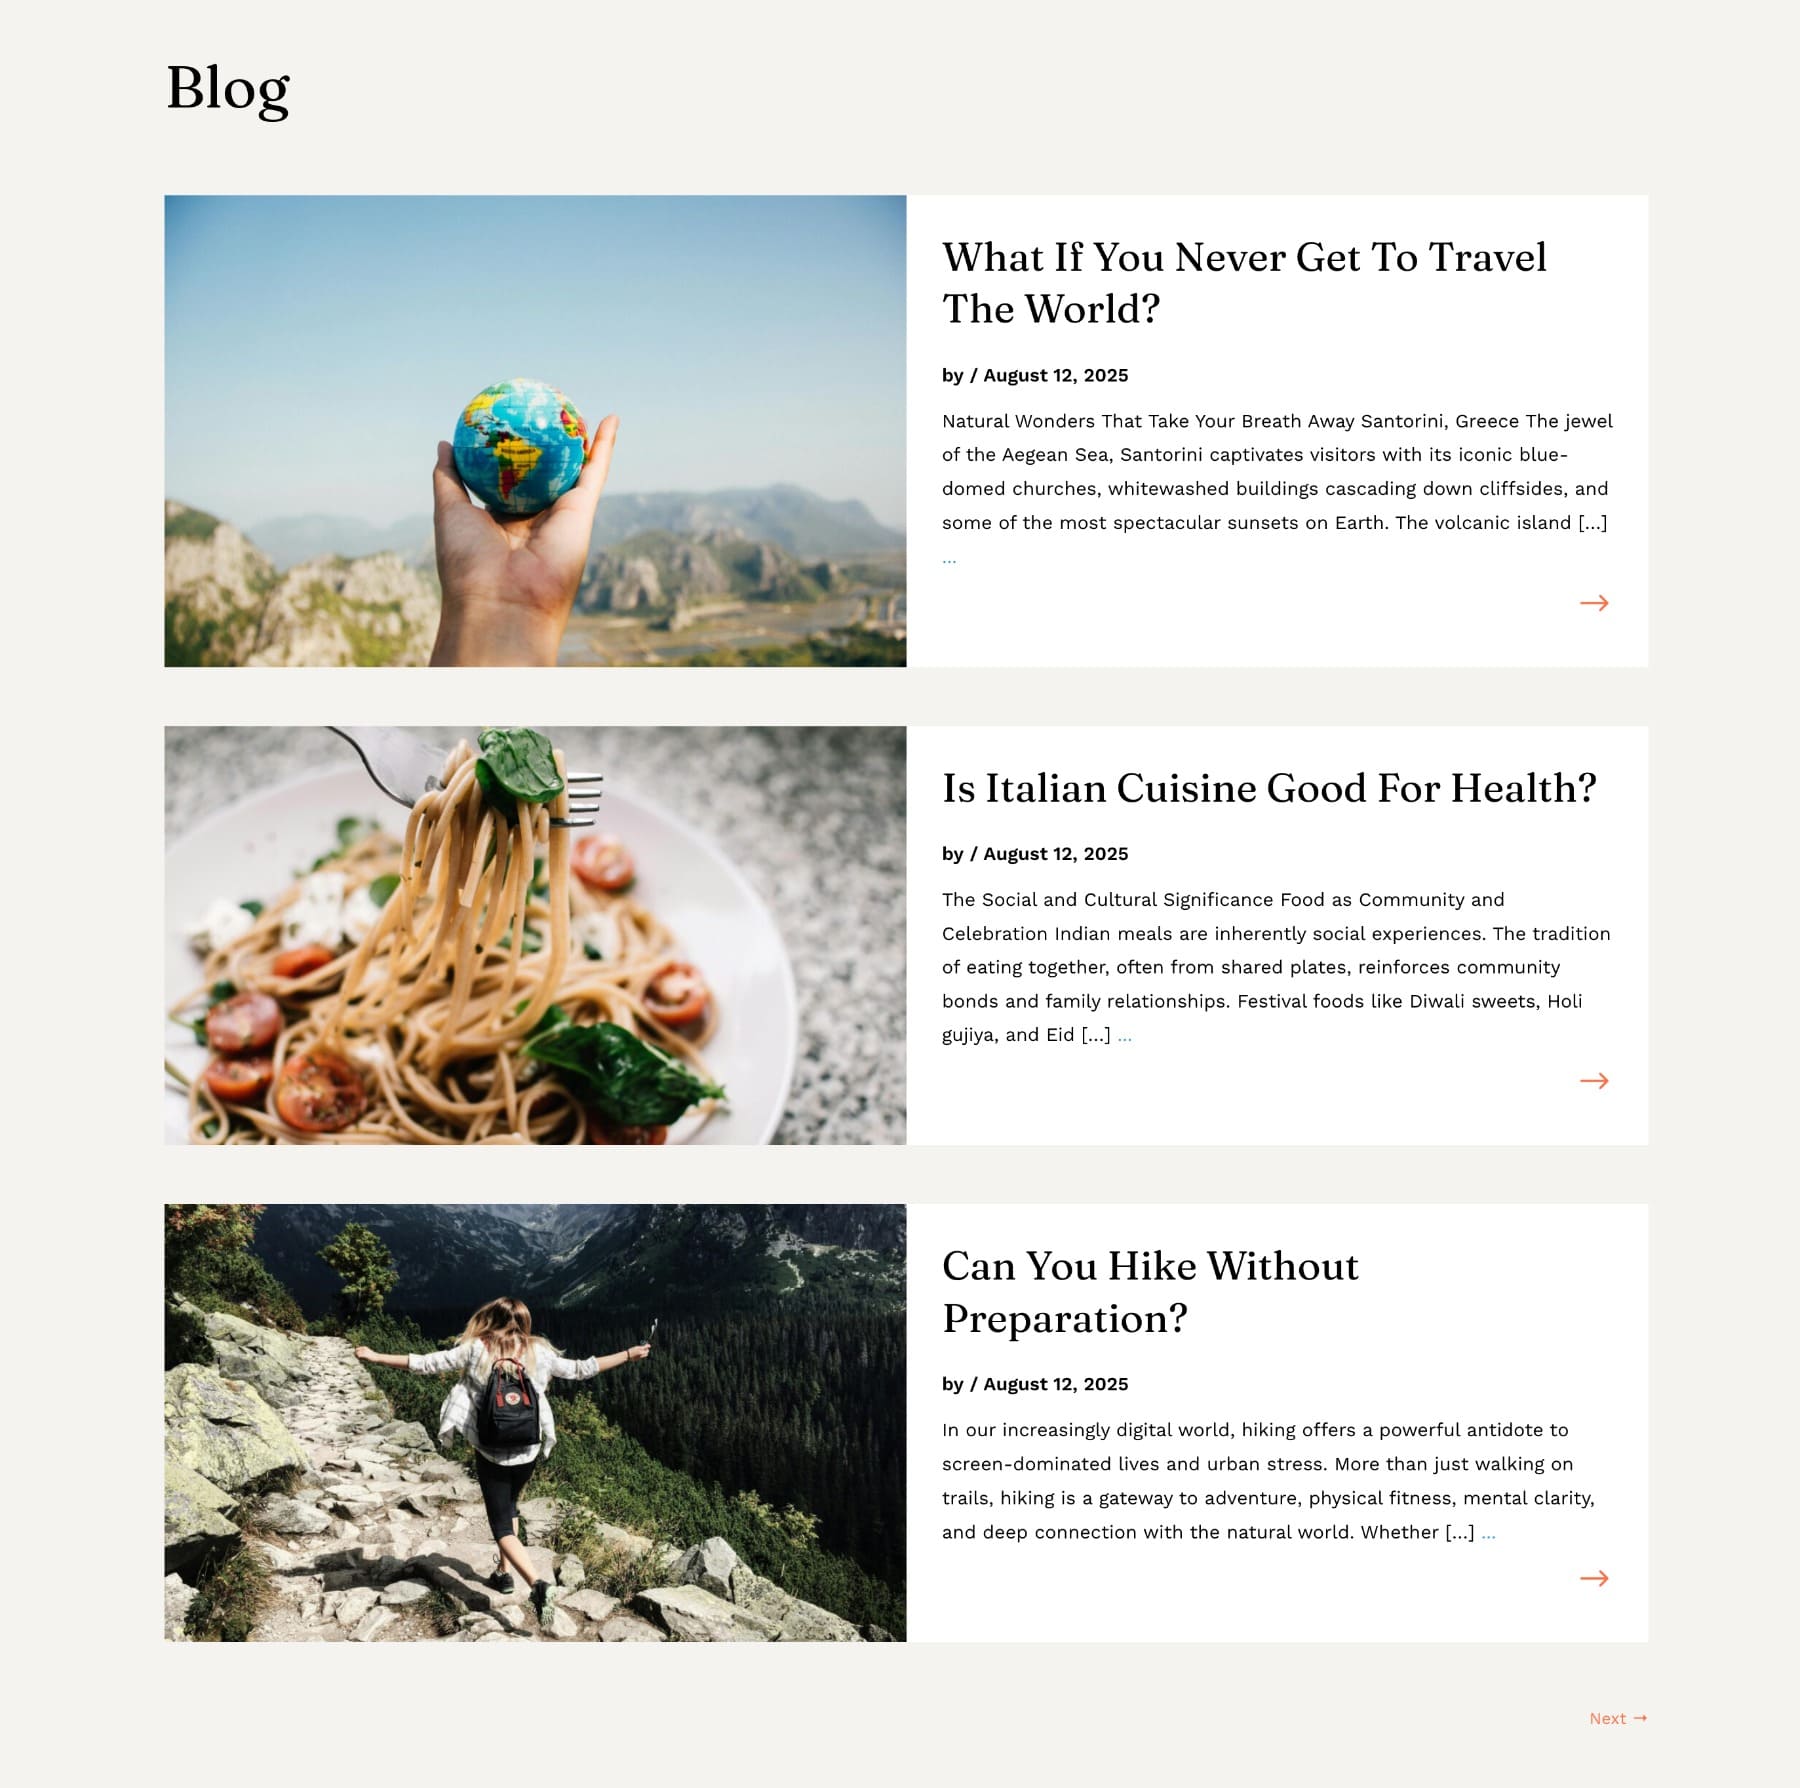
Each post appears as a horizontal card with the featured image on the left and the post content on the right. The content side includes the post title, publish date, excerpt, and a right-pointing arrow that links to the full post. Cards stack vertically down the page, and a Next → pagination link appears at the bottom when there are more posts to show.
Before you build the layout, make sure your posts have featured images. Manual excerpts are also helpful if you want tighter control over the preview text, although Divi can still pull an excerpt automatically.
Step 1: Set Up The Page Structure
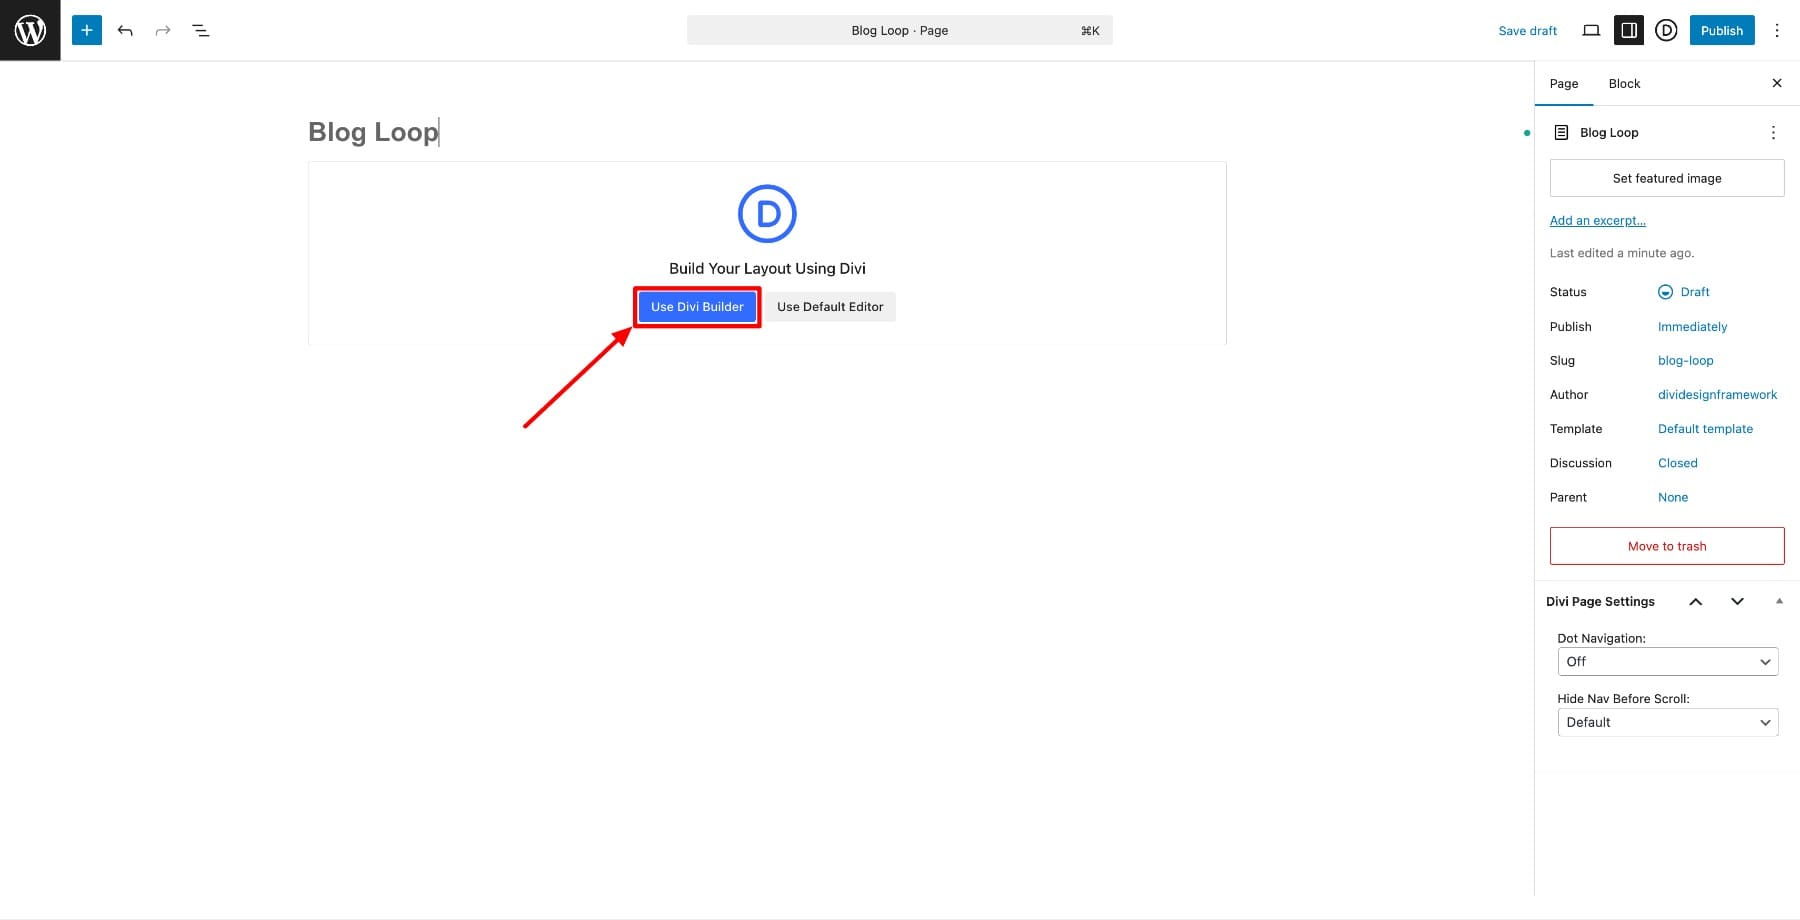
Start by opening the page where you want your horizontal blog loop to live. If you are working from a blank page, click Use Visual Builder to launch the editor.
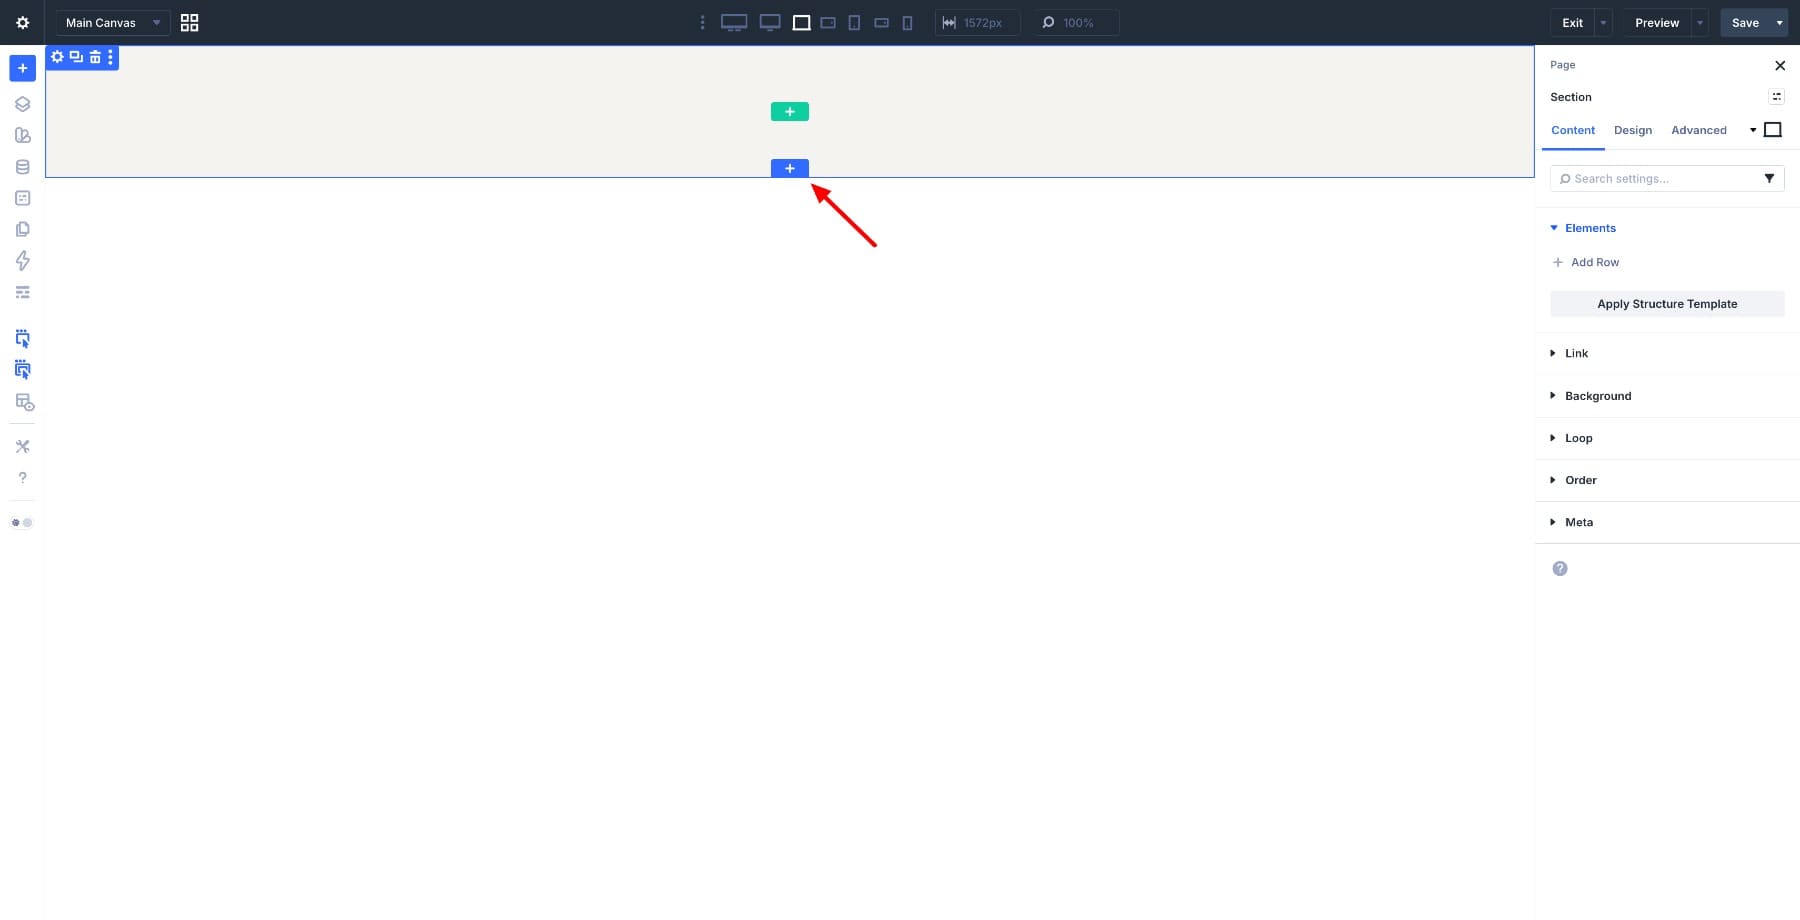
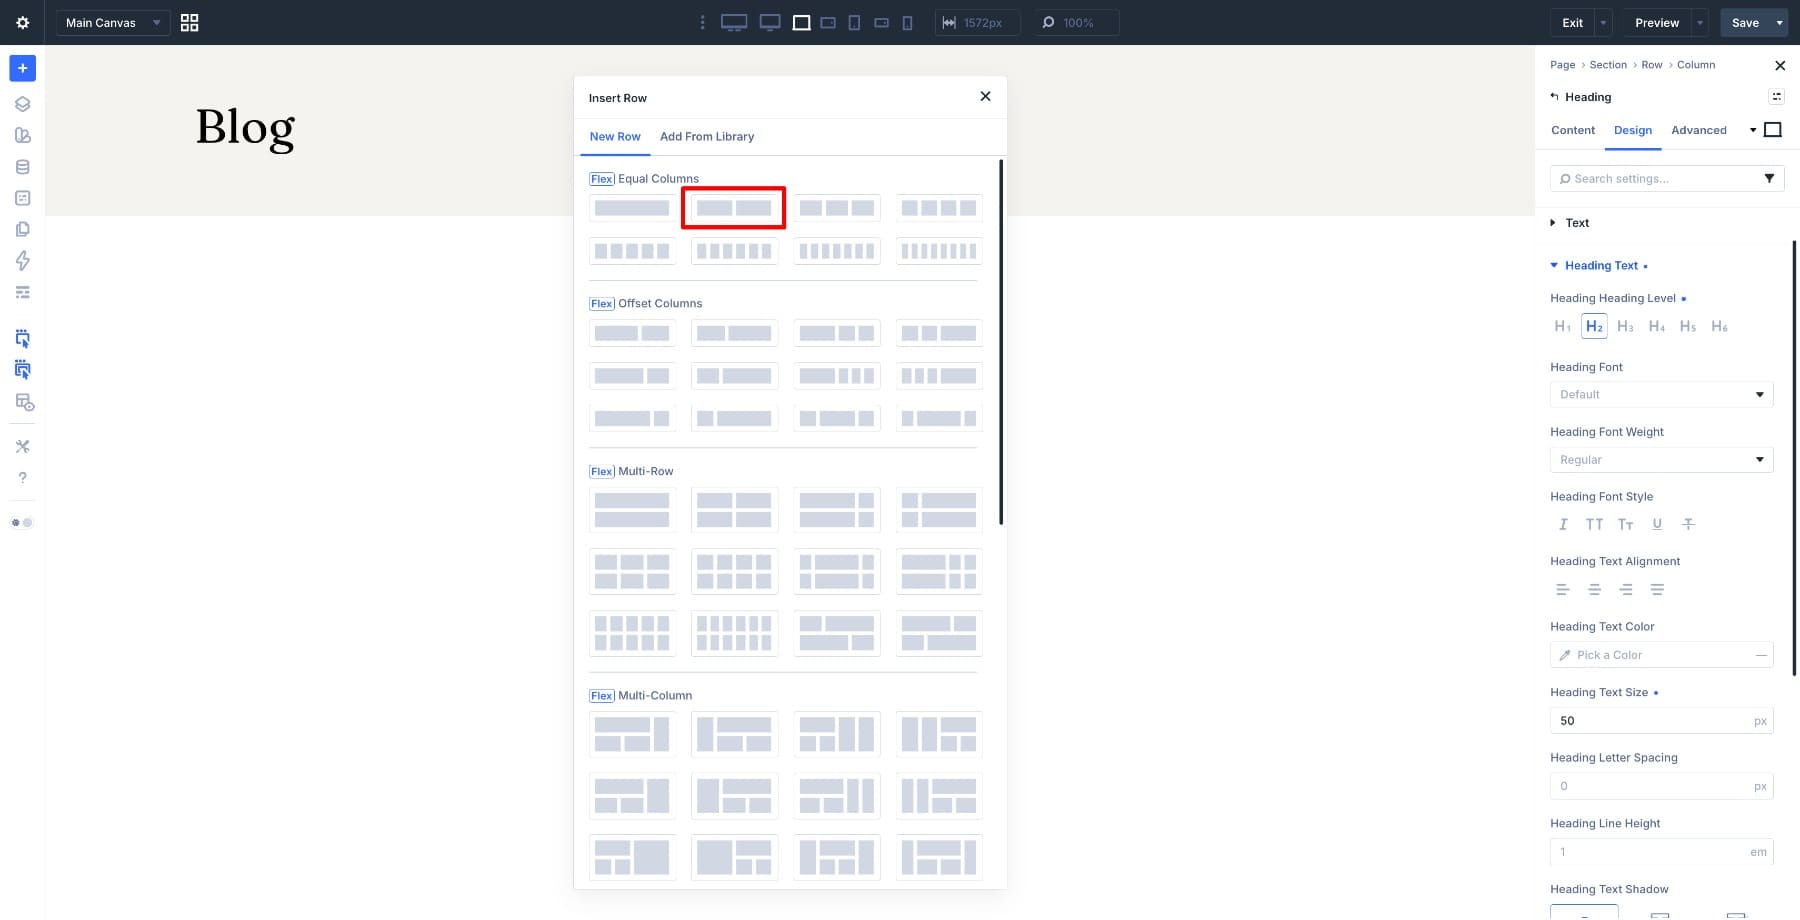
Click the blue + icon to insert a new section and choose Regular Section. A row is added automatically inside it.
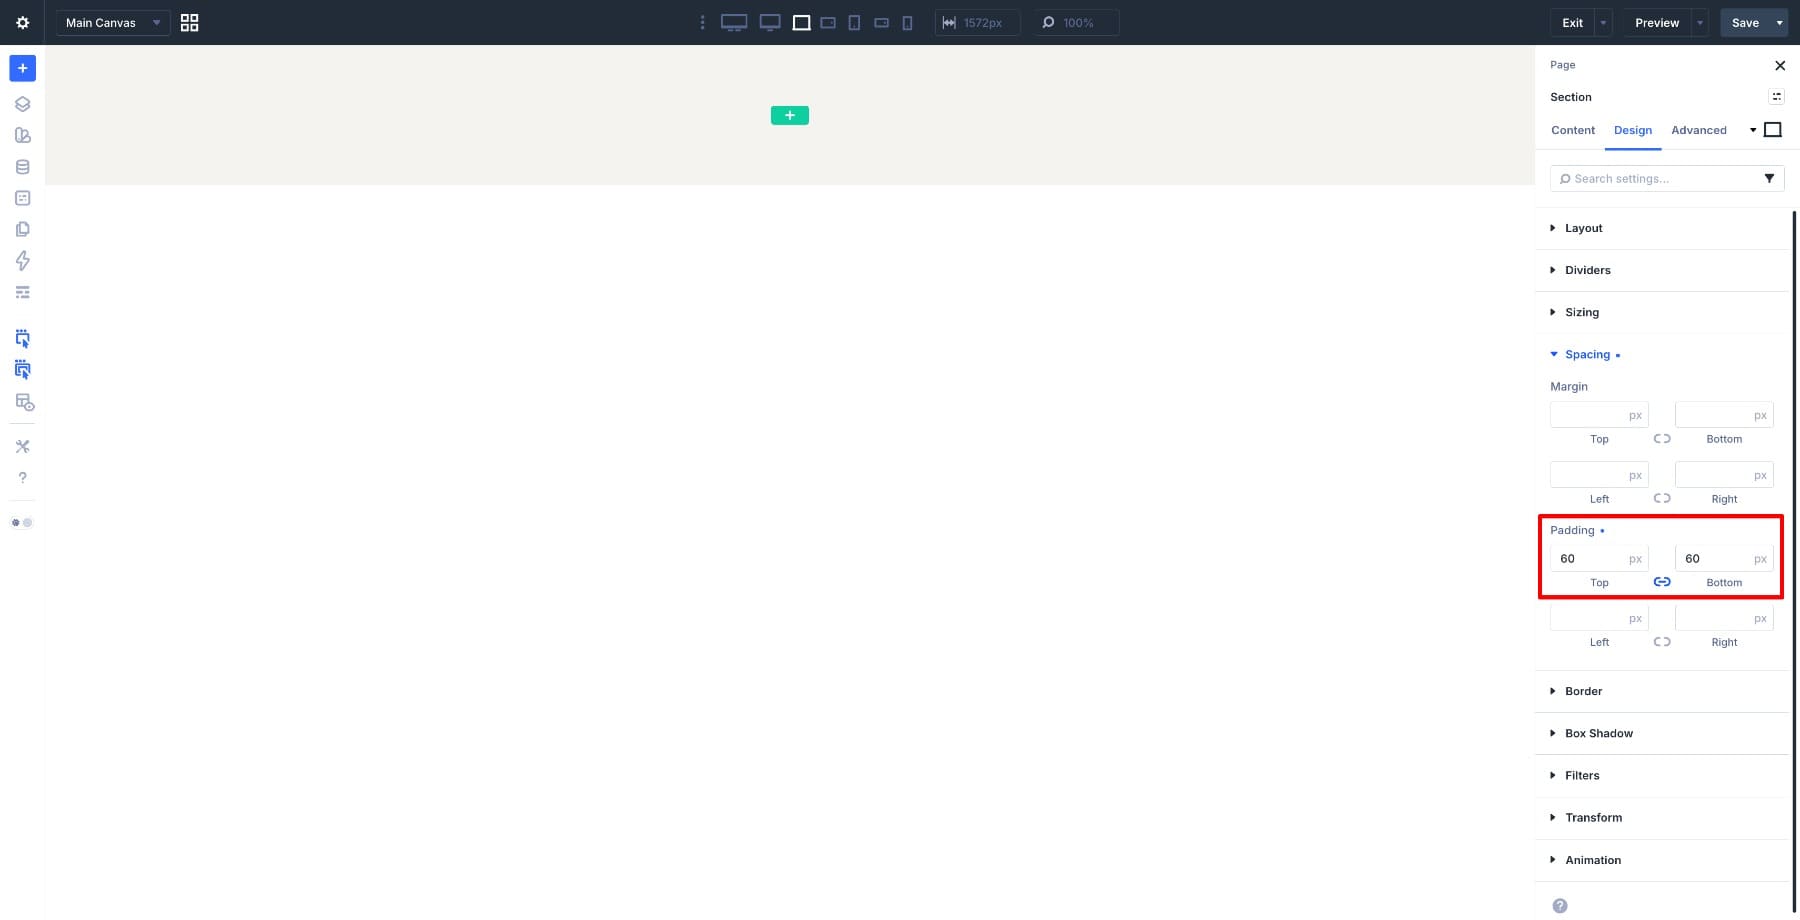
Open the Section settings by clicking the section gear icon. Go to Design > Spacing and set the top and bottom padding to 60px. This gives the layout breathing room above and below the blog feed.
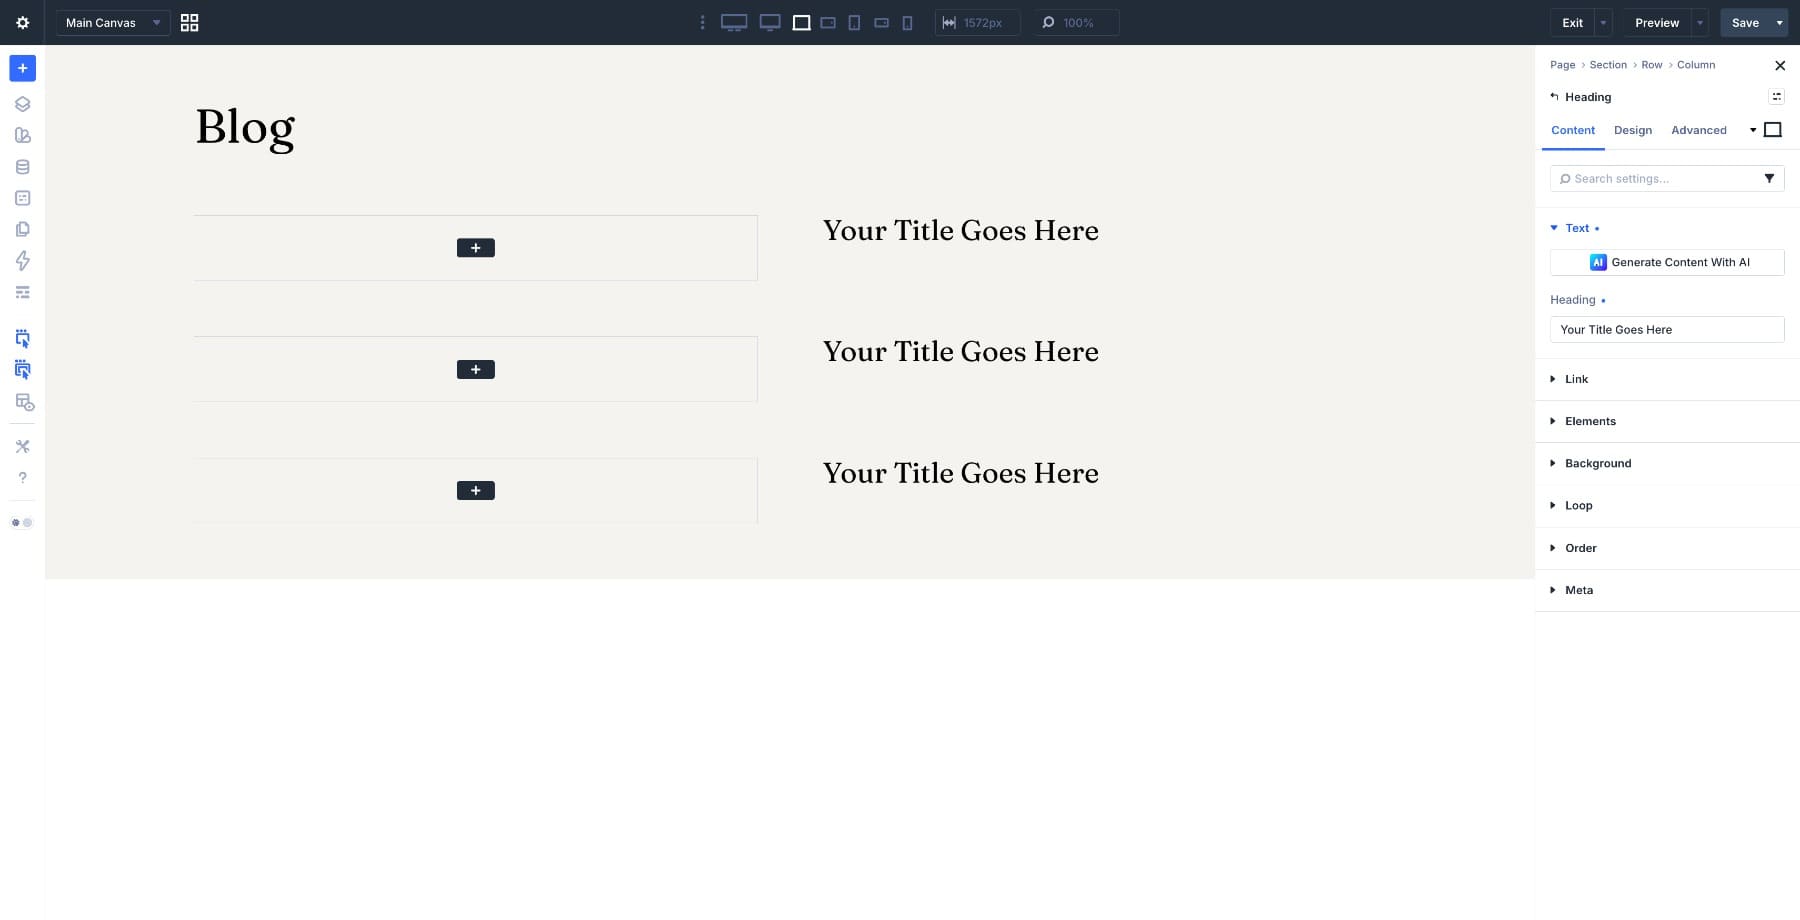
Inside the section, add a single-column row. This row is only for the page heading, so one column is all we need.
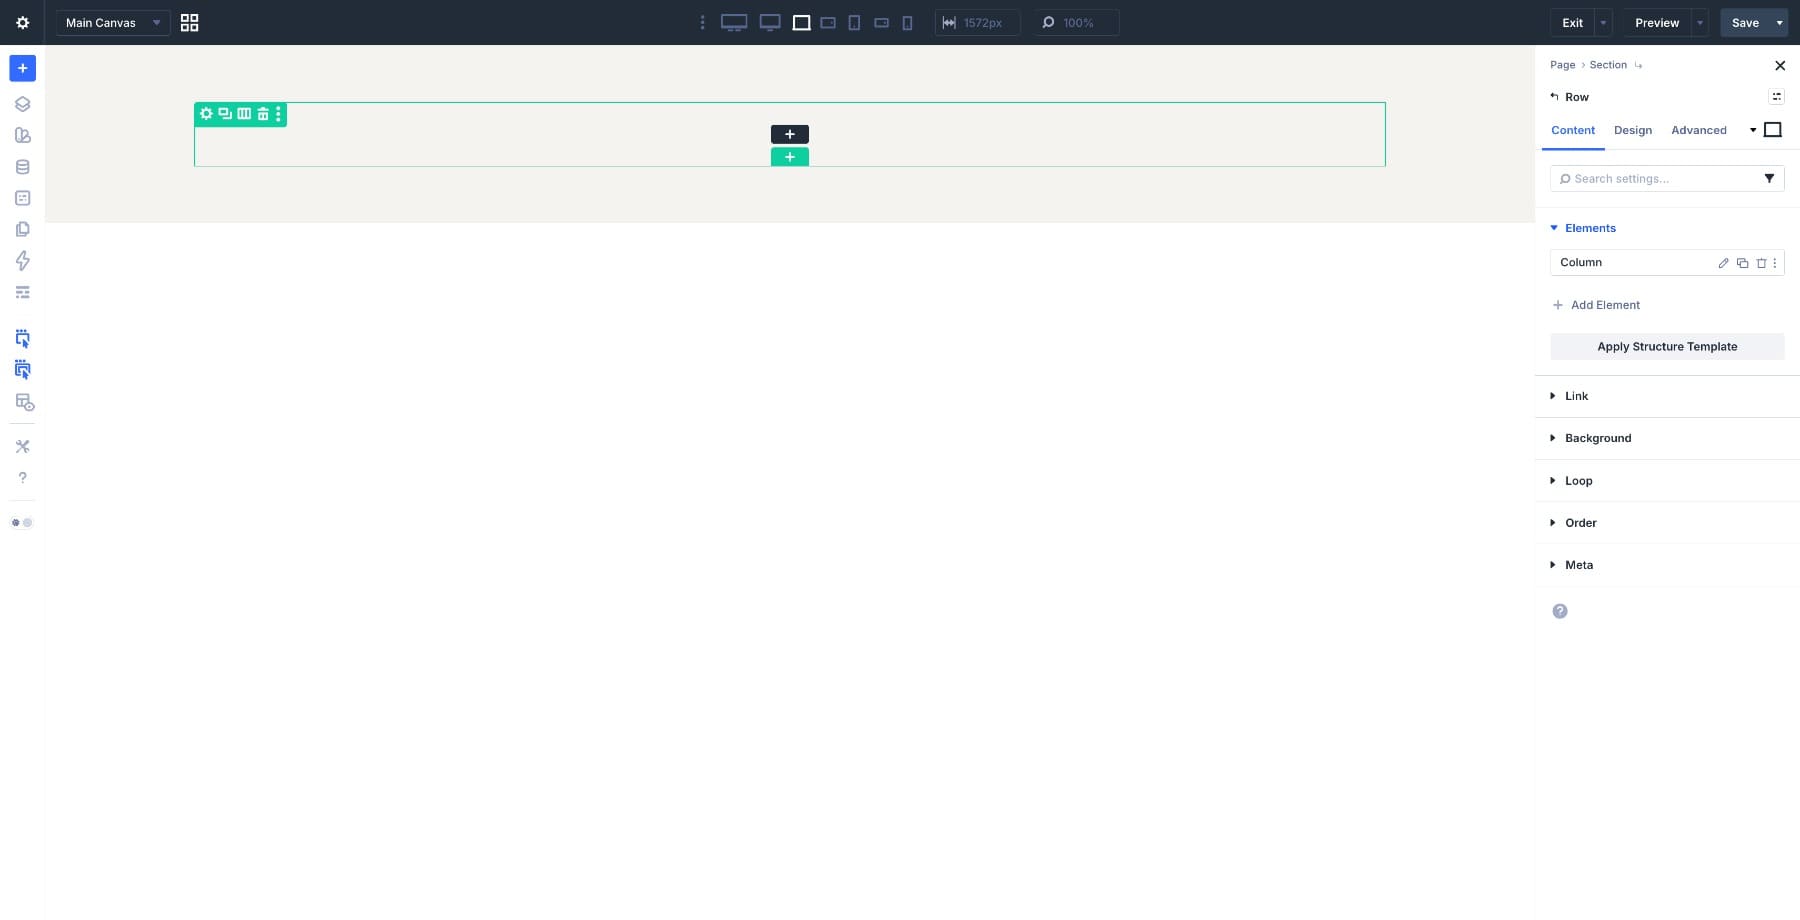
Inside the row, add a Heading module and type Blog as the heading text.
Open the Heading module settings and go to Design > Text. Set the Font Size to around 50px, choose a font weight that matches your site’s heading style, and keep the heading left-aligned.
Add enough bottom spacing after the heading so the first blog card does not sit too close to it. Once the heading looks right, move on to the row that will become the actual loop.
Step 2: Enable Loop On The Blog Row
Below the heading row, insert a new 2-column row. This row will become the repeated blog card. The left column will hold the featured image, and the right column will hold the title, publish date, excerpt, and link.
Open the Row settings and set the row’s Admin Label to Blog Nav. This label will make the loop easier to identify later when we connect the Pagination module.
With the same row settings still open, go to Content > Loop and toggle Loop Element on. Once enabled, this row becomes the repeating container. Everything built inside it will repeat for every post that matches the query.
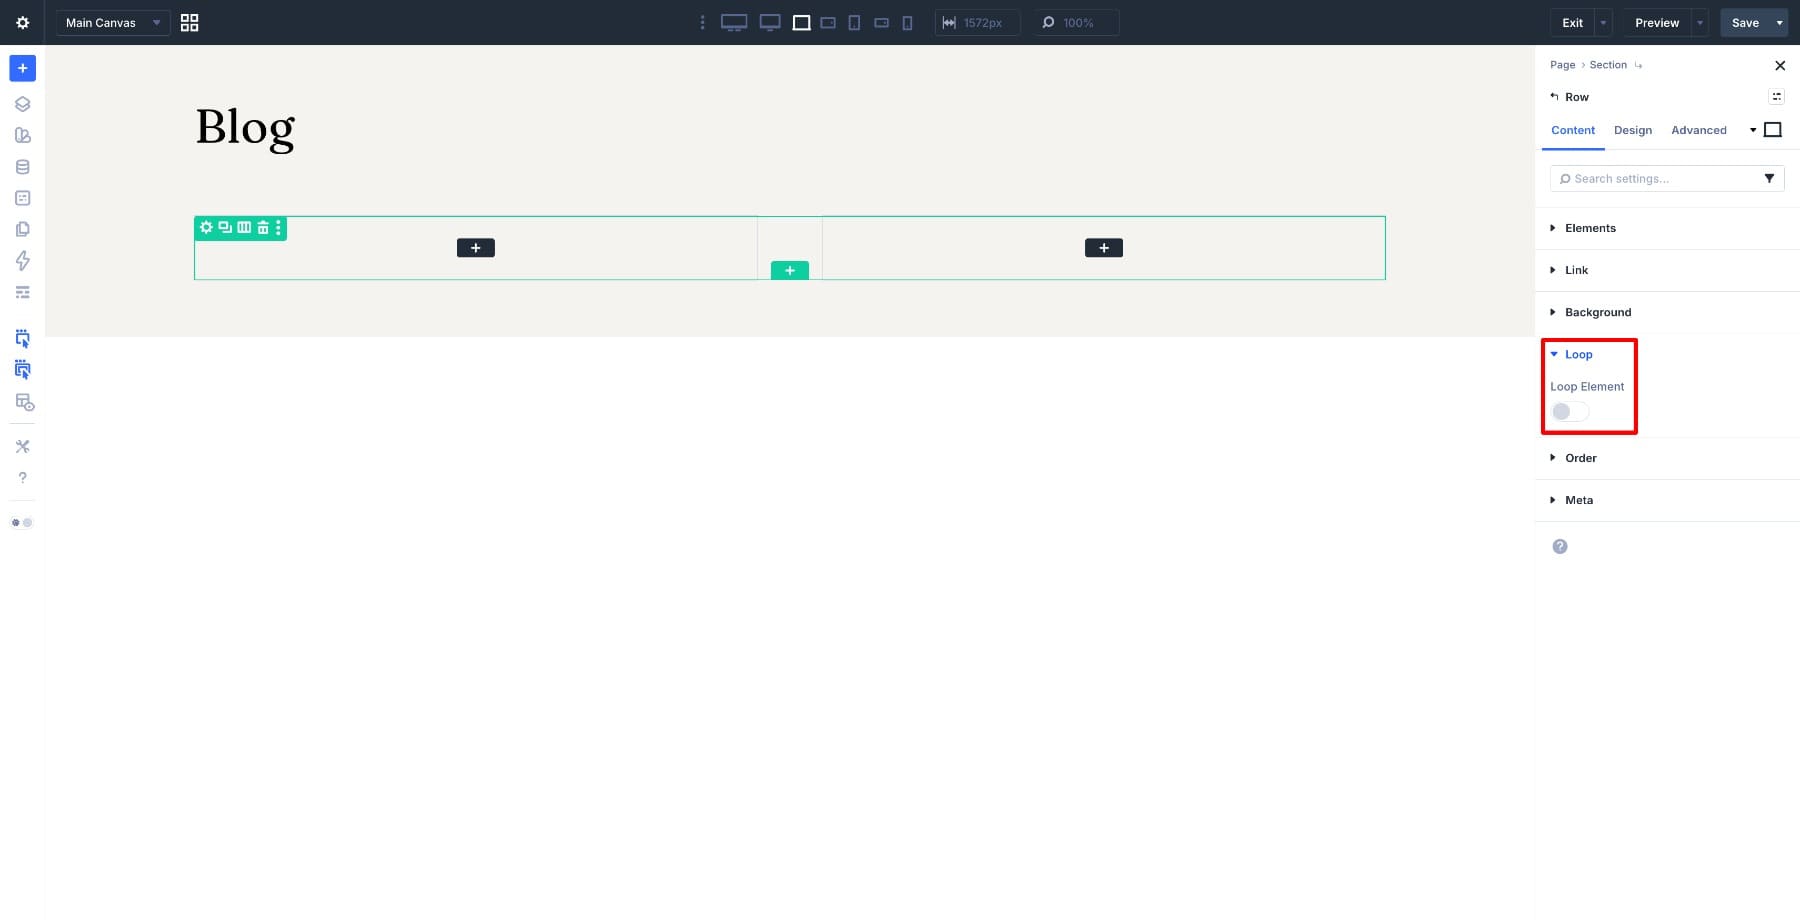
Next, set up the query. Set Query Type to Post Type and Post Type to Posts. Set Posts Per Page to 3, Order By to Date, and Order to Descending so the newest posts appear first.
If you do not want sticky posts to override the normal date order, enable Ignore Sticky Posts as well.
The row will multiply in the Visual Builder to reflect the number of posts you set. The columns are still empty, but the loop is already active. Next, we’ll build the card structure inside the looped row.
Step 3: Build The Blog Card Structure
With the loop running, build the card inside the first looped row. We’ll start with the image column, then add the content elements on the right.
In the left column, click the + icon and add a Divider module. We’ll use this Divider as a background image container for the featured image.
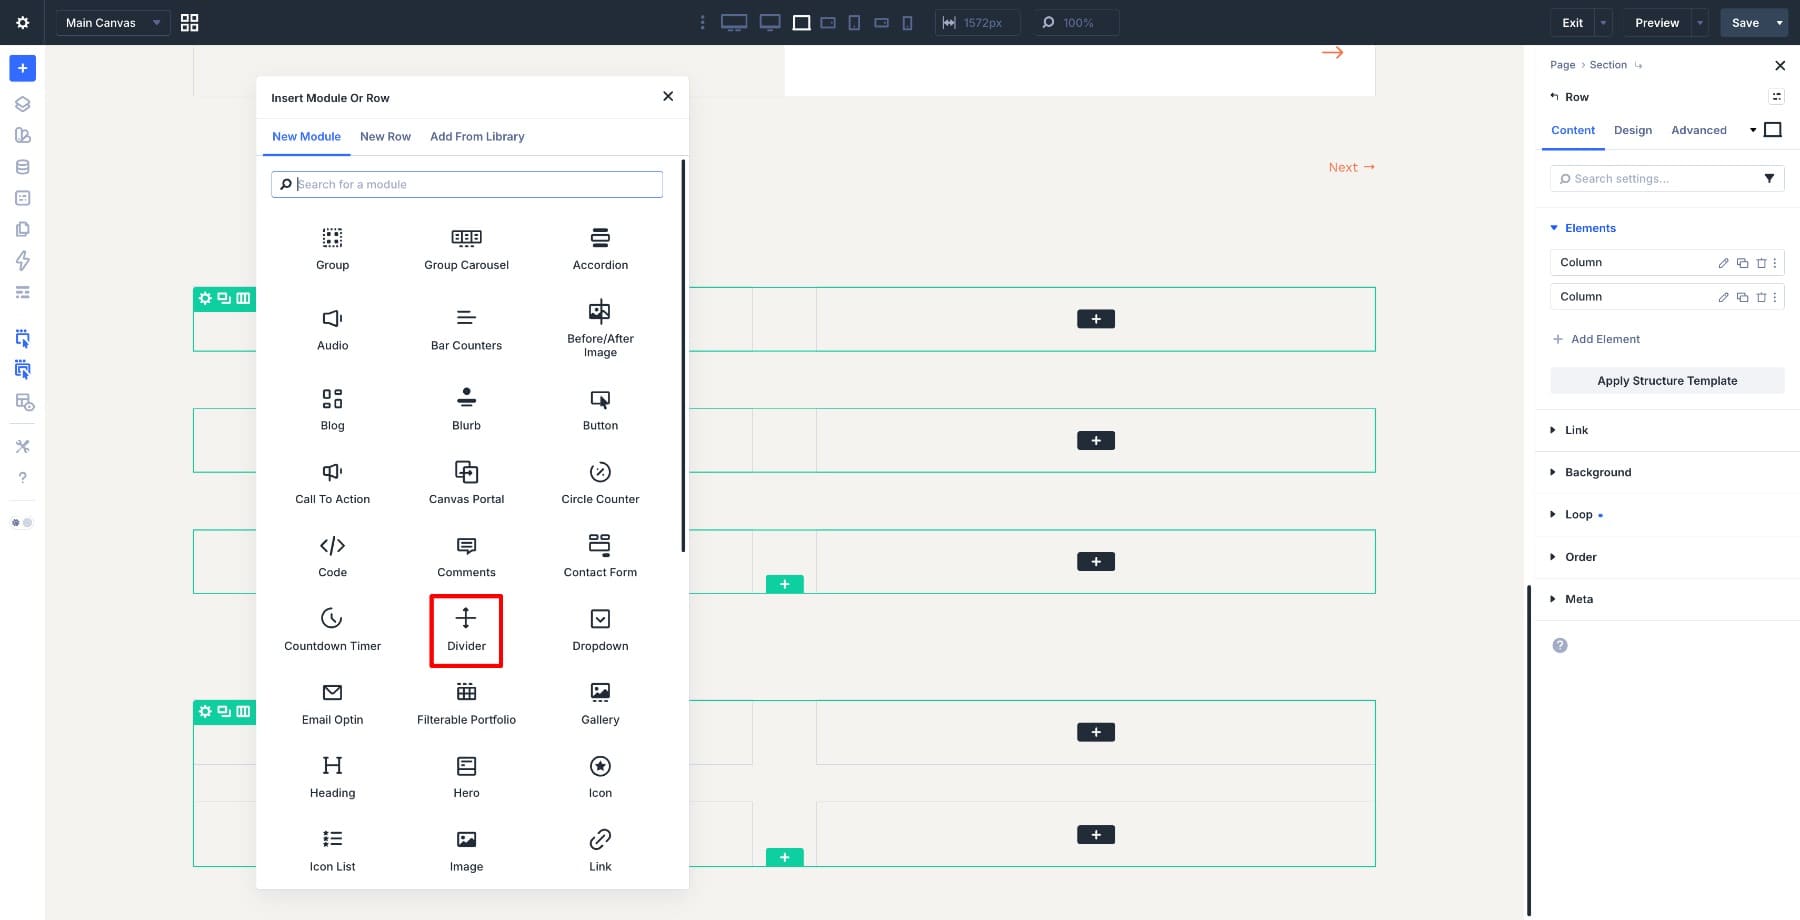
In the right column, click the + icon and add a Heading module. This will become the dynamic post title once we connect it to loop data.
Below the Heading module, add a Group module. This Group will hold the meta line.
Open the Group settings, go to Design > Layout, and set the direction to Horizontal. Inside the Group, add a Text module and type Published on as the static label. Then add a second Text module next to it. This second Text module will pull the dynamic publish date in Step 5.
If you prefer an author-based meta line, add another Text module for the author and connect it to the loop author field before the date.
Below the Group, add another Text module for the post excerpt. This gives each card a short preview of the post before visitors click through.
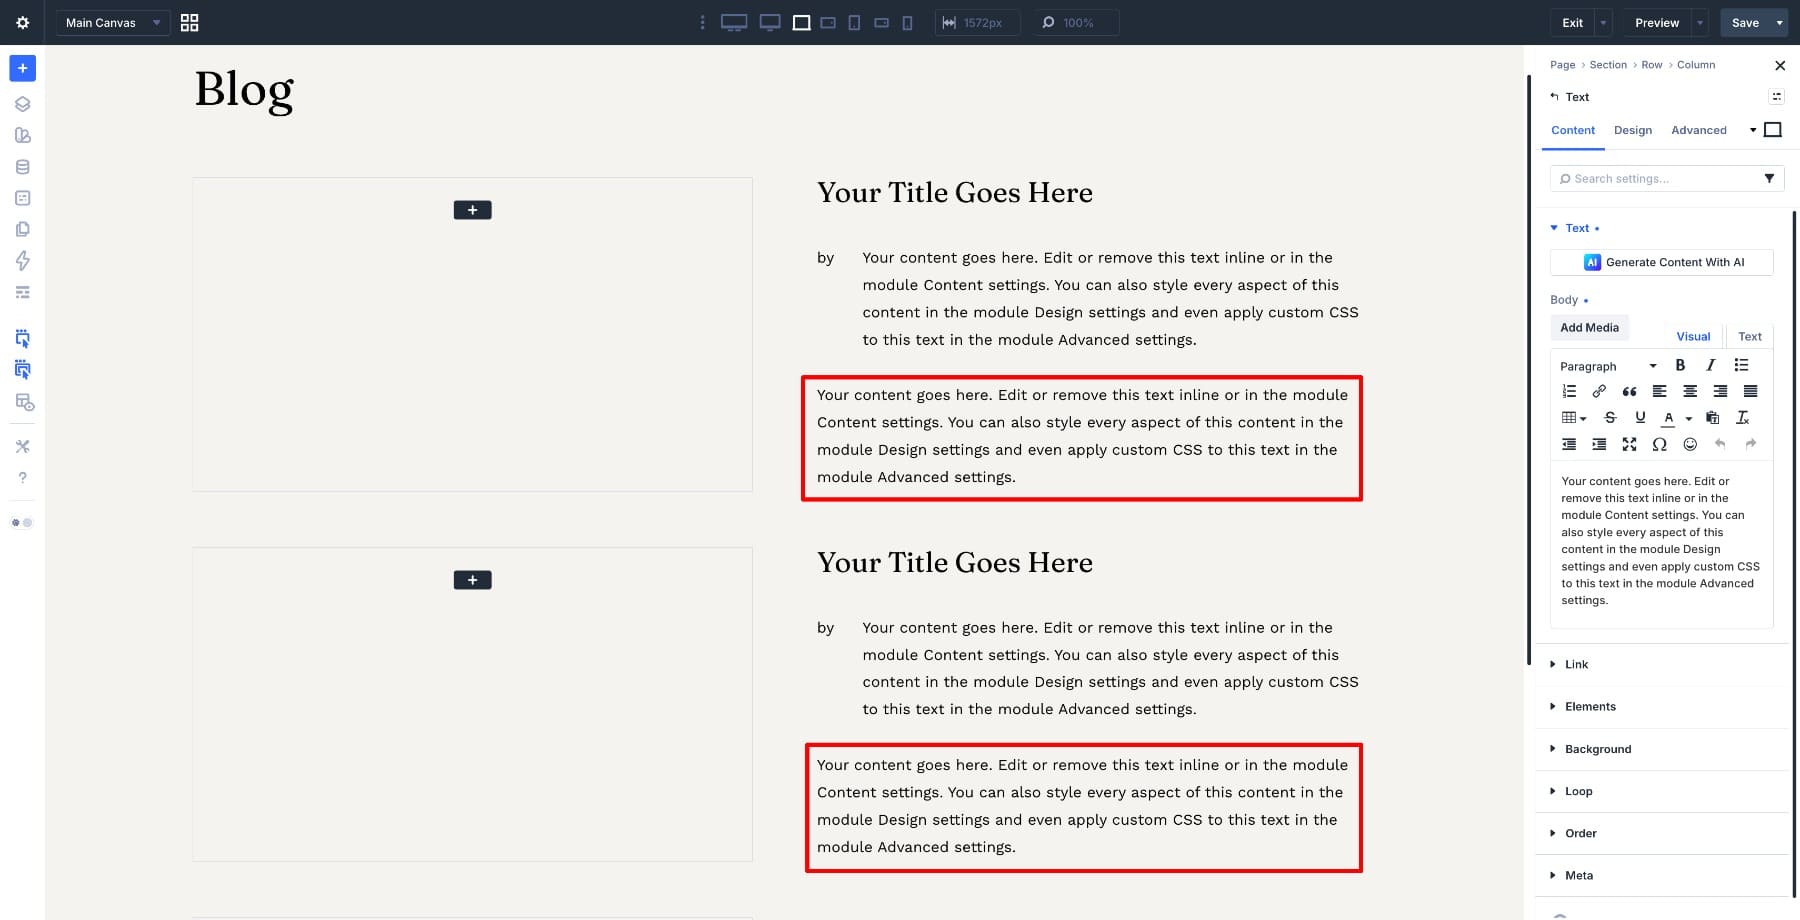
Finally, add an Icon module at the bottom of the right column. Search for the → arrow icon and select it. This will become the read more link for each post.
Accessibility note: this tutorial uses the featured image as a background image so the card can keep a clean horizontal shape. If the image needs to carry important meaning, consider using an Image module connected to the featured image instead.
Step 4: Style The Blog Card
With the structure in place, style the card from the outside in.
Open the Row settings and go to Design > Border. Add a 1px solid border and set the color to a light gray such as #E0E0E0. This gives each card a subtle edge without making the layout feel heavy.
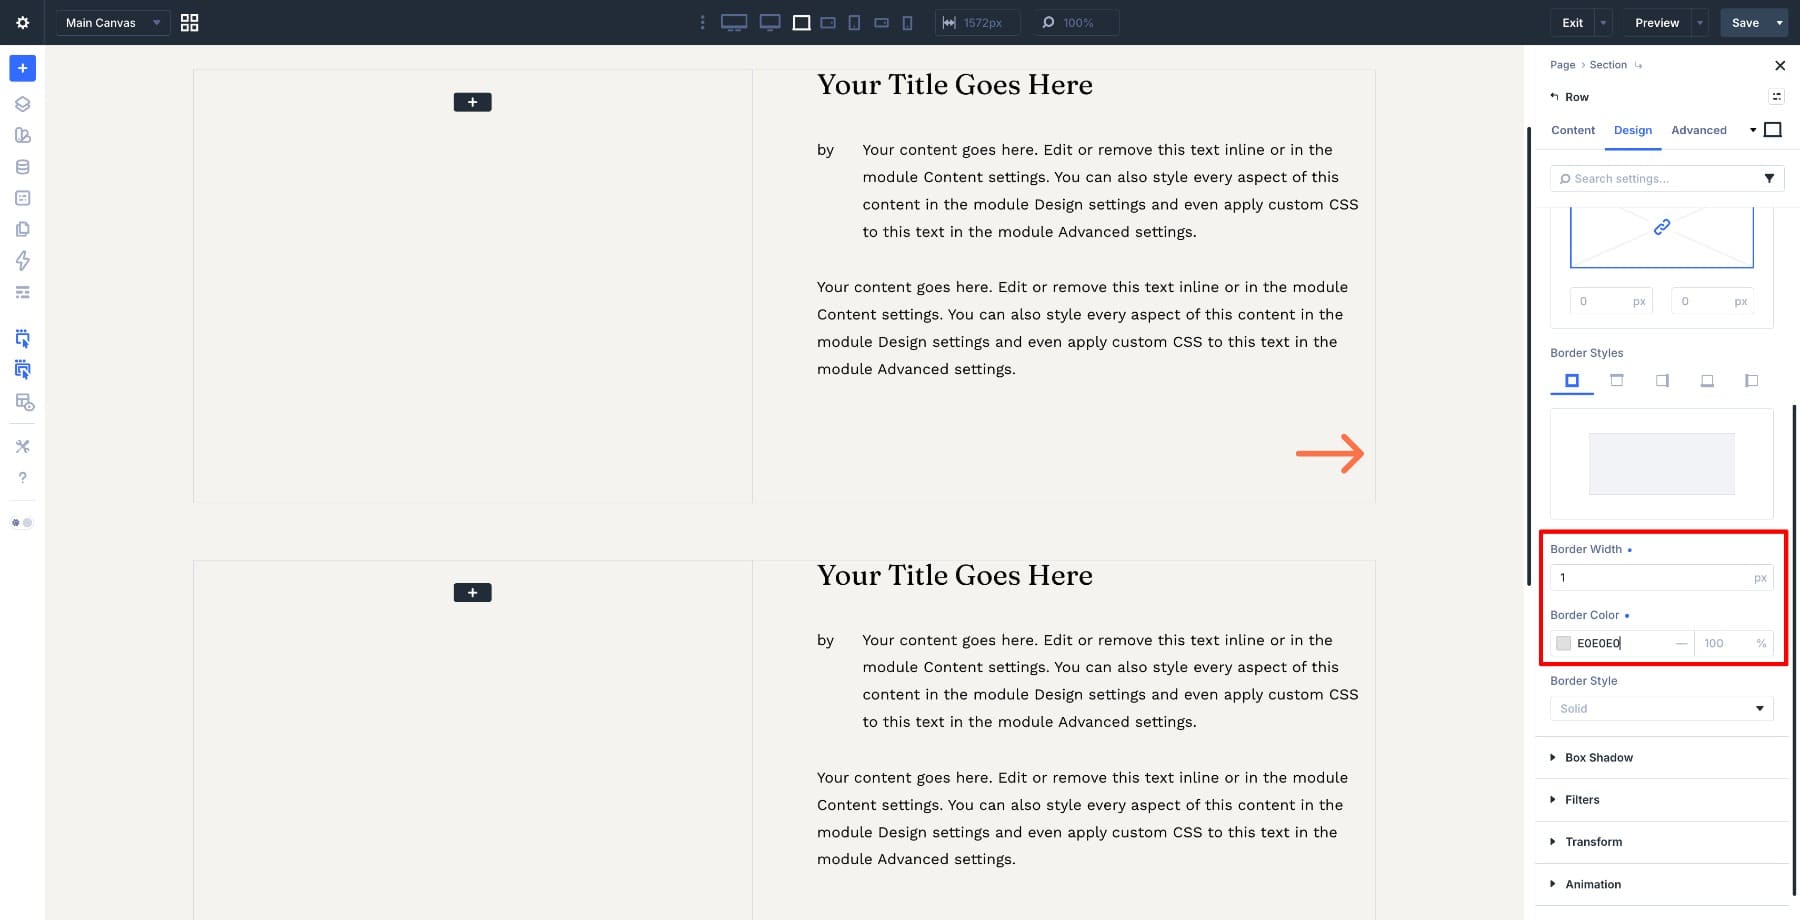
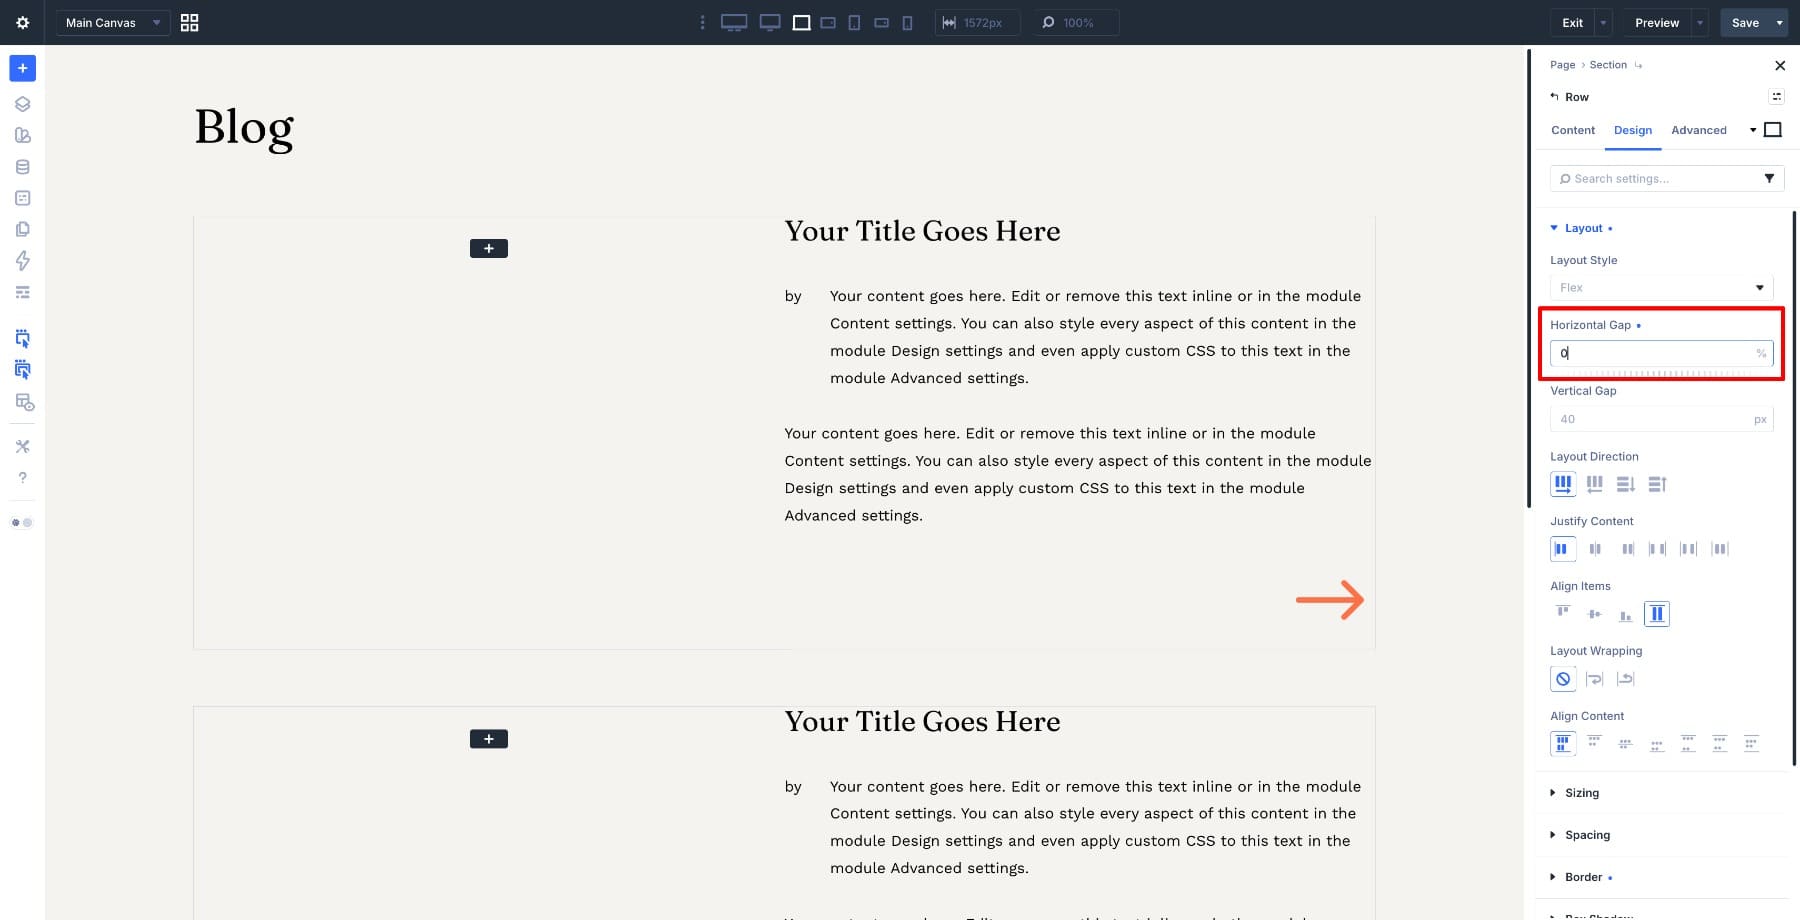
Still inside the Row settings, go to Design > Layout and set the Horizontal Gap to 0. This keeps the image column and content column flush against each other.
Open the right column settings and go to Design > Background. Add a soft off-white color such as #FAFAFA. This gives the text area a clean editorial feel and separates it from the image column.
Go to Design > Spacing and add 30px padding on all sides so the content does not sit against the card edge.
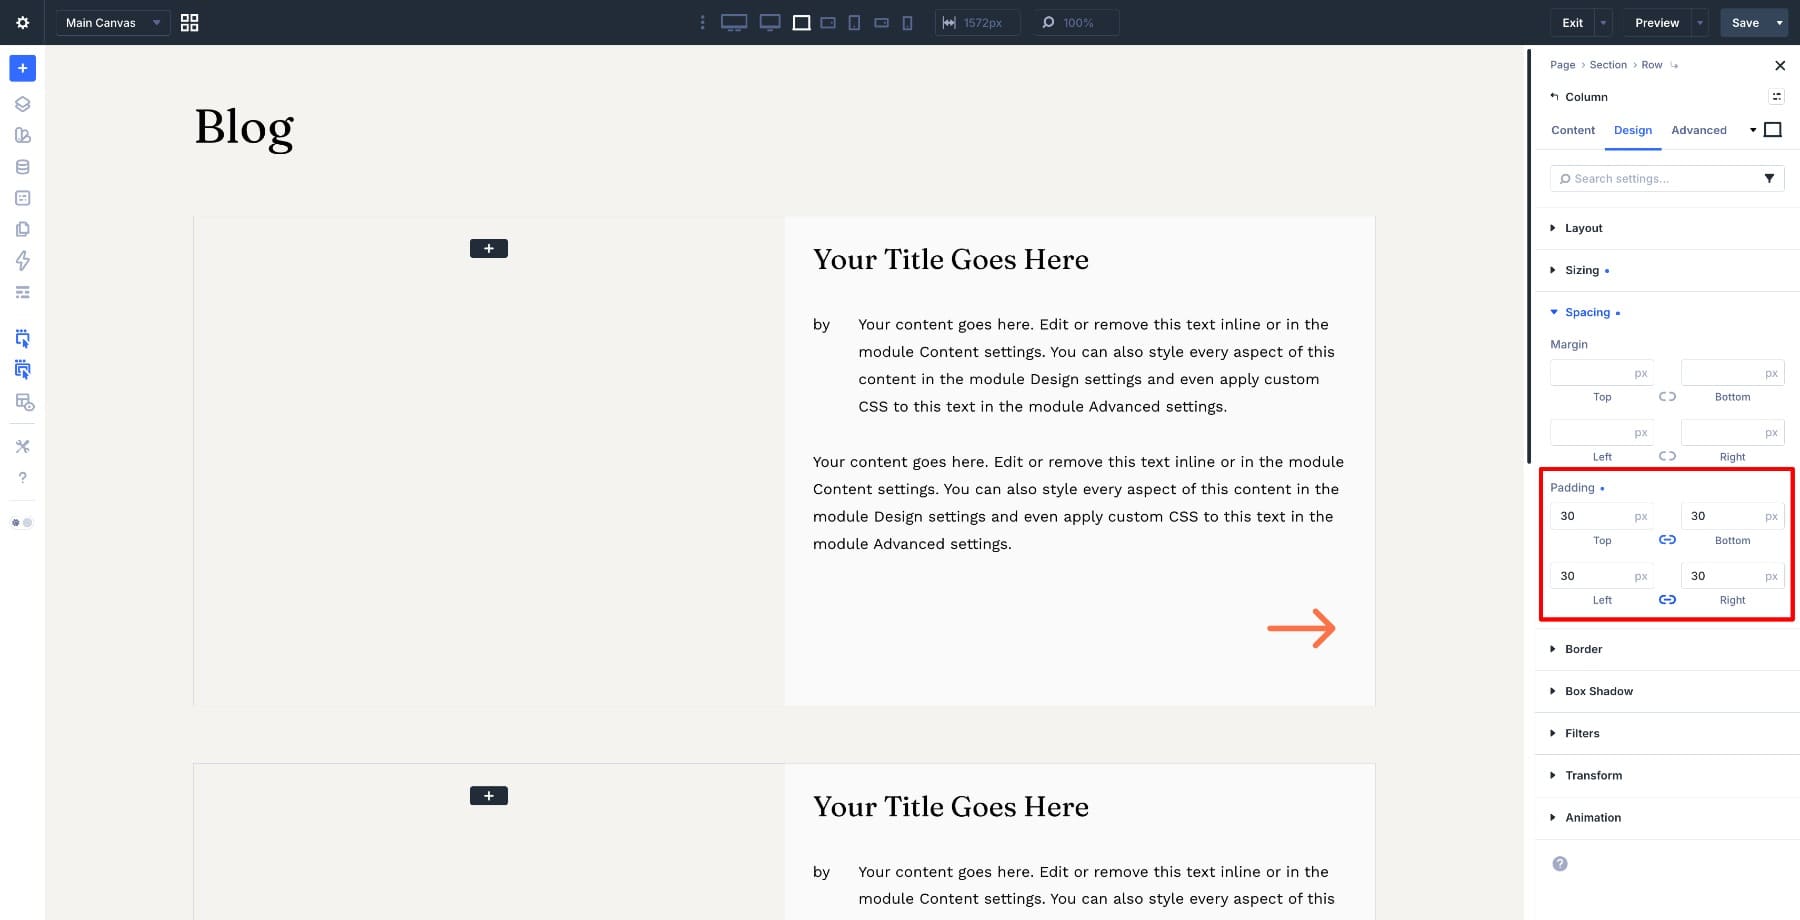
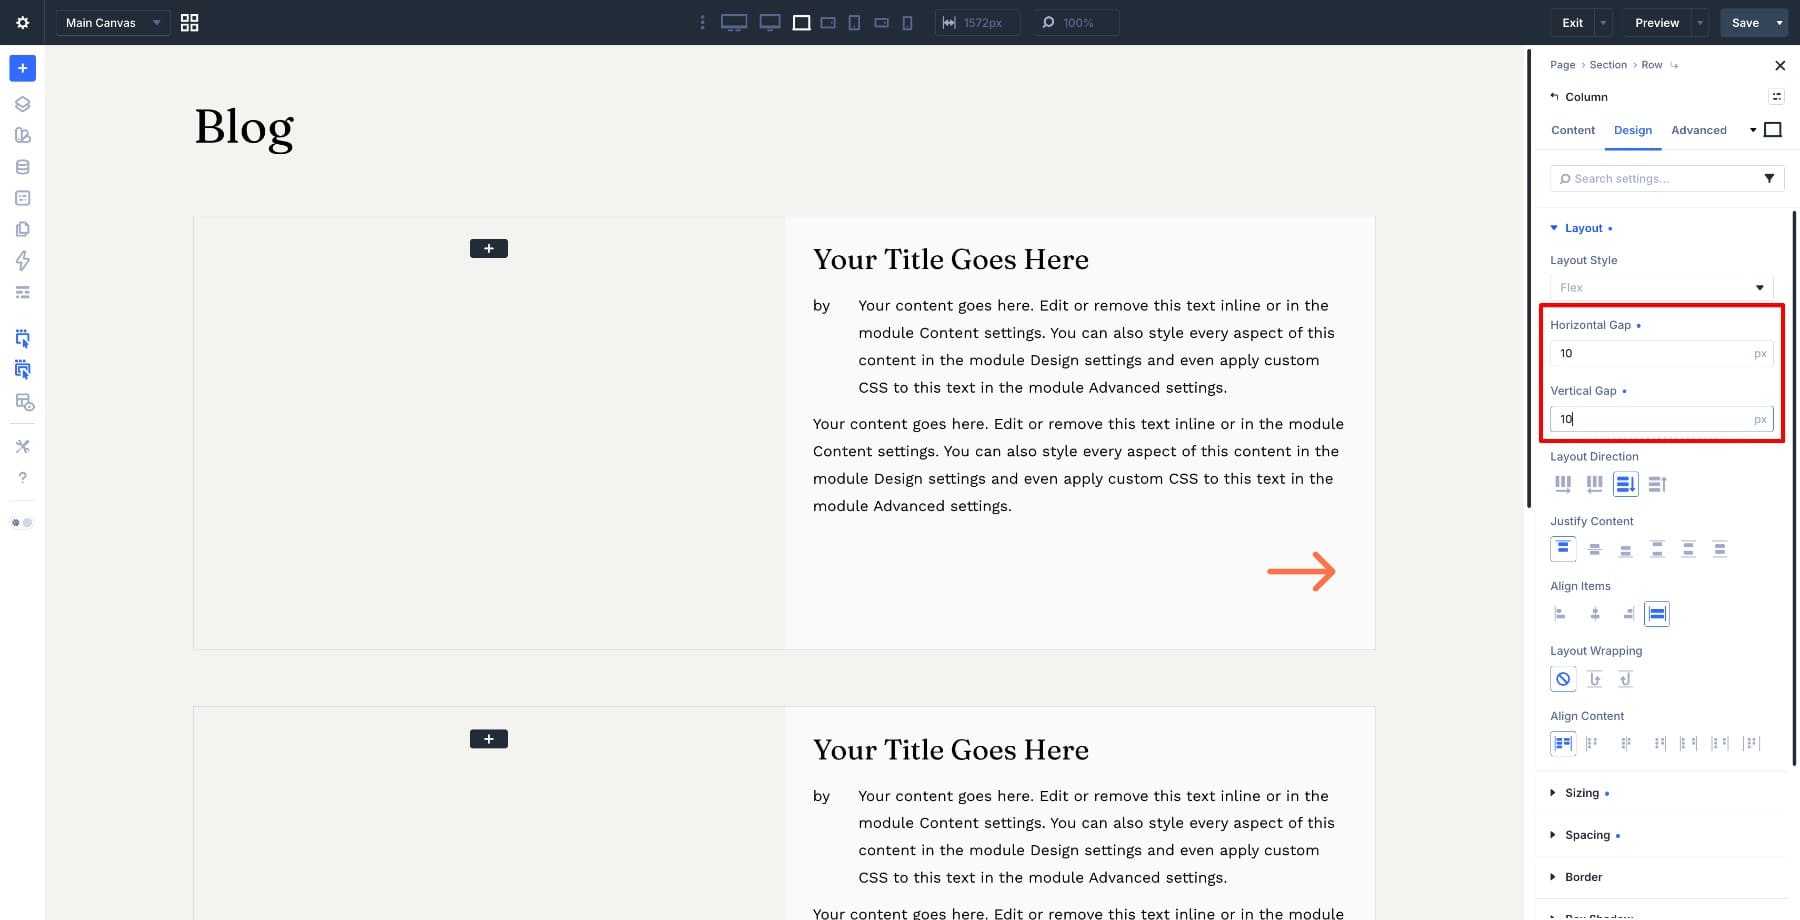
Go to Design > Layout and set the Horizontal Gap and Vertical Gap to 10px. This keeps the spacing between the elements inside the column consistent.
Open the Heading module and style the post title. A font size around 30px on desktop works well for this type of horizontal card, but adjust it to match your site. Keep the line height tight enough that longer titles still feel controlled.
Open the Group module settings and go to Design > Layout. Set the Horizontal Gap to a small value so the label and date sit on the same line without drifting apart. Then open each Text module inside the Group, go to Design > Text, set the Font Weight to Semi Bold, and make the font slightly smaller than the title.
Style the excerpt Text module so it reads clearly under the meta line. Keep the font size close to your body text size and use a comfortable line height.
For the Icon module, go to Design > Icon and set the color to match your site’s accent or link color. Set the size to around 30px, then align it to the right using Design > Alignment.
![]()
Step 5: Connect Dynamic Content
The card is built and styled. Now replace the placeholder content with live post data from the loop.
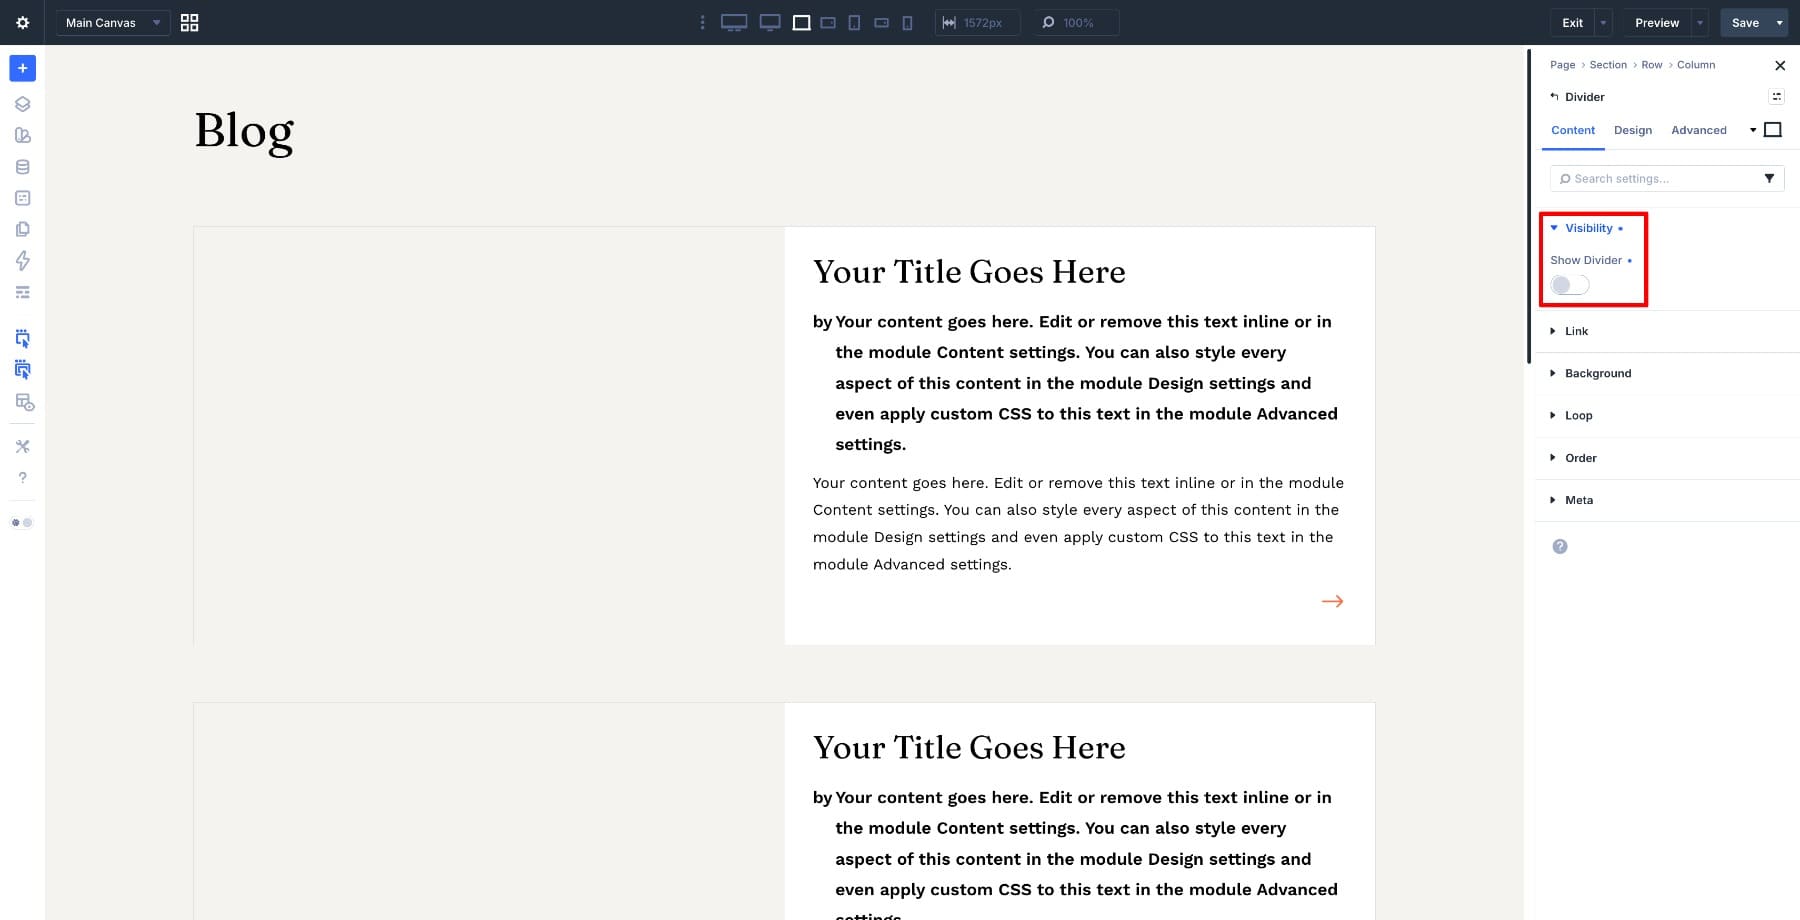
Open the Divider module inside the left column. Go to Content > Visibility and turn off Show Divider. This hides the divider line so only the background image shows.
Go to Content > Background and switch the background type to Image. Click the dynamic content icon on the image field and select Loop Featured Image. Each repeated card will now pull the featured image from its own post.
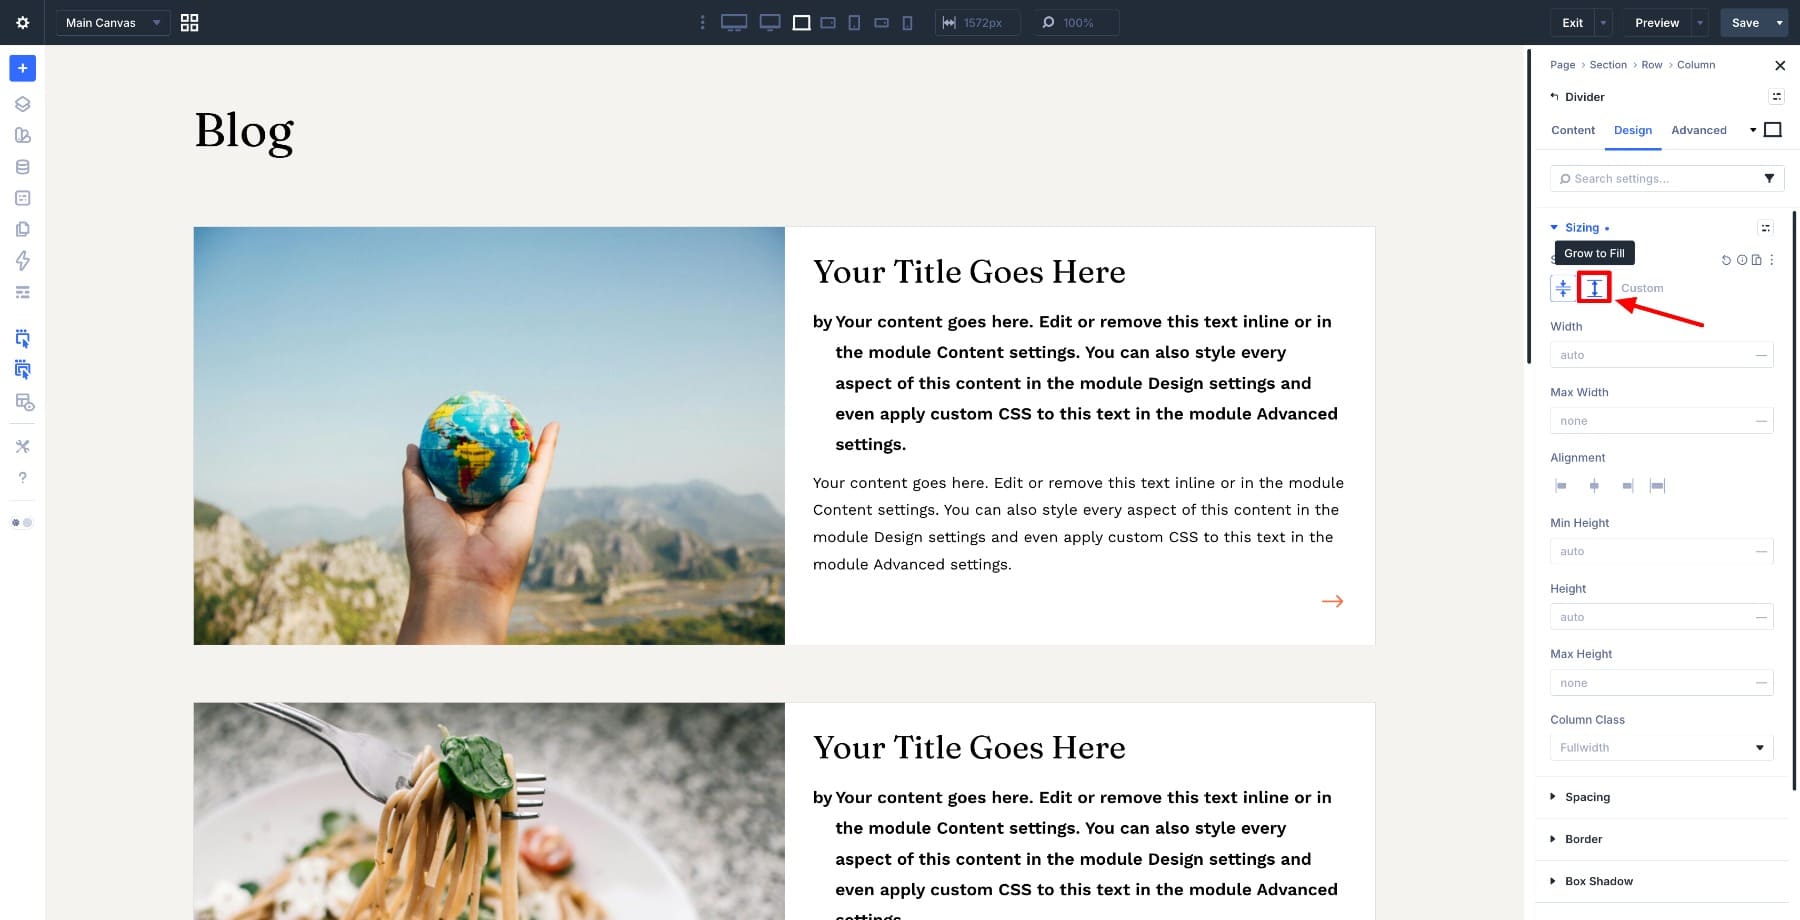
If the background image does not fill the image area, go to Design > Sizing and enable Grow to Fill. This helps the image container stretch with the card height.
Open the Heading module and go to Content > Text > Heading. Click the dynamic content icon and select Loop Post Title. The heading will now display the correct title for each post.
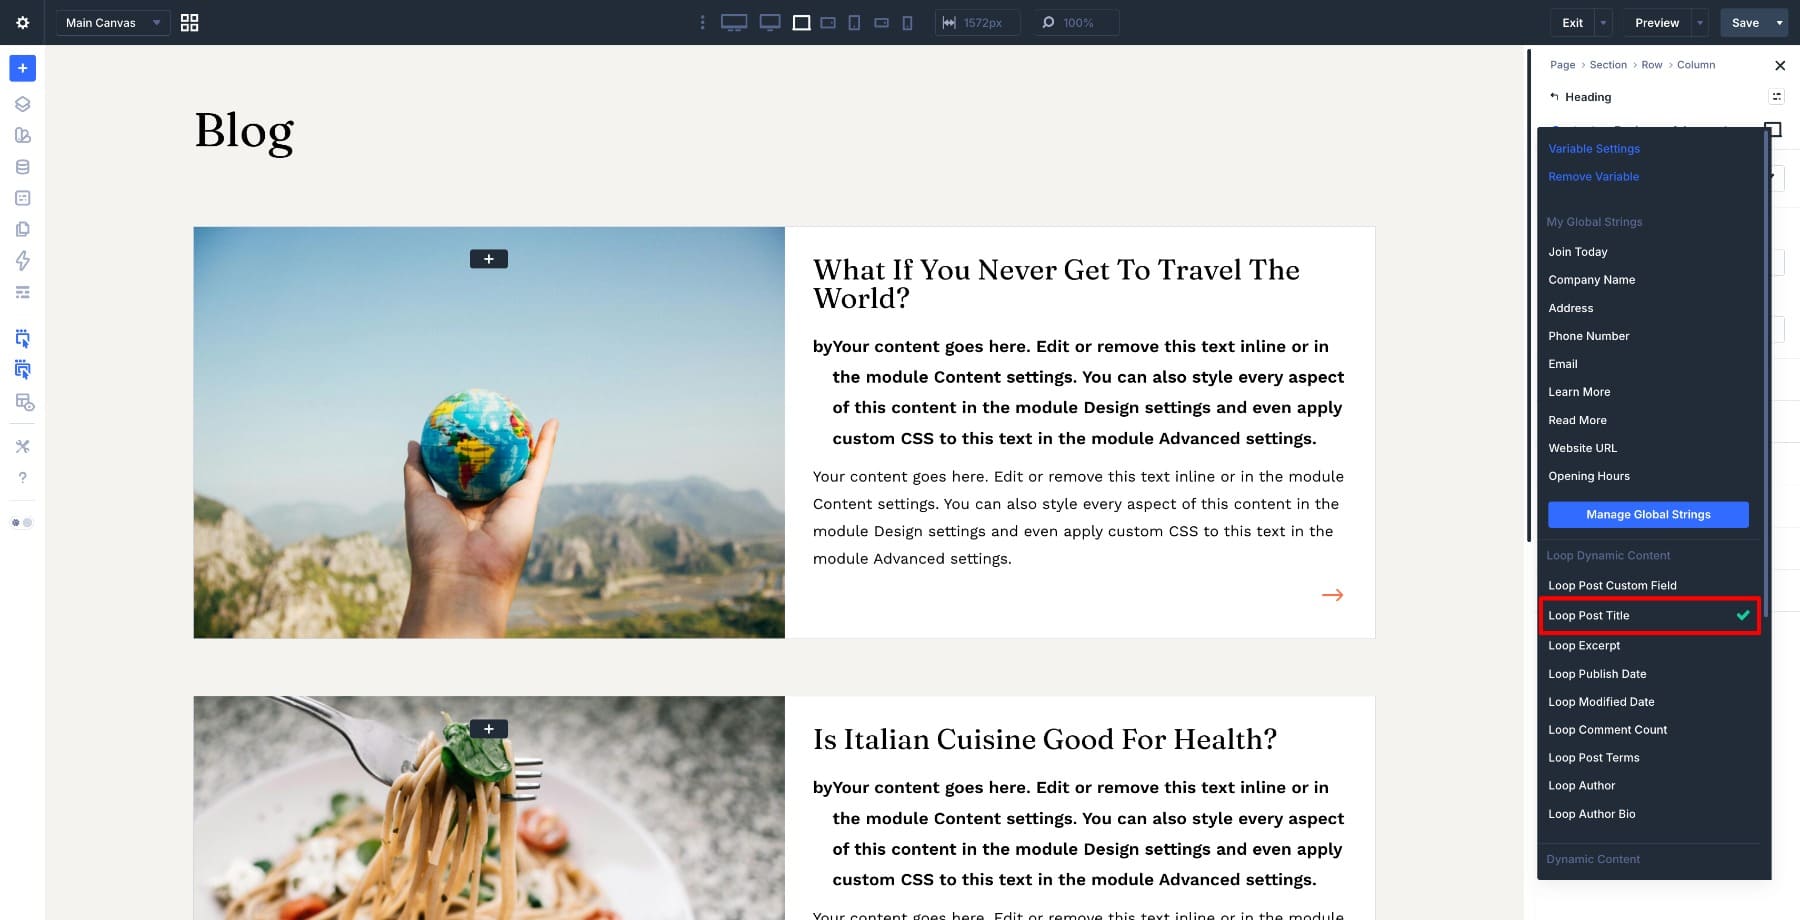
Still inside the Heading module, go to Content > Link. Click the dynamic content icon on the URL field and select Loop Post URL. This makes the title link to the correct post.
Open the second Text module inside the Group, the one next to the Published on label. Go to Content > Text, click the dynamic content icon, and select Loop Post Date.
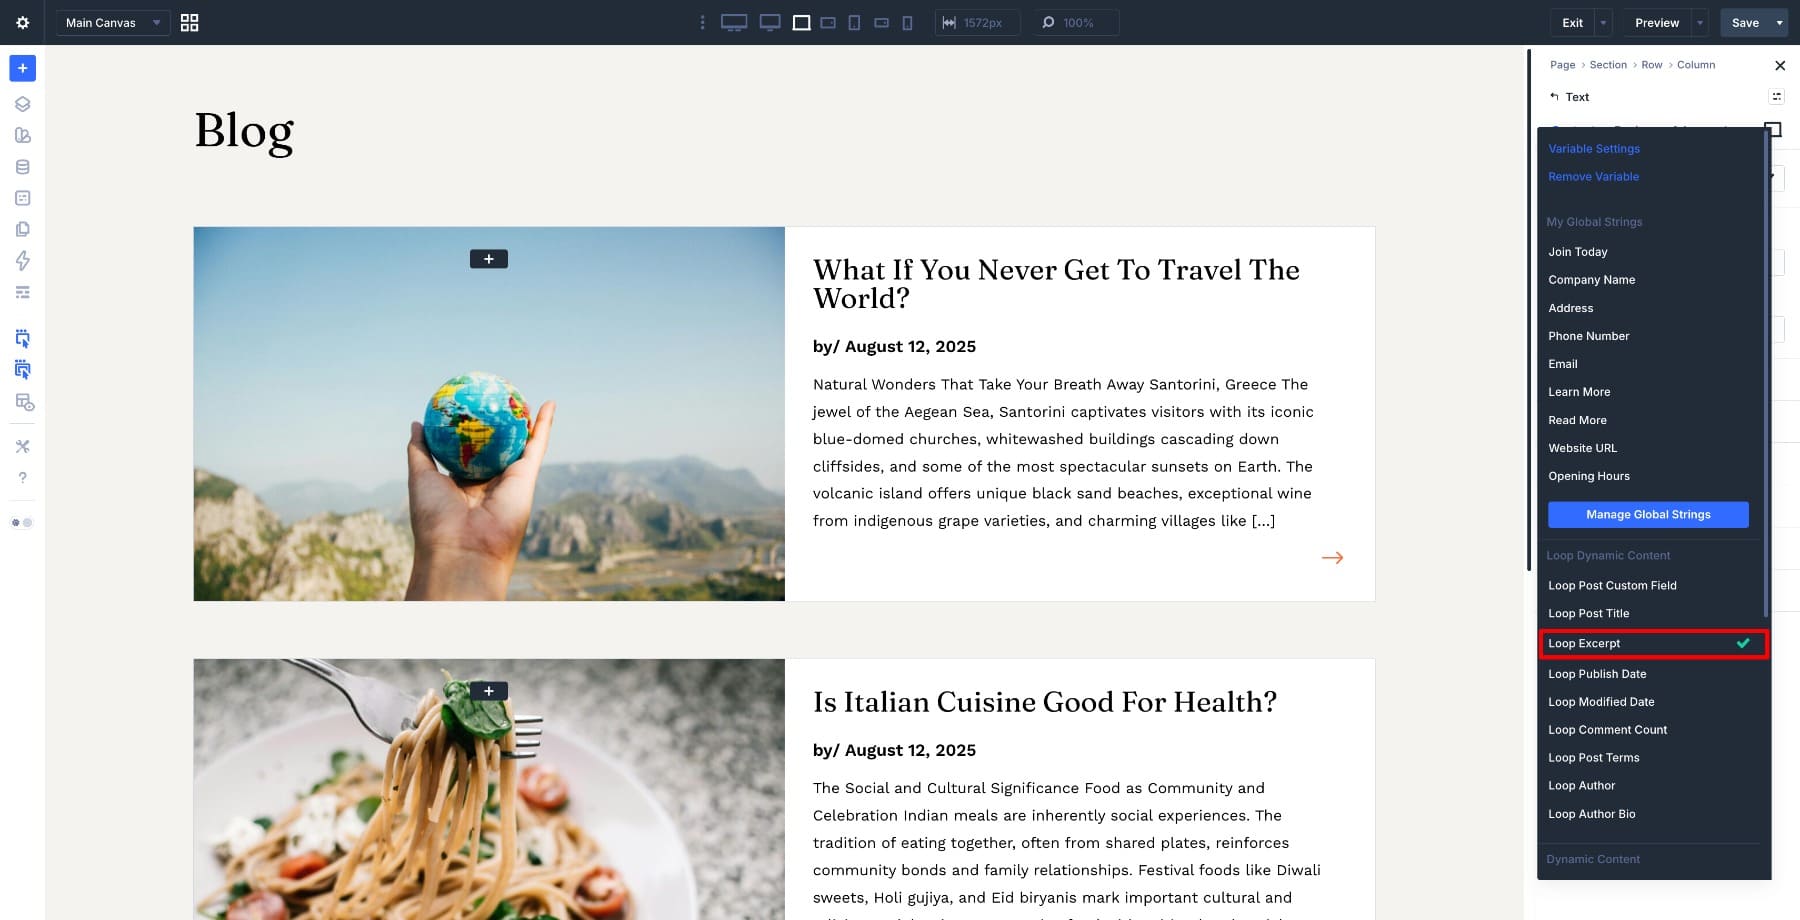
Open the excerpt Text module and go to Content > Text. Click the dynamic content icon and select Loop Excerpt. If the excerpt feels too long for the card, adjust the dynamic content options so the preview stays short and balanced.
Open the Icon module and go to Content > Link. Click the dynamic content icon on the URL field and select Loop Post URL. The arrow now links to the correct post for each card.
Preview the page. Each card should now show its own featured image, title, publish date, and excerpt while keeping the same horizontal layout.
Step 6: Add Pagination
Once the loop is pulling live post data, add pagination so visitors can move through the rest of your posts. This matters because the query is set to show only three posts per page.
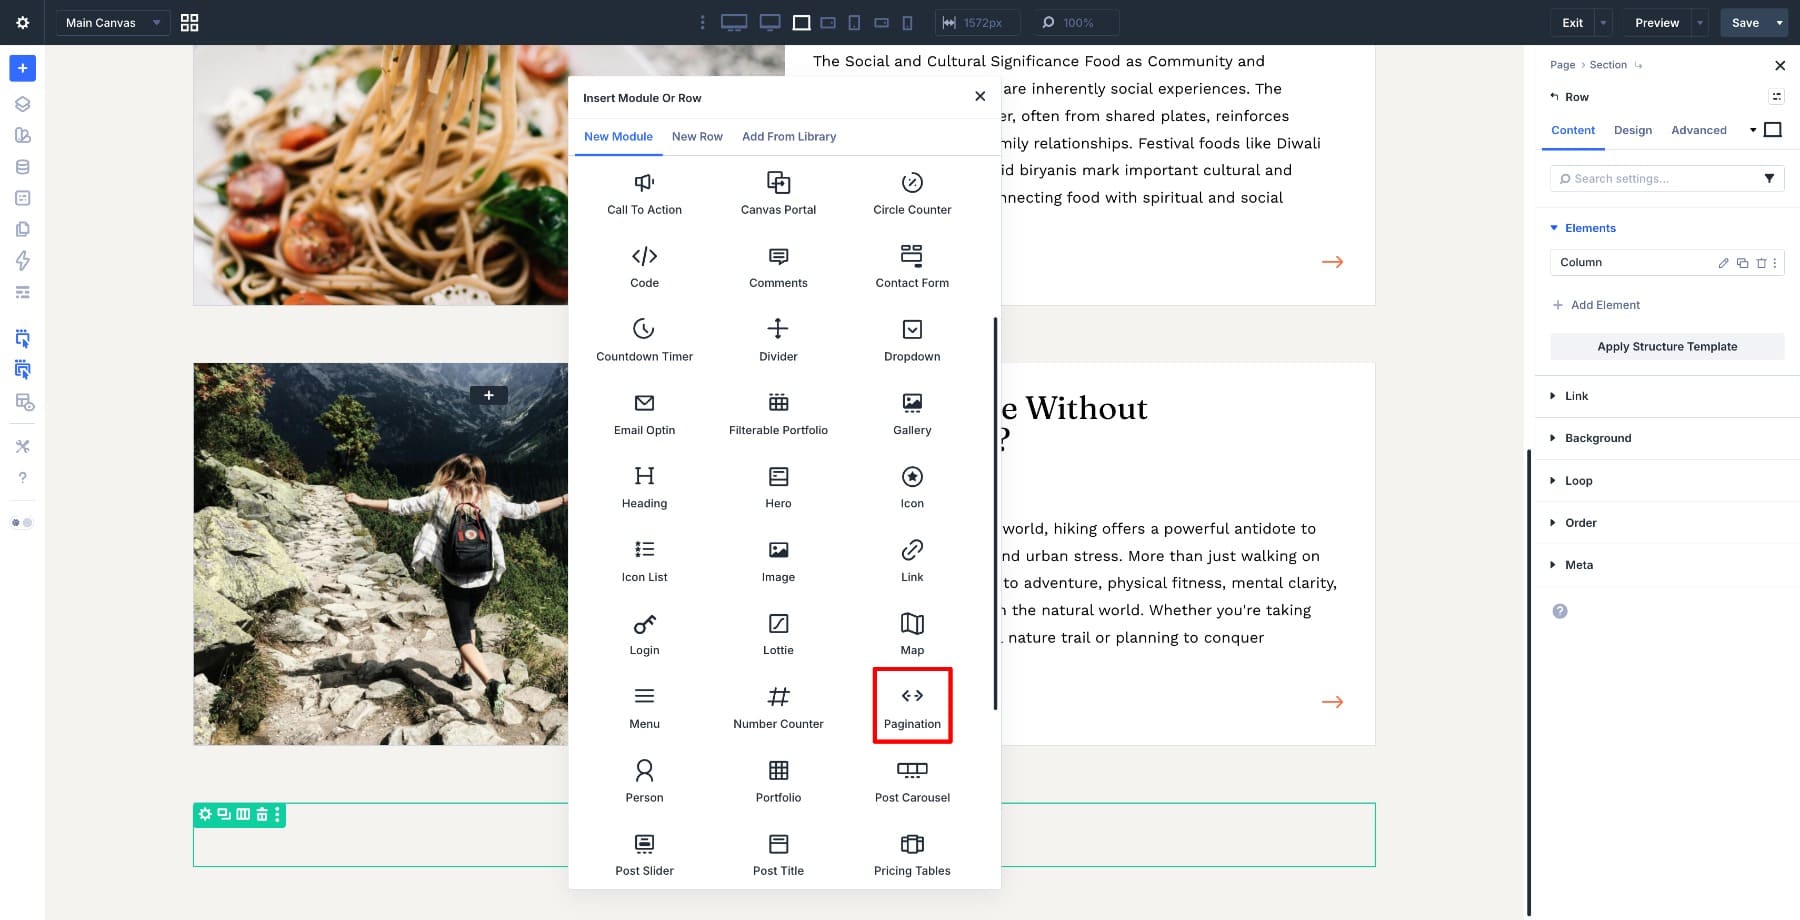
Inside the same section, add a new single-column row below the loop row. Keep this row outside the looped row. Search for the Pagination module and add it inside the row.
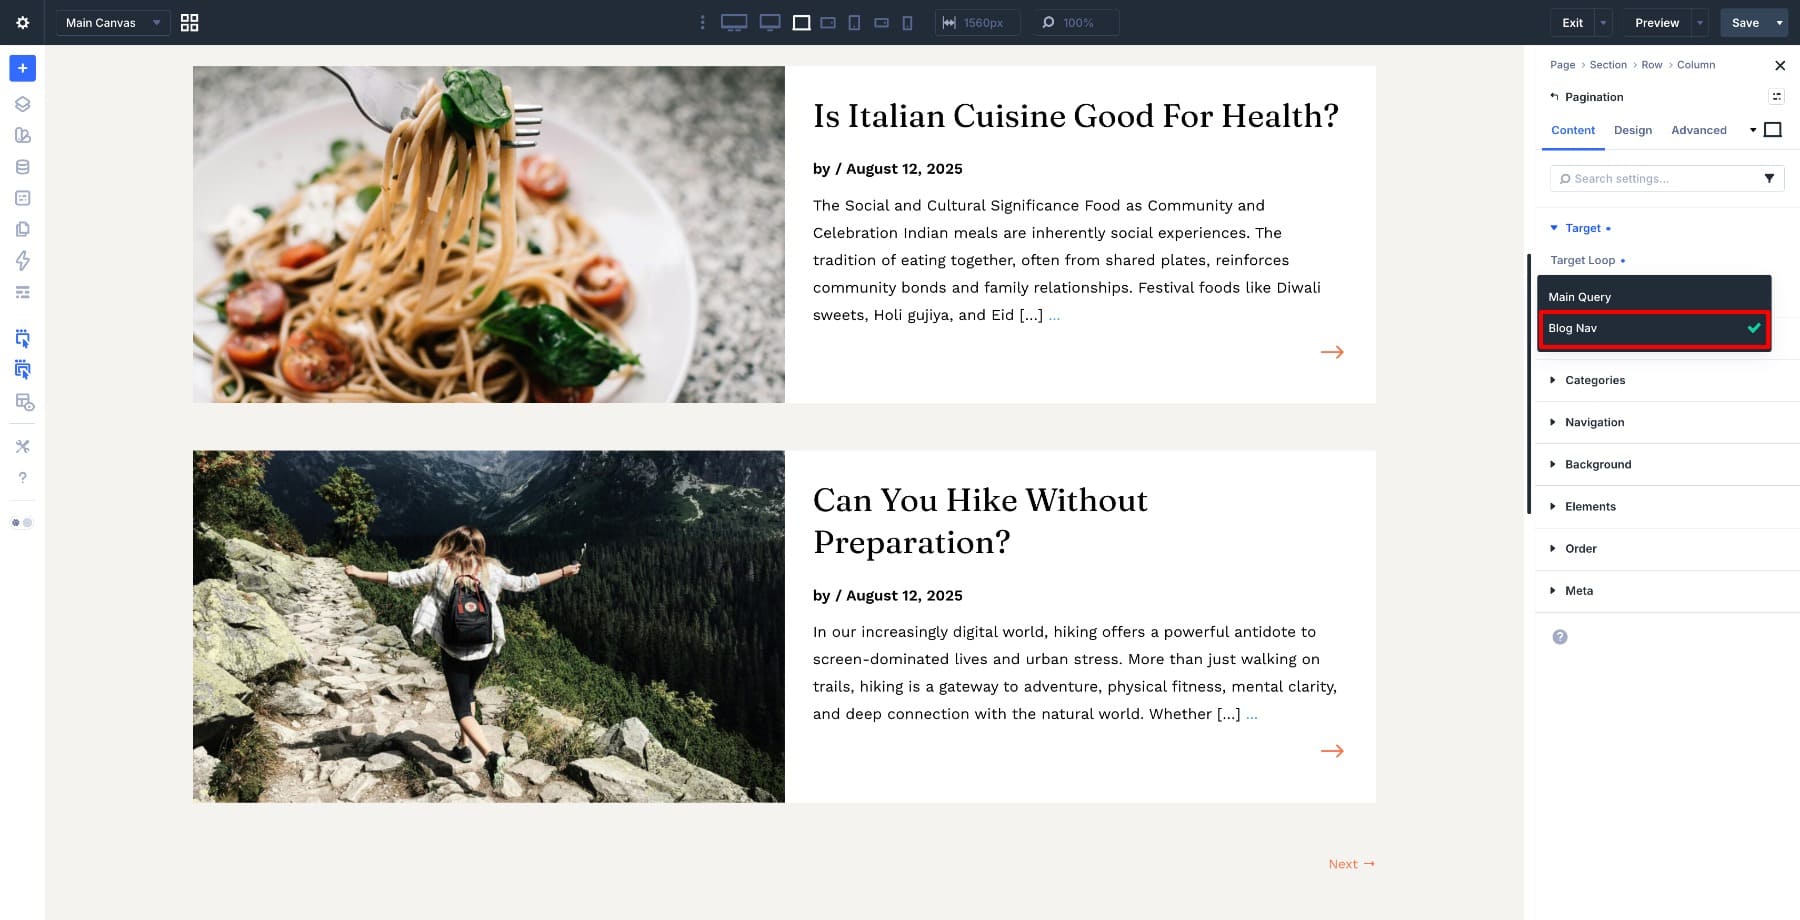
Open the Pagination module settings and go to Content > Target. Set the Target Loop to Blog Nav. This connects the Pagination module to the looped row we labeled earlier.
You can also customize the pagination labels. For this layout, a simple Previous and Next → style keeps the navigation minimal.
Save the page and preview it. If your site has more posts than the Posts Per Page value, the Pagination module will appear and move through the loop results.
Step 7: Optimize The Layout For Responsive Screens
The horizontal card works best on desktop, but smaller screens need a quick responsive pass. Switch to tablet and mobile view using the responsive toolbar and check how the cards stack.
On tablet and mobile, let the two columns stack so the featured image sits above the content. Then reduce the title size, tighten the excerpt if needed, and check the Divider height so the image does not collapse or take up too much space.
A good starting point is to keep the desktop title around 30px, reduce it on tablet, and reduce it again on mobile. For the image area, use a smaller minimum height on mobile so each card remains easy to scroll through.
Once the cards read well across desktop, tablet, and mobile, save the page and preview the finished layout.
Build A Horizontal Blog Loop With Divi 5’s Loop Builder Today!
You just built a custom horizontal blog loop in Divi 5 without editing theme files or writing custom code. Instead of forcing your posts into a preset Blog Module layout, you designed the card structure yourself, connected each element to loop data, and let Divi repeat the card automatically.
That is the strength of the Loop Builder. It gives you control over the layout while keeping the content dynamic. You can use the same approach for other post types too, including projects, products, events, resources, or team members. The structure stays the same: design one item, connect the dynamic fields, define the query, and let Divi handle the loop.
The post How To Build A Horizontal Blog Loop In Divi 5 appeared first on Elegant Themes Blog.