If you run a WooCommerce store, then you’ve probably heard that ChatGPT now lets users shop for products directly inside the chat interface. A user asks something like “I need a blue yoga mat under $40” and ChatGPT responds with actual products from registered merchants, complete with prices and stock availability.
It is a brand new sales channel but most WooCommerce store owners have no idea how to get listed.
In this guide, I’ll show you exactly how to get your WooCommerce products appearing in ChatGPT’s shopping results.
I’ll cover everything from registering as an OpenAI merchant to generating your product feed and submitting it for approval.
Here is a quick overview of topics covered in this guide:
- What is ChatGPT Agentic Commerce?
- Why Sell on ChatGPT with WooCommerce?
- What You'll Need Before You Start
- How to Sell on ChatGPT with WooCommerce (Step by Step)
- FAQs About Selling on ChatGPT with WooCommerce
- Start Getting Your WooCommerce Products Discovered in ChatGPT Today
- Additional Resources for Growing Your WooCommerce Store
What is ChatGPT Agentic Commerce?
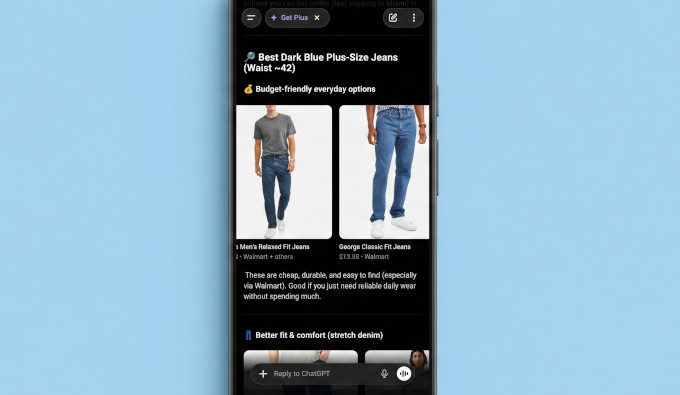
ChatGPT Agentic Commerce — also called ChatGPT Shopping — is a feature that lets people discover products inside a ChatGPT conversation and click through to buy from the merchant’s store.
Here’s what the customer experience looks like: a user asks ChatGPT something like “I need a blue yoga mat under $40” and ChatGPT responds with actual products from registered merchants, complete with prices and stock availability.
The user then clicks through to your WooCommerce store to complete the purchase.
This works through the Agentic Commerce Protocol (ACP), which is a system that connects your WooCommerce store to ChatGPT’s shopping layer. ChatGPT reads your product feed, understands what you sell, and surfaces your products in relevant conversations.
OpenAI launched the merchant program in late 2025. It’s currently live for U.S. merchants, with global expansion rolling out.
Why Sell on ChatGPT with WooCommerce?
- High-Intent Product Discovery: Your products appear directly in ChatGPT’s shopping results when users ask relevant, specific questions. This places your brand in front of customers at the exact moment they are seeking expert guidance and recommendations.
- Direct Store Traffic and Retention: Since users click through to your WooCommerce store to complete their purchase, you keep full ownership of the customer relationship. This allows you to capture email sign-ups, build brand loyalty, and manage your own customer data without a middleman.
- Increased Revenue via Contextual Upsells: Driving users to your own site means you can present them with relevant upsells, cross-sells, and order bumps at the point of purchase. For most stores, this added revenue per order makes product discovery a more profitable long-term strategy than restricted native checkout options.
- Seamless Integration with Clean Data: Providing a compliant product feed with identifiers like GTIN or MPN ensures your store is “AI-ready.” This structured data helps ChatGPT understand your catalog perfectly, leading to more accurate and frequent recommendations.
Overall, connecting your WooCommerce store to ChatGPT allows you to bridge the gap between AI-driven research and your own high-converting checkout experience.
What You’ll Need Before You Start
Before going through the steps, make sure you have:
- A WooCommerce store running on WordPress
- Products with accurate data — titles, descriptions, prices, and stock status
- Product identifiers (GTIN or MPN) for each product (I cover how to add these in Step 2)
How to Sell on ChatGPT with WooCommerce (Step by Step)
Here’s how to get your WooCommerce store set up to appear in ChatGPT’s shopping results, starting with the merchant application.
Step 1: Register as a merchant with OpenAI
The first thing you need to do is apply to become an OpenAI merchant.
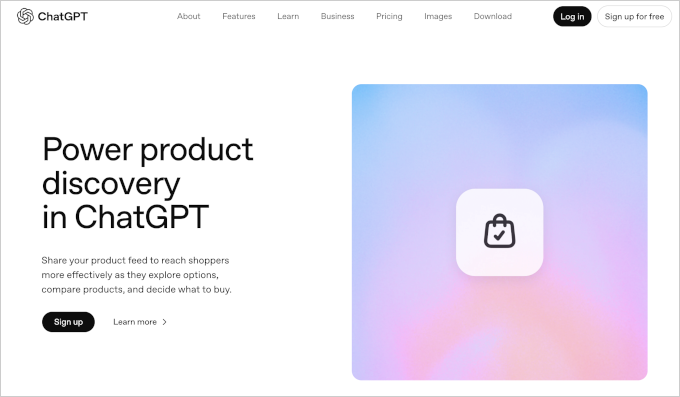
You’ll need to fill in your business details, your region, the types of products you sell, and agree to their policies.
After you submit, you’ll get a confirmation email. OpenAI reviews your application and contacts you when the next stage opens, which is when you’ll be asked to provide your product feed.
There’s no official timeline published. From what merchants have reported, the initial review can take anywhere from a few days to a few weeks.
The key thing: apply now. The earlier you’re in the queue, the sooner you’ll get access as OpenAI expands the program.
Step 2: Add GTIN or MPN identifiers to your WooCommerce products
This step confuses most WooCommerce store owners, and it’s the step almost no guide online explains properly.
OpenAI requires each product in your feed to have a unique identifier. The two types it accepts are:
- GTIN (Global Trade Item Number): the barcode number on a product. It includes UPCs (12 digits), EANs (13 digits), and ISBNs. If you’re reselling other brands’ products, then their GTIN is usually on the product packaging or the manufacturer’s website.
- MPN (Manufacturer Part Number) — the reference number a manufacturer uses to identify a specific product. If you make your own products, then your internal part number works here.
To add these identifiers in WooCommerce, go to Products » All Products, open a product, scroll down to the ‘Product data’ section, and look for the ‘SKU’ field.
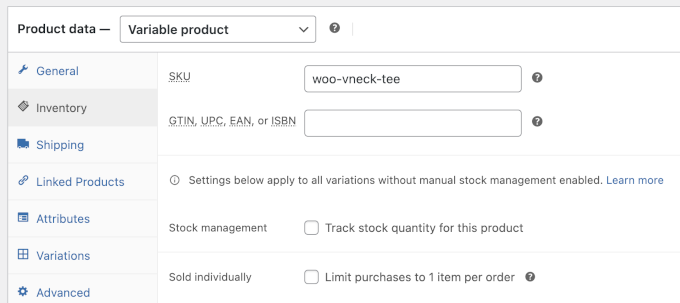
You can use the SKU field for your MPN if you don’t have a separate GTIN field available.
Below that you will find the option to add GTIN, EAN, UPC, and ISBN.
Tip: If you have a large product catalog then updating products one at a time could take some time. However, if you are in a hurry, simply go to WooCommerce » Products, click ‘Export’ to download your product data as a CSV file. You can open this file in a spreadsheet app like Microsoft Excel or Google Sheets. Add your GTINs or MPNs and then re-import the CSV back to your WooCommerce store.
For details, follow our tutorial on importing and exporting WooCommerce product data.
How do you find and add GTIN or MPN?
Here are a few common scenarios:
- You make your own products: create an MPN using a consistent format like BRAND-CATEGORY-001. That’s a valid identifier.
- You sell handmade or one-of-a-kind items: use a unique MPN per item.
- You’re not sure what your GTIN is: check the manufacturer’s website, your supplier’s product sheet, or the barcode on the physical product.
- Products like books have ISBN as their global identifier.
Step 3: Install a ChatGPT Product Feed Plugin
To generate a product feed that meets OpenAI’s commerce specifications, you’ll need a plugin.
The plugin I’ve found most capable for this specific use case is Product Feed Pro by AdTribes.
It is the most powerful WooCommerce product feed plugin on the market that supports ChatGPT / OpenAI as well as Google Shopping, TikTok, several advertising platforms, and popular comparison engines.
This helps you showcase your products on multiple platforms, including OpenAI / ChatGPT.
First, you need to install and activate the Product Feed Pro by Adtribes plugin. For details, see our tutorial on how to install and activate a WordPress plugin.
Upon activation, you’ll need to visit the Product Feed » License page to enter your license key. You can find this in your AdTribes account dashboard.
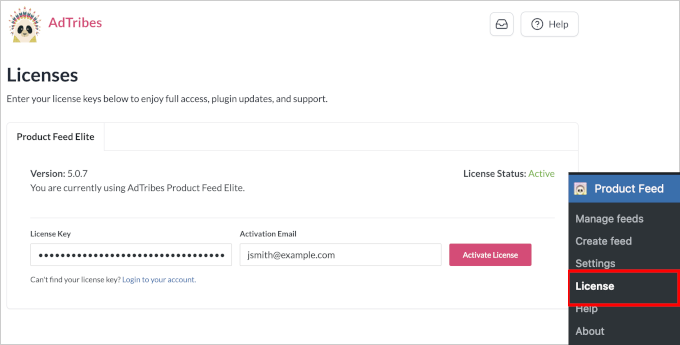
Once you have activated the license, you are ready to set up your product feed for OpenAI / ChatGPT.
Step 4: Configure and Generate Your Product Feed
After activating the plugin, navigate to Product Feed » Create Feed in your WordPress admin.
From here, enter a name for this feed and choose your country. After that, select ‘OpenAI Product Feed’ under the Channels option.
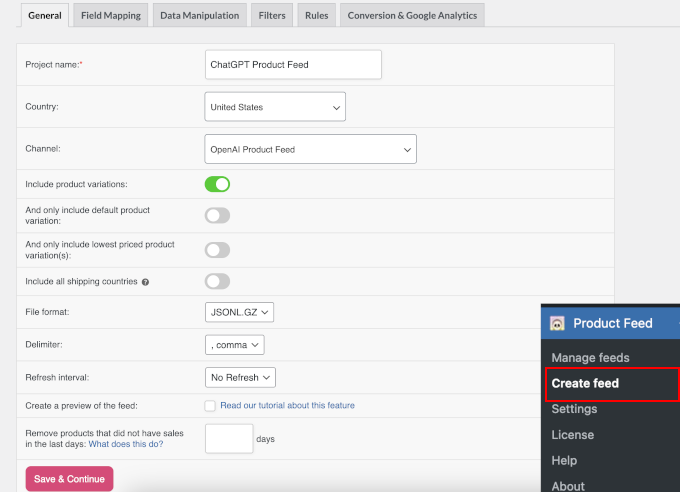
Below that, you need to select the file format for your feed. I recommend using JSONL because it is OpenAI’s preferred format.
Click ‘Save & Continue’ to move on to the next screen.
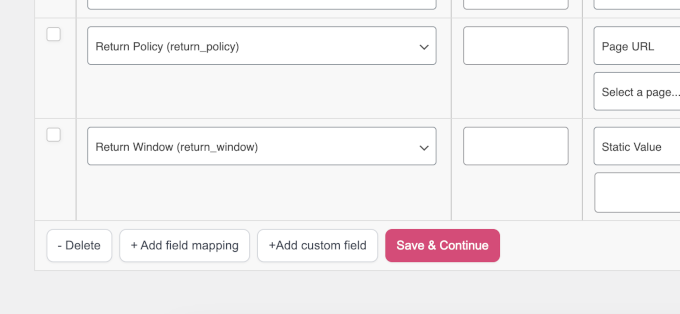
This will bring you to the Field Mapping step. Most OpenAI attributes are pre-filled, so you just need to review and confirm the mappings or fill in any empty ones.
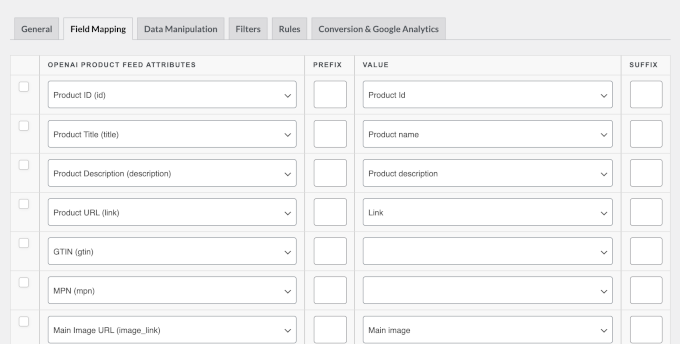
If you have custom fields that are not listed, you can add them manually by clicking the ‘+Add custom field’ button at the bottom.
Once finished, click the ‘Save & Continue’ button.
After that, the plugin will take you to the Data Manipulation tab.
Here you can set up advanced manipulation like changing a field to be used as a different data point.

If you are unsure, simply skip this by clicking the ‘Save Changes’ button.
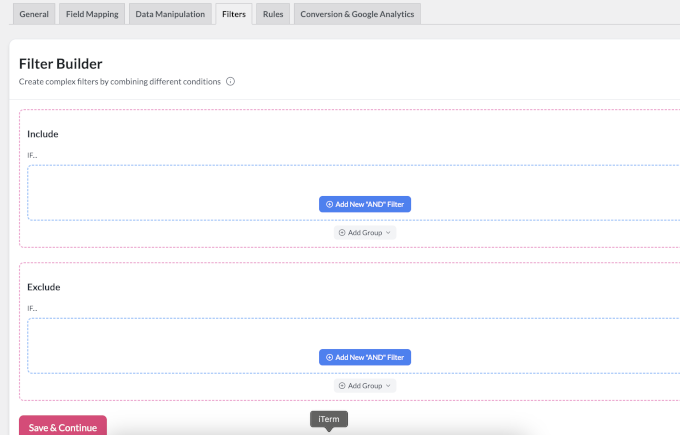
Next, the plugin will take you to the Filters and Rules settings. This allows you to create custom filters and display rules for your feed.
Lastly, you can enable UTM tracking in Google Analytics.
This allows you to track your ChatGPT feed performance in Google Analytics.
Bonus Tip: The easiest way to set up Google Analytics is by using MonsterInsights. It is the best Google Analytics plugin for WordPress and comes with powerful eCommerce conversion tracking features.
Finally, click the ‘Generate Product Feed’ button to save and generate your OpenAI product feed.
Step 5: Submit Your Product Feed to OpenAI
Once OpenAI approves your merchant application (from Step 1), they’ll send instructions to submit your product feed through the merchant portal.
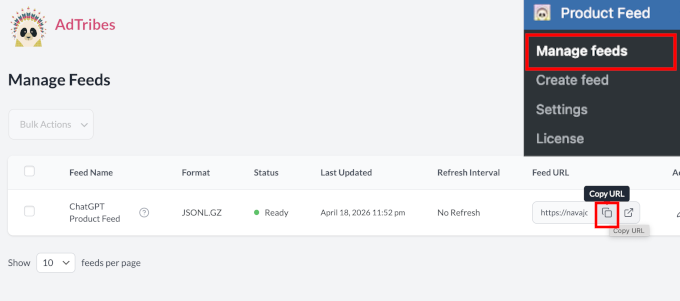
Go to Product Feed » Manage Feeds page and copy your ChatGPT product feed URL.
Now, you need to submit the feed URL to OpenAI by following the instructions in the email they sent you. They will run an automated validation process against their commerce specifications. This usually takes 24 to 48 hours.
If your feed fails validation, then the portal will tell you which fields are missing or incorrectly formatted.
Common issues include:
- Missing GTIN or MPN on some products
- Price formatted incorrectly (needs to include currency code)
- Product images that are too small or using an unsupported format
Fix whatever the validator flags, regenerate your feed, and resubmit.
Once your feed passes validation, your products will start appearing in ChatGPT’s shopping results for relevant user queries. Users will see your products, click through to your WooCommerce store, and complete their purchase there, where you can also offer them relevant upsells or cross-sells to increase the order value.
Expert Tip: Once buyers arrive at your store, follow our tips on how to optimize your WooCommerce checkout to get more sales.
FAQs About Selling on ChatGPT with WooCommerce
What if my products don’t have GTINs?
This is the most common sticking point. If you resell other brands’ products, the GTIN is usually on the product packaging, in your supplier’s product sheet, or on the manufacturer’s website. If you make your own products, you can use your own MPN, a part number you create and assign consistently.
Handmade or one-of-a-kind items can use a unique MPN formatted something like YOURSTORE-ITEM-001. For digital products or services, check OpenAI’s current merchant spec because requirements for non-physical products may differ.
How long does OpenAI merchant approval take?
OpenAI doesn’t publish an official timeline. From what merchants have shared publicly, the initial review takes anywhere from a few days to a few weeks. After approval, feed validation typically takes 24 to 48 hours.
The practical advice: apply as early as possible. The queue is real, and early applicants get access first.
Can I sell digital products on ChatGPT?
Physical products are the primary focus of ChatGPT’s current commerce feature. Digital downloads, subscriptions, and services may have different requirements or may not yet be supported. Check OpenAI’s current merchant guidelines for the latest on non-physical product categories because this is an area where the program is likely to expand.
Will this replace my WooCommerce store?
No. ChatGPT commerce is an additional sales channel, not a replacement for your store. Your WooCommerce site remains your primary storefront and the system that processes all orders.
How much does it cost to sell on ChatGPT?
Registering as a merchant and submitting a product feed is free. You’ll need a product feed plugin, check the plugin’s website for current pricing.
OpenAI hasn’t announced any platform fee or revenue share for sales made through ChatGPT, but check their current merchant terms before launching.
Do customers need a ChatGPT account to buy?
Customers need to be signed into a ChatGPT account to interact with the shopping feature. Browsing and seeing products in chat results works for most users.
Start Getting Your WooCommerce Products Discovered in ChatGPT Today
ChatGPT’s commerce channel is genuinely new territory for WooCommerce store owners.
The good news: getting your products listed is more straightforward than it looks. It’s mainly a matter of working through the steps in the right order.
To recap:
- Apply as a merchant at chatgpt.com/merchants.
- Add GTIN or MPN identifiers to your products, install Product Feed Pro by AdTribes, generate your OpenAI feed, and submit it for validation.
Additional Resources for Growing Your WooCommerce Store
- How I Use AI to Autogenerate WooCommerce Product Descriptions
- 5 Ways to Use AI in WooCommerce (Save Time & Make Money)
- I tested 9 best AI automation tools for WordPress (my honest reviews)
- How to Automatically Add WordPress Products in Google Shopping
If you liked this article, then please subscribe to our YouTube Channel for WordPress video tutorials. You can also find us on Twitter and Facebook.
The post How to Sell on ChatGPT with WooCommerce (Agentic Guide) first appeared on WPBeginner.