For a web agency, scaling too fast often turns into a nightmare. When it leads to an increase in repetitive tasks, available resources are exhausted long before the work is completed: your workflows are fragmented, your processes are inefficient, and your team is demotivated.
Healthy and sustainable growth requires a fundamental shift in mindset: working smarter, not harder. In this scenario, automation is no luxury; it’s a strategic requirement for survival and success.
But how do you translate the idea of working smarter into a functional workflow? The quick answer is: Connect your infrastructure with your management tools.
In this guide, we’ll show you how to connect your Kinsta hosting infrastructure and your Trello project management system by building a custom, automated synchronization layer.
Let’s dive in.
The gap between infrastructure and management
If you use Trello to manage your agency’s projects, you’re familiar with the onboarding ritual: for every website you launch, you must manually create and configure a Trello board, and populate checklists for all the tasks involved, from DNS setup to SEO optimization.
Then comes daily maintenance—repetitive tasks and checks performed regularly to ensure that client sites run smoothly, resource usage stays within plan limits, and updates are applied without error. In a manual workflow, this means logging into multiple dashboards just to verify that a site isn’t hitting bandwidth or running out of disk space.
The more client projects you take on, the greater the chance of human error, and the more likely “monitoring fatigue” becomes. Consider the standard lifecycle of a client site:
- The onboarding process: Provisioning environments, DNS configuration, SSL deployment, and CI/CD setup.
- The operational phase: Tracking server health and resource consumption to prevent downtime or unexpected overage costs.
In reality, both phases require constant organizational coordination. The main problem is the silo effect: Hosting and management are two isolated ecosystems. Information flows only if someone remembers to check a metric and send a Slack message.
If a site reaches its resource limit but the developer fails to update the Project Manager, inefficiencies and delays are inevitable.
Modern, growth-oriented agencies cannot rely on manual coordination. Communication must flow seamlessly and automatically from the infrastructure (Kinsta hosting) directly to the management tool (Trello).
This is where the Kinsta API becomes your most valuable team member, helping you transform raw hosting data into actionable information for your Project Managers.
The tech stack: Why Kinsta and Trello
Choosing the right tools is the first step toward effective automation. Kinsta and Trello are a perfect match because both platforms offer robust APIs that let you build an automated bridge between the technical and management aspects of your workflows.
- The Kinsta API: Kinsta provides a RESTful API that allows your team’s developers to programmatically perform technical and operational actions—from provisioning environments to extracting real-time analytics and server logs. Kinsta is a programmable infrastructure.
- Trello’s Project Management System: Trello is much more than a collection of notes and lists; it’s a visual representation of your agency’s processes based on Kanban board logic. The Trello API helps you transform a static dashboard into a dynamic environment that responds to events on your server.
By integrating Kinsta and Trello, you transform MyKinsta raw data into actionable insights for your teams. No more manual work, missed steps, overhead, or lost value from your developers.
With that said, it’s time to roll up your sleeves and gather your tools.
Gather your tools
Before you start with the coding, you will need to gather the necessary tools:
- Kinsta API key
- Trello API key
- Trello token
- A GitHub code repository
Let’s start with the Kinsta API key.
Step 1: Generate a Kinsta API key
The Kinsta API key allows you to access your hosting service via the API. Follow these steps to create a new Kinsta API key:
- Go to your MyKinsta dashboard.
- Navigate to the API Keys page (Your name > Company settings > API Keys).
- Click Create API Key.
- Choose an expiration or set a custom start date and number of hours for the key to expire.
- Give the key a unique name.
- Click Generate.
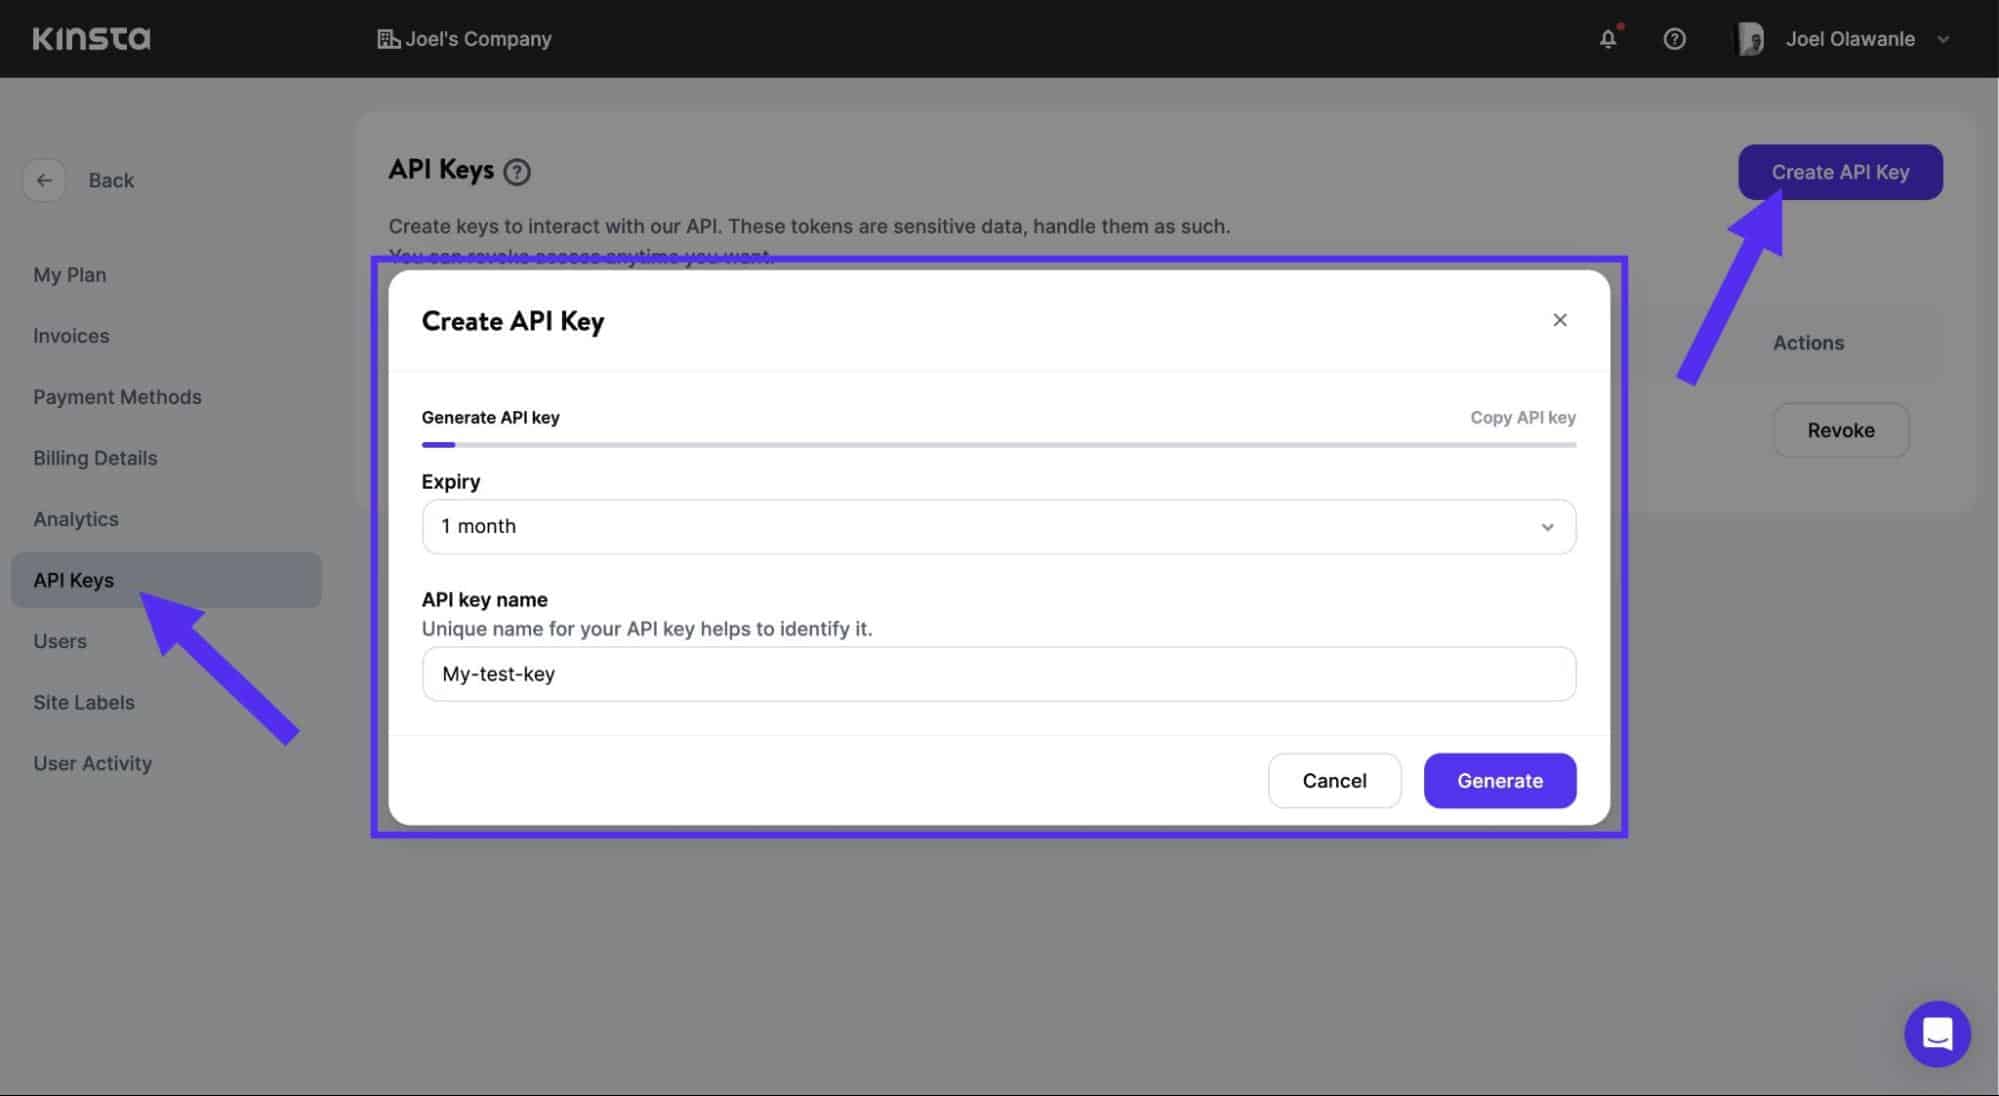
Ensure you copy your API key and store it in a safe place. You won’t be able to see it again. If you lose it, you’ll need to revoke it and generate a new one.
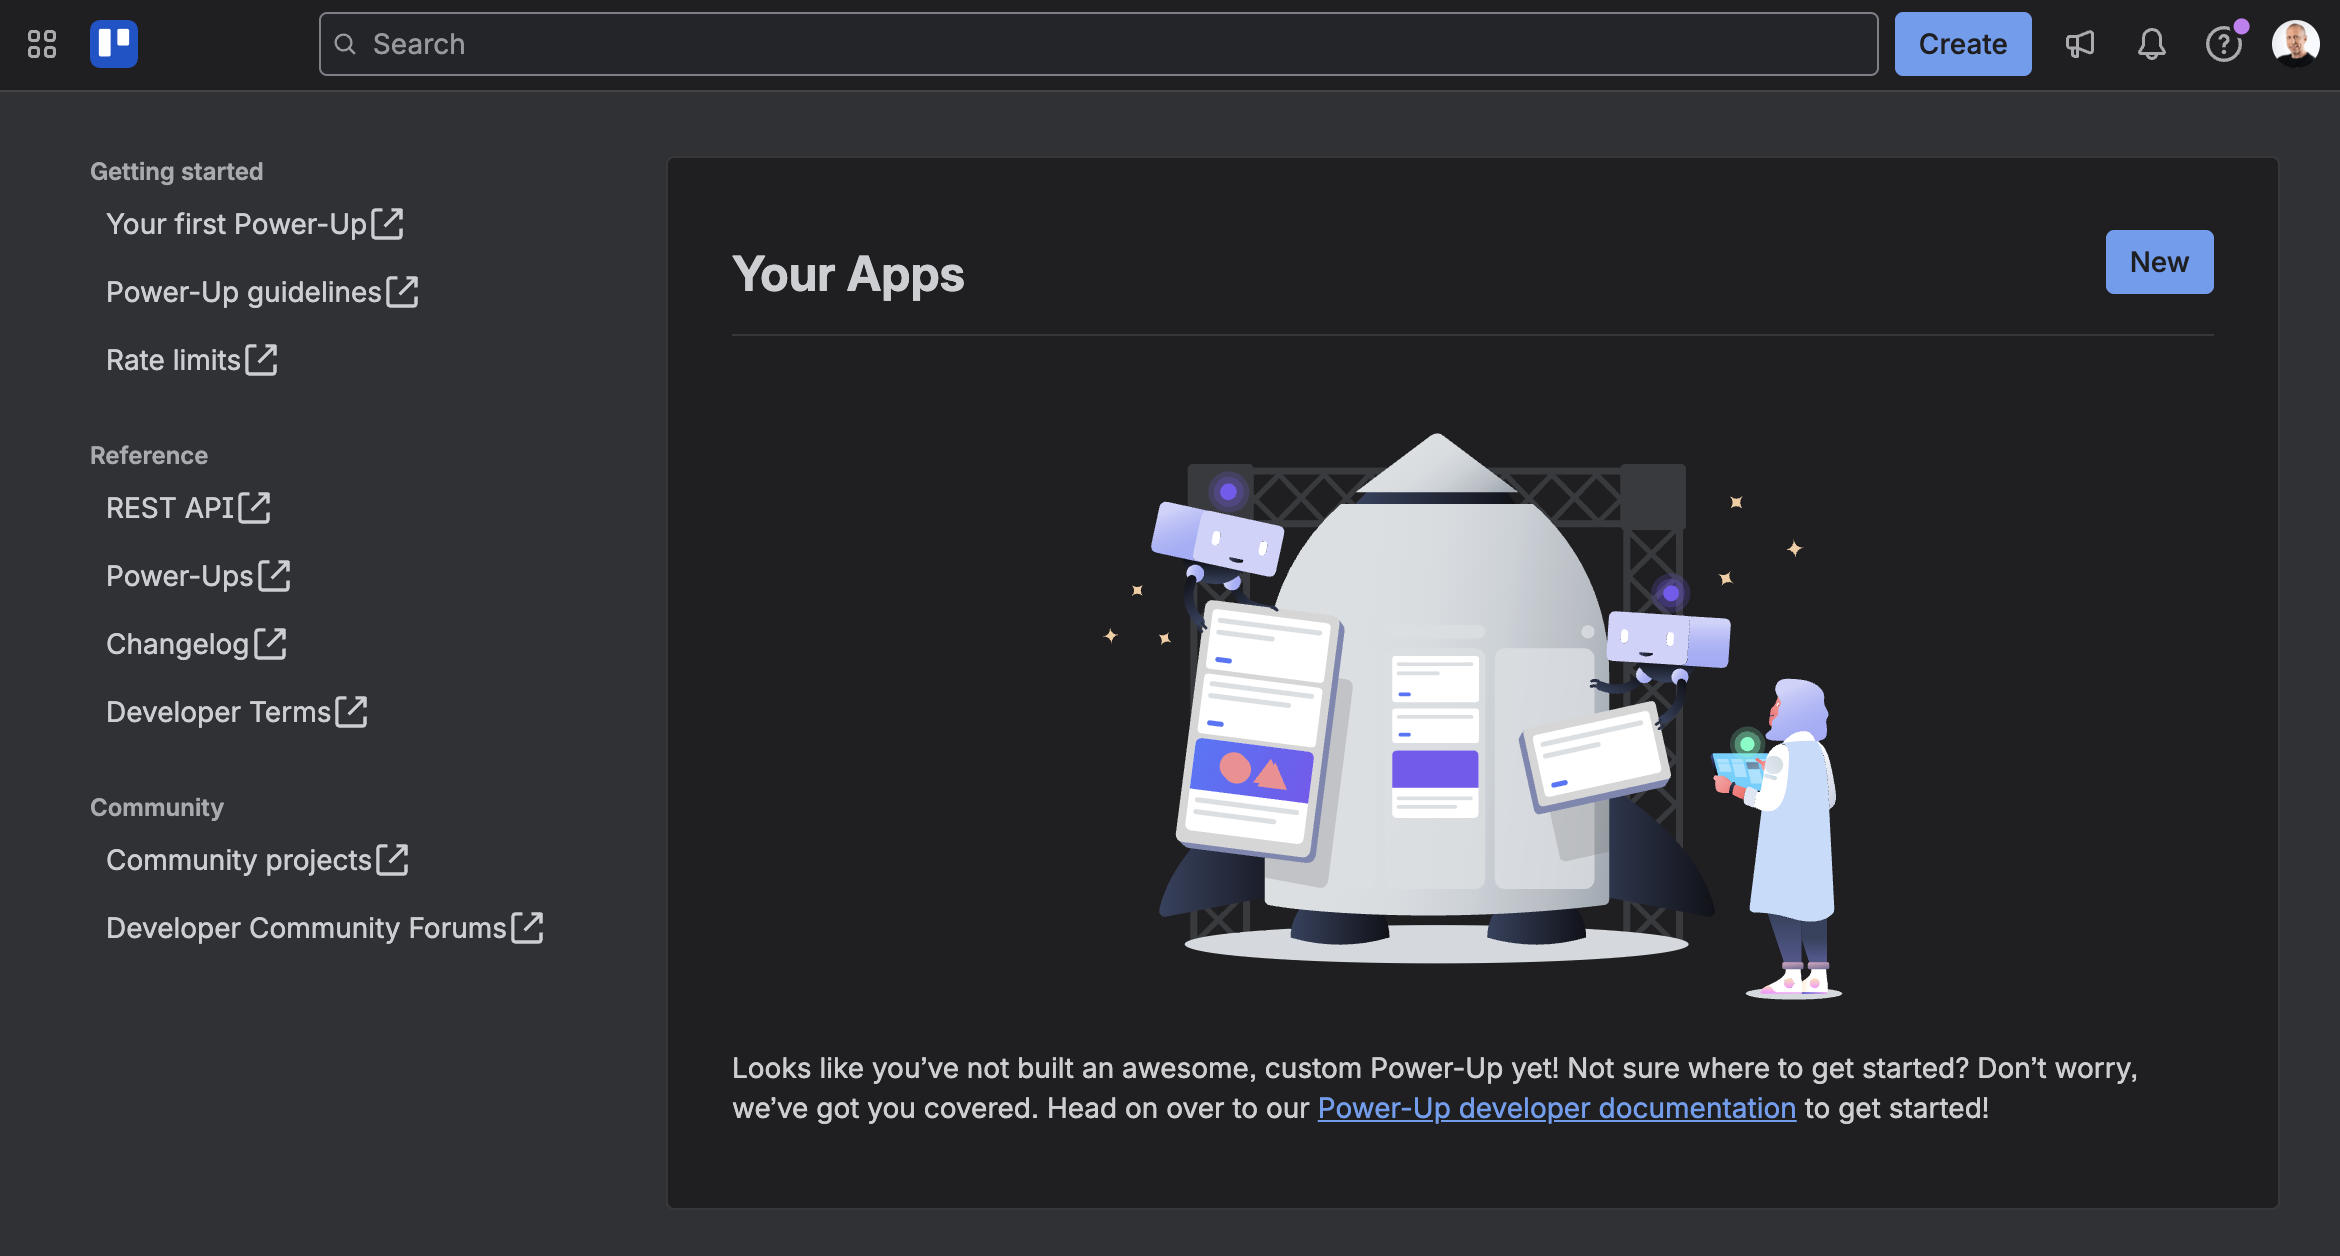
Step 2: Generate Trello API key and token
To generate an API key, Trello requires you to create a Trello Power-Up, which is essentially a Trello application. To start, go to the Power-Up admin portal.
Click on New and fill in the form that pops up.
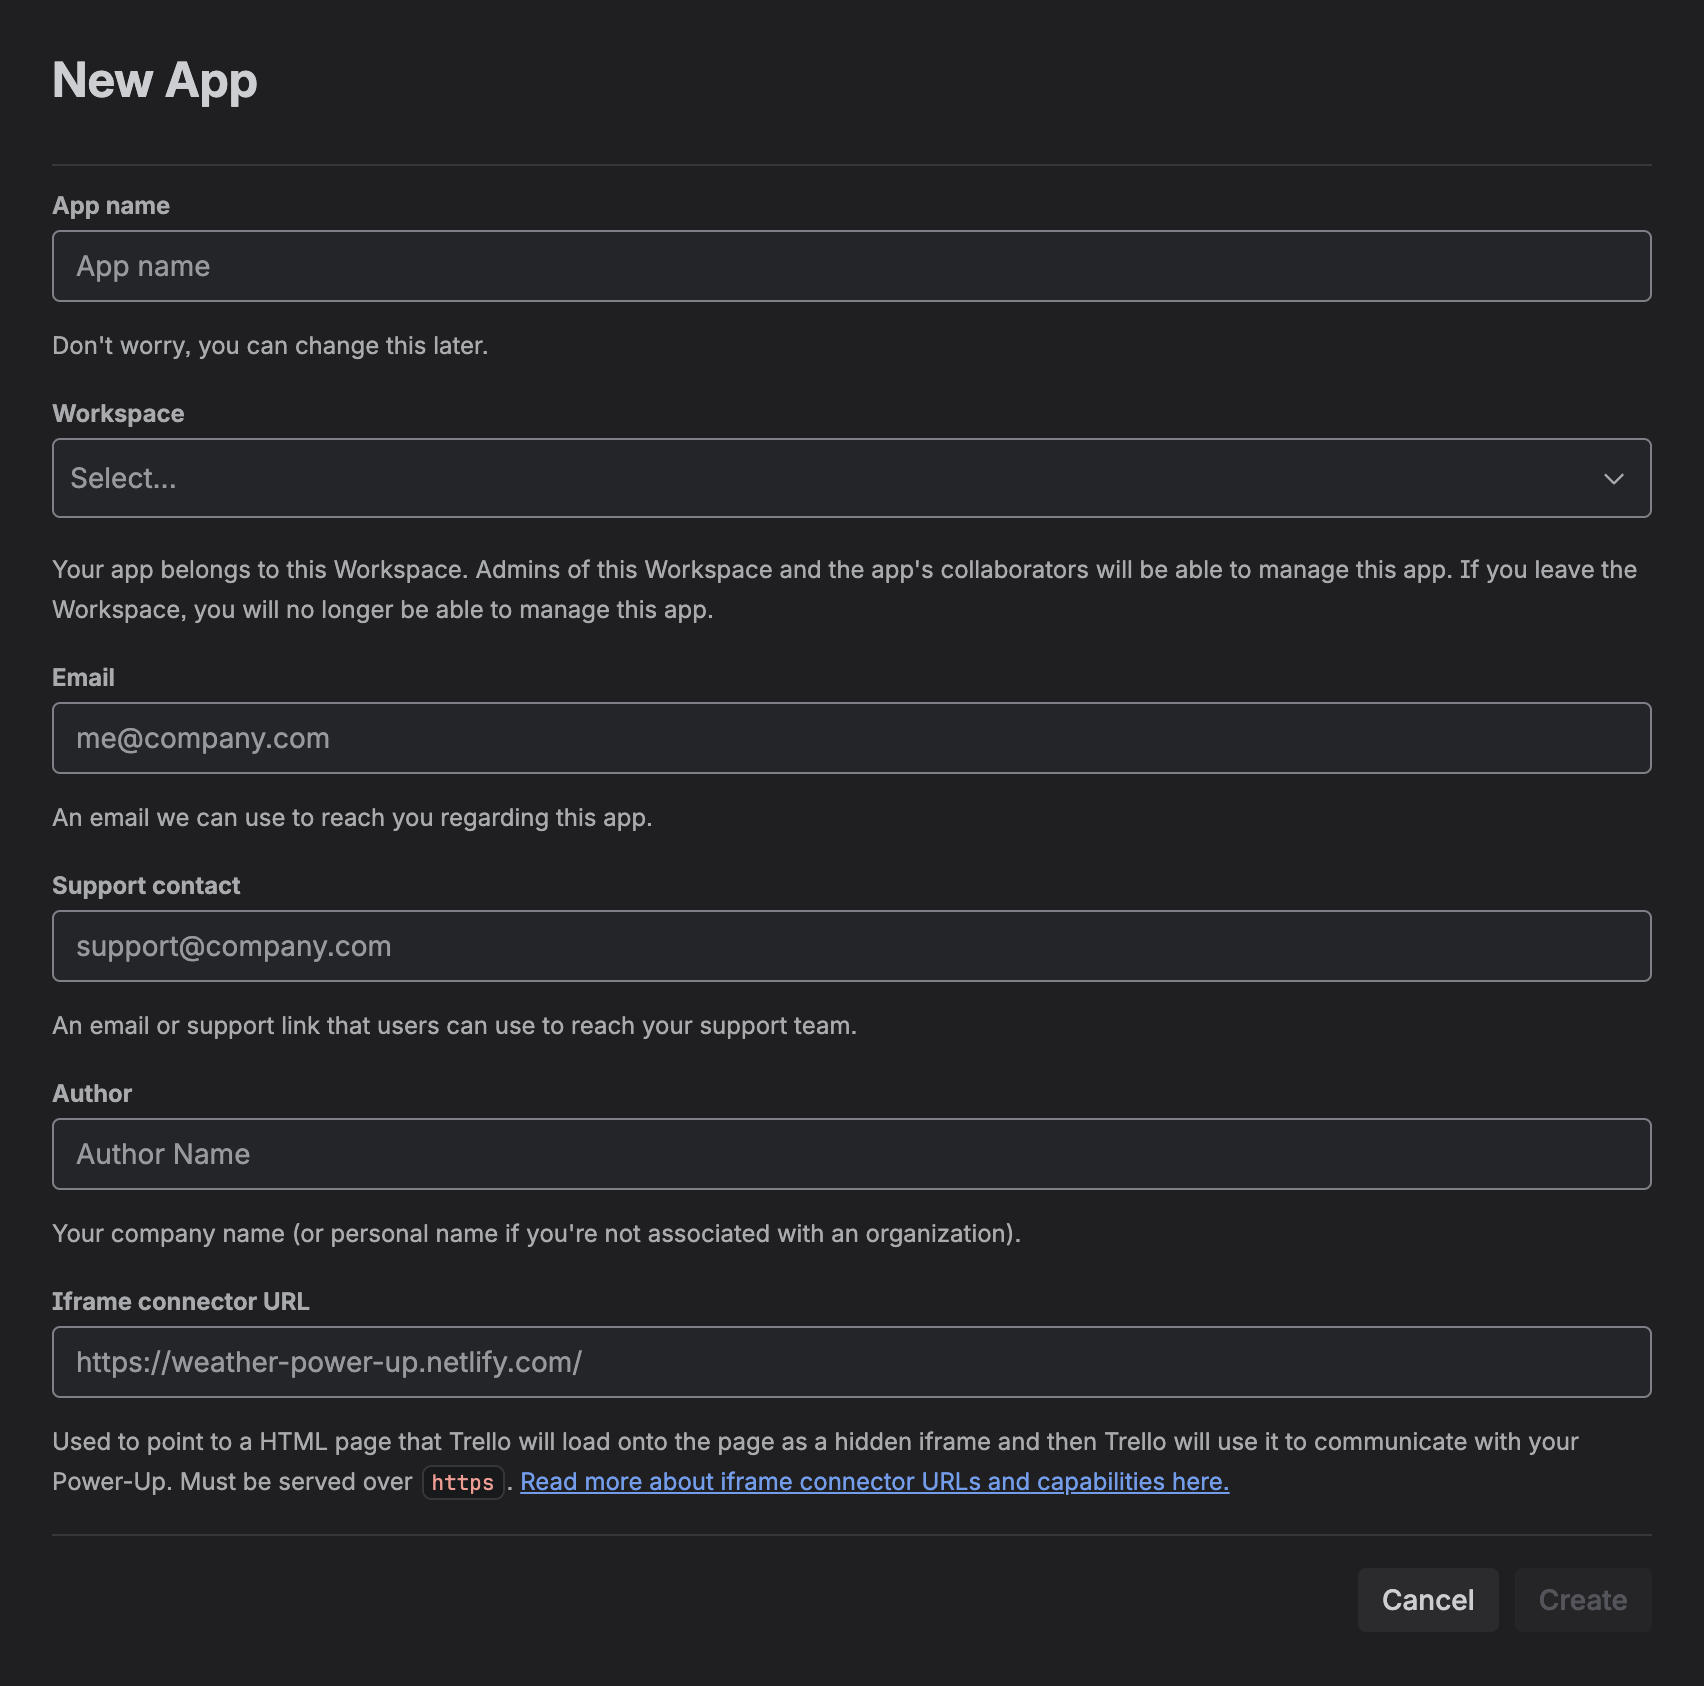
Once you have saved your information, you will be redirected to your Power-Up dashboard. Enter the required details and save your settings. Next, click API Key in the left menu, then Generate a new API key in the middle of the page.
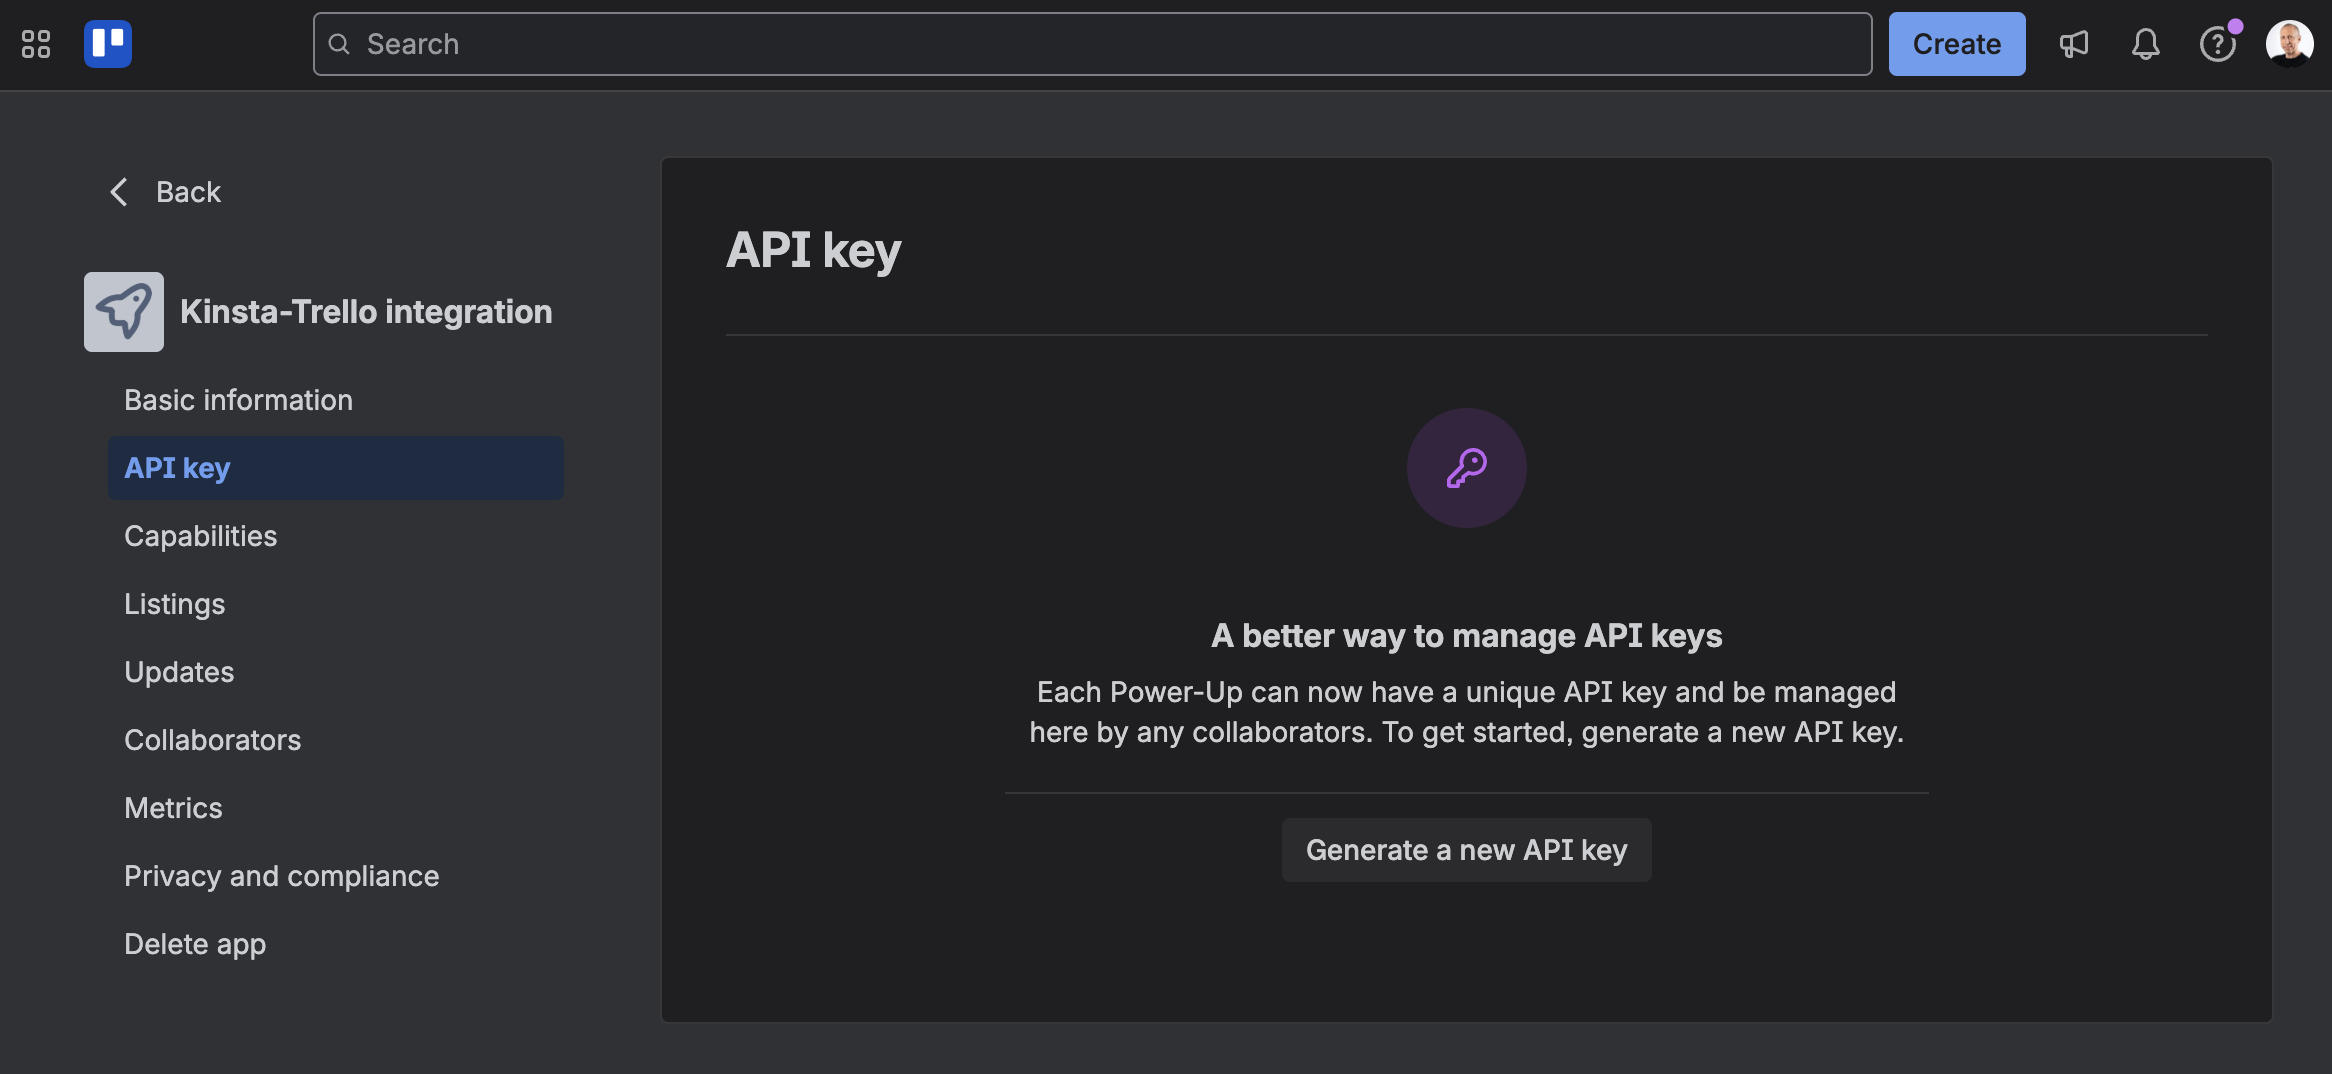
That’s all! You now have your Trello API key. Make sure you store it in a safe place.
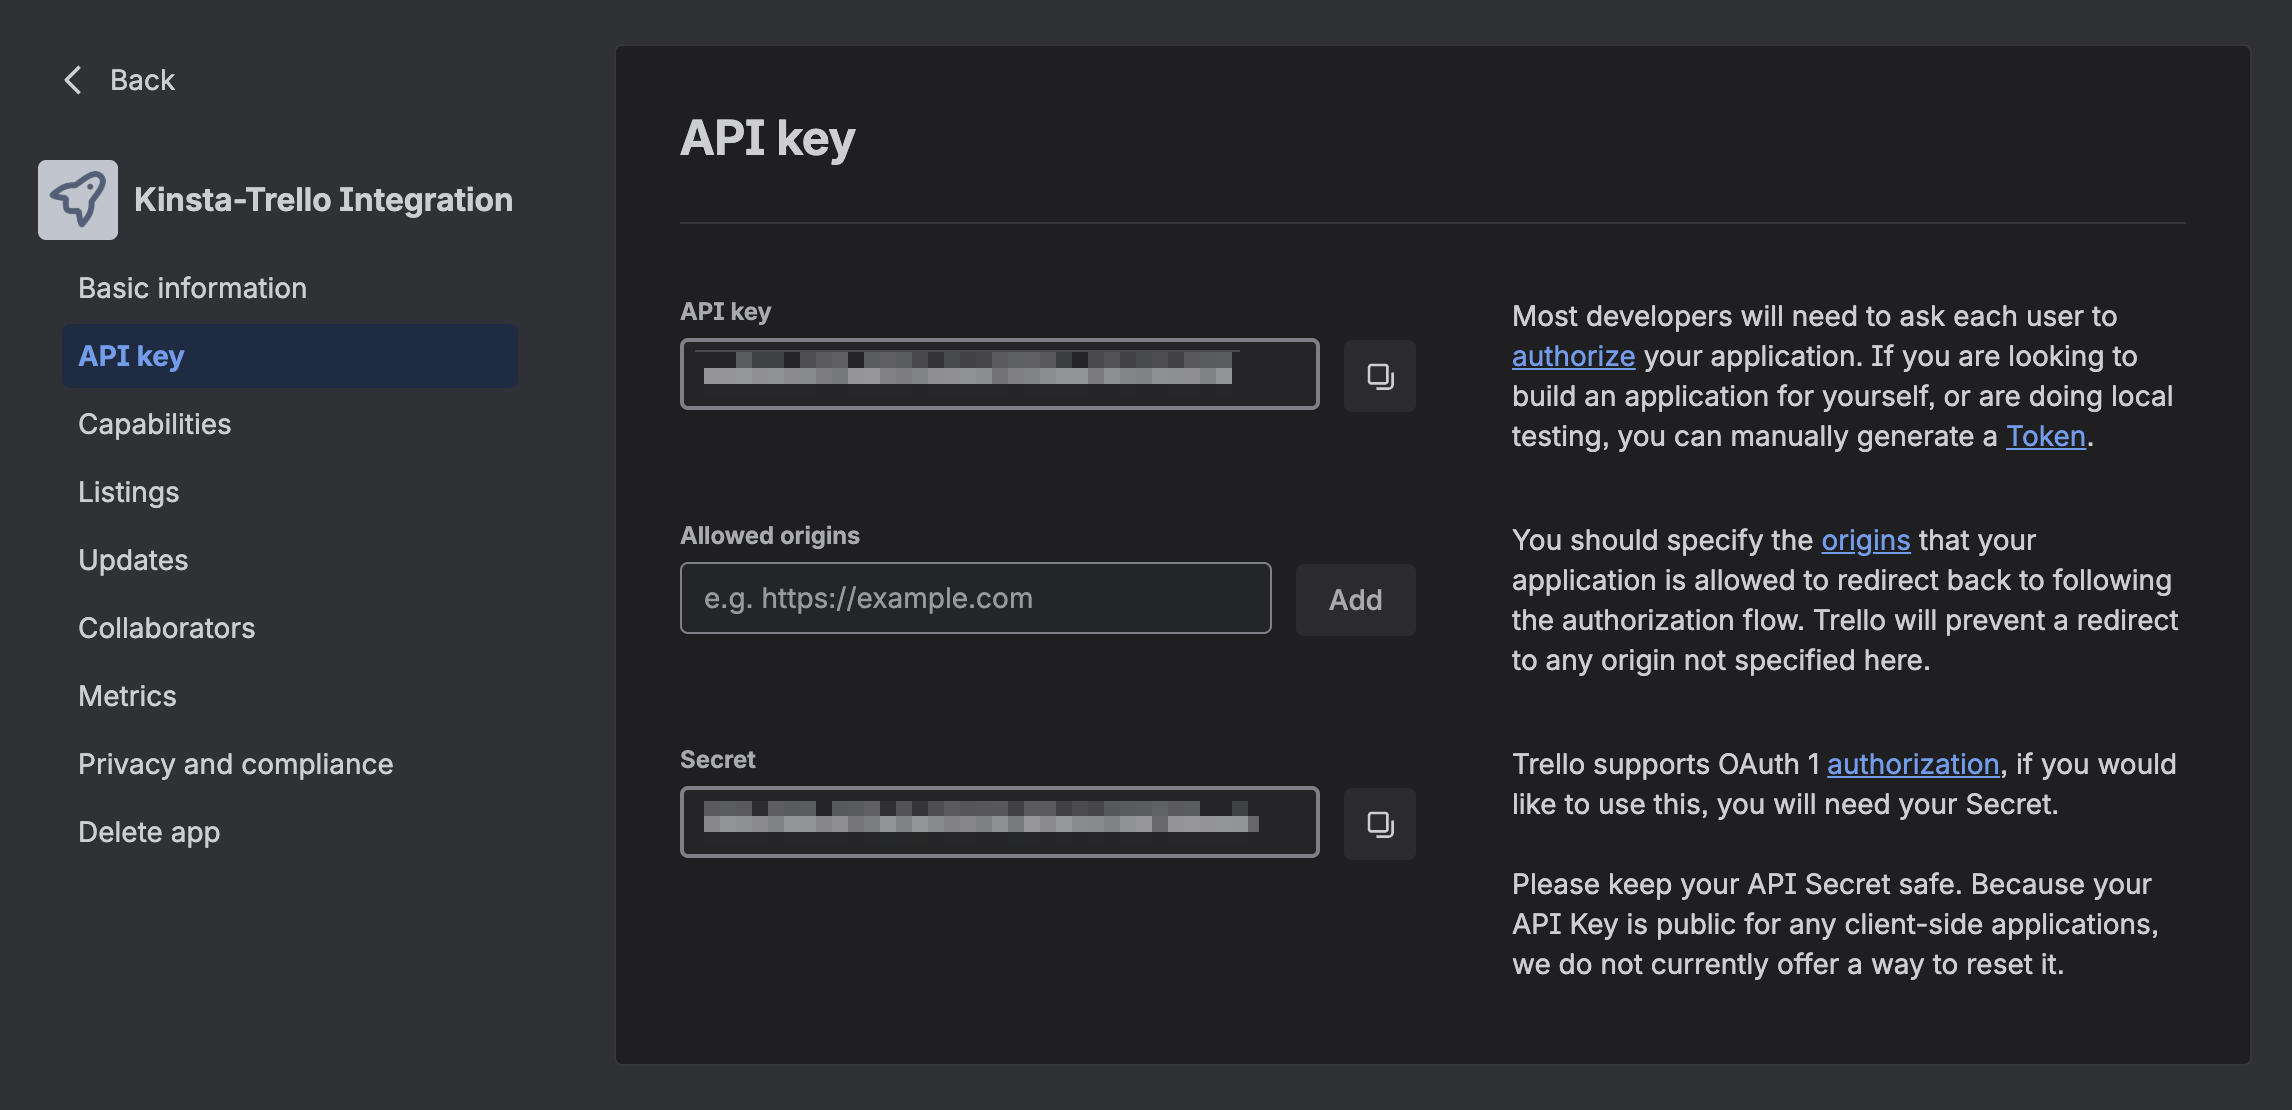
However, an API key alone is not enough to integrate Trello into your apps. You also need to generate a token. Click the Token link on the right to view a page listing the permissions that you are granting to your Power-Up. Review these permissions, then authorize Trello to share data.
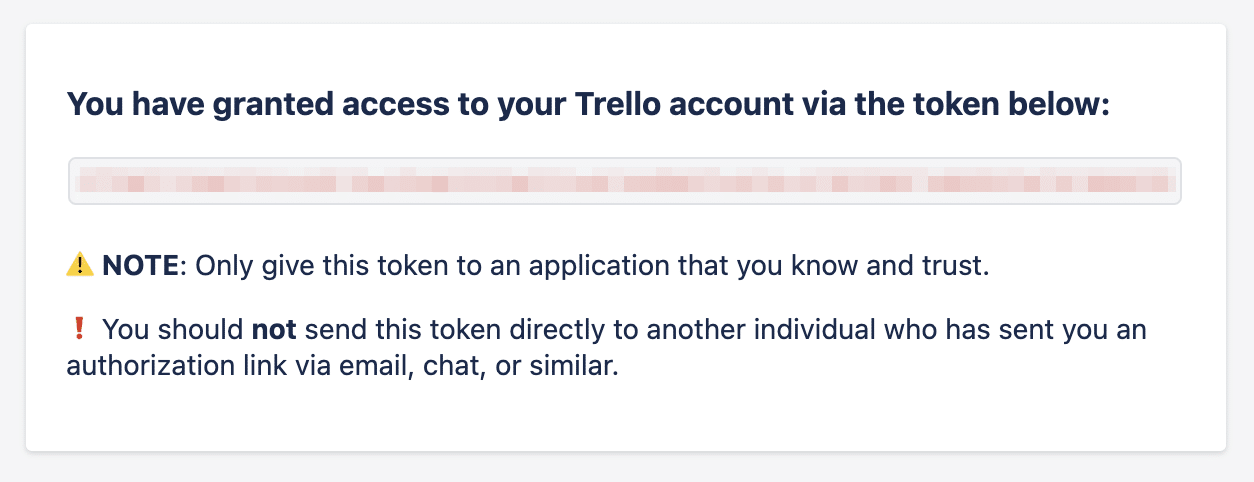
Copy and paste the Trello token into a safe place.
Step 3: Create a code repository on GitHub
GitHub is not only a code repository. It’s also a place where you can set up repetitive tasks and automations.
On GitHub, you’ll need to set up the following three things:
- The repository, which hosts your code;
- Secrets, used to store your API keys and token; and
- The workflow, which contains the automation instructions.
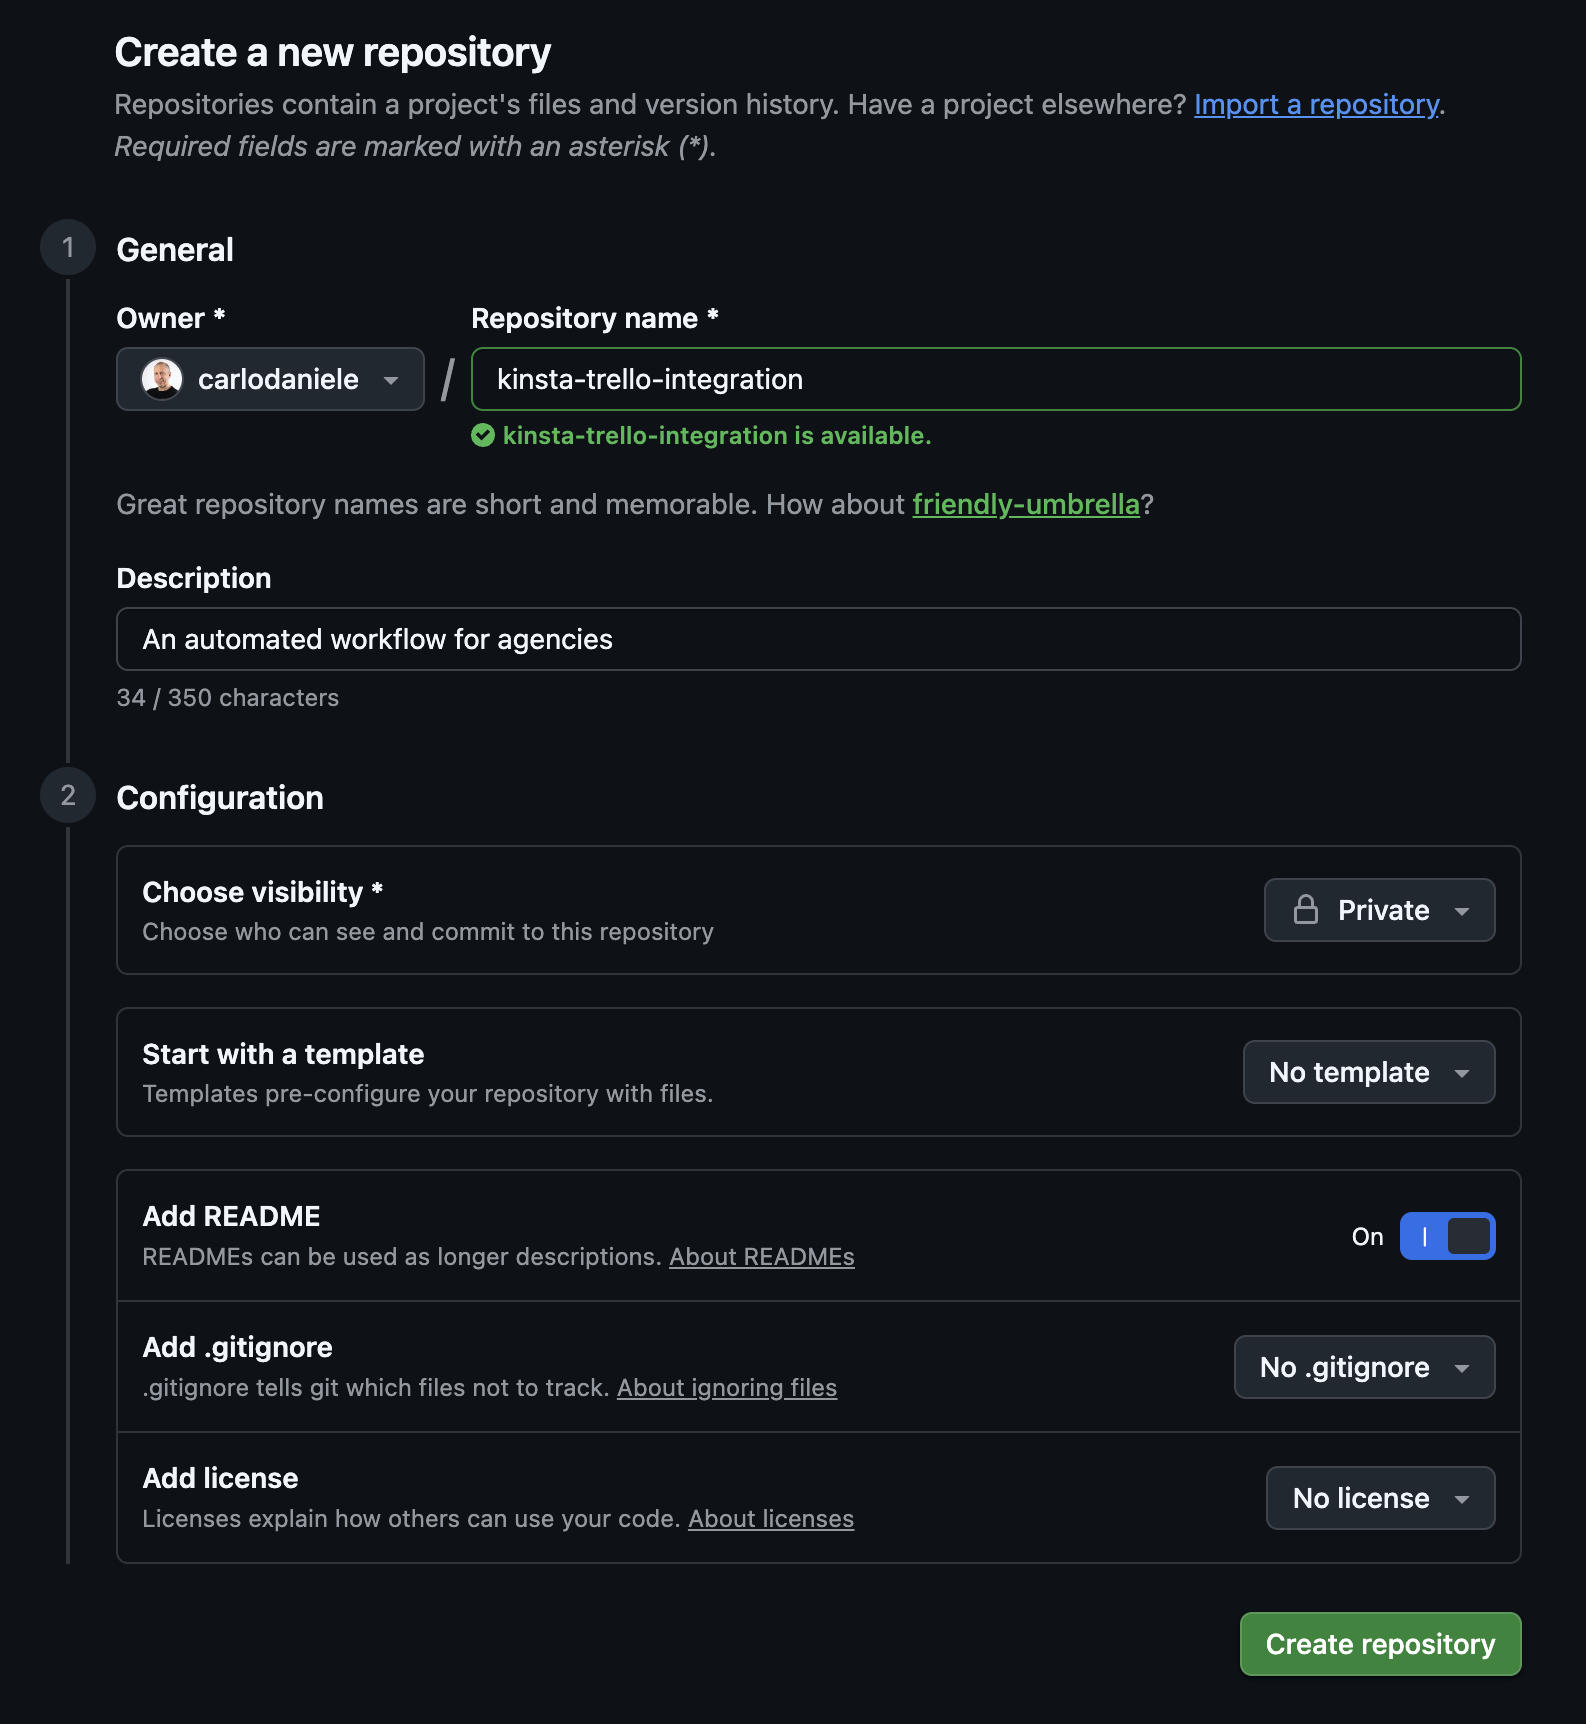
1. Create the GitHub repository
On GitHub, click the green New button.
- Give your repository a name.
- Add a description.
- Set the visibility to Private.
- Check the Add README option.
- Click Create repository.
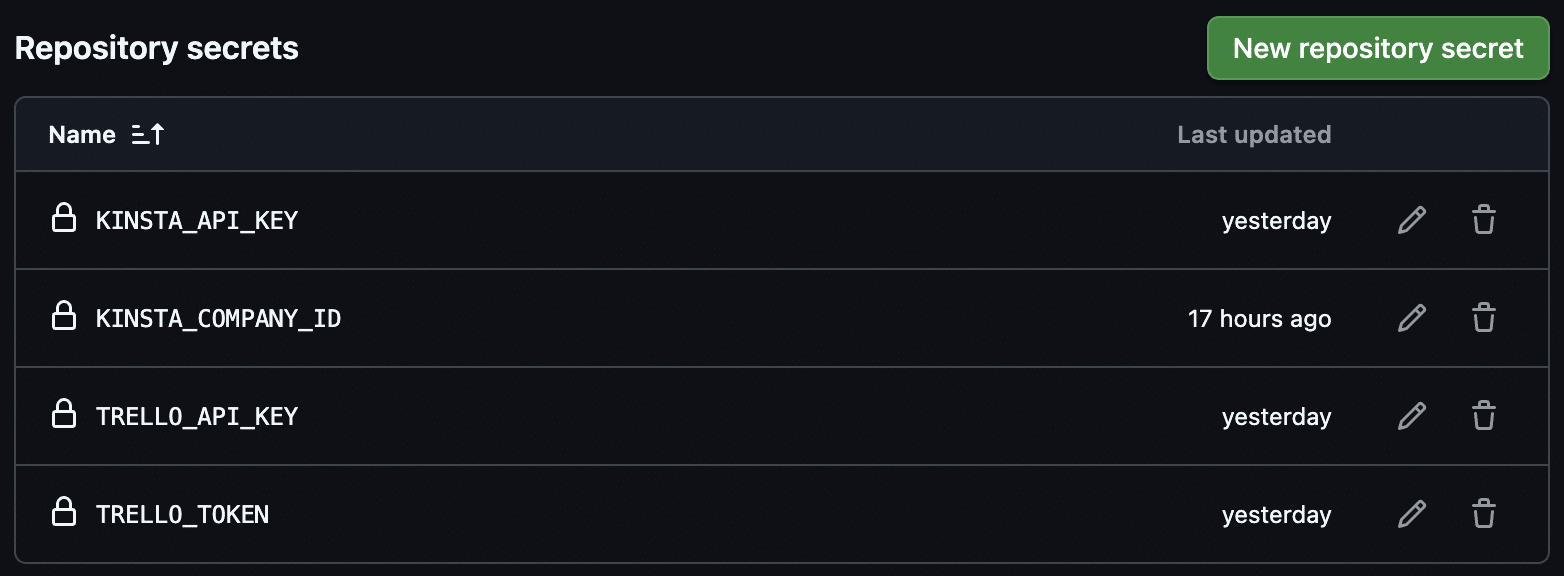
2. Configure your Action secrets
Next, you need to configure your secrets. This is an important step because it enables you to avoid including your API keys directly in your code.
In your new repository, click on the Settings tab at the top of the page. In the left-hand menu, click Secrets and variables, followed by Actions.
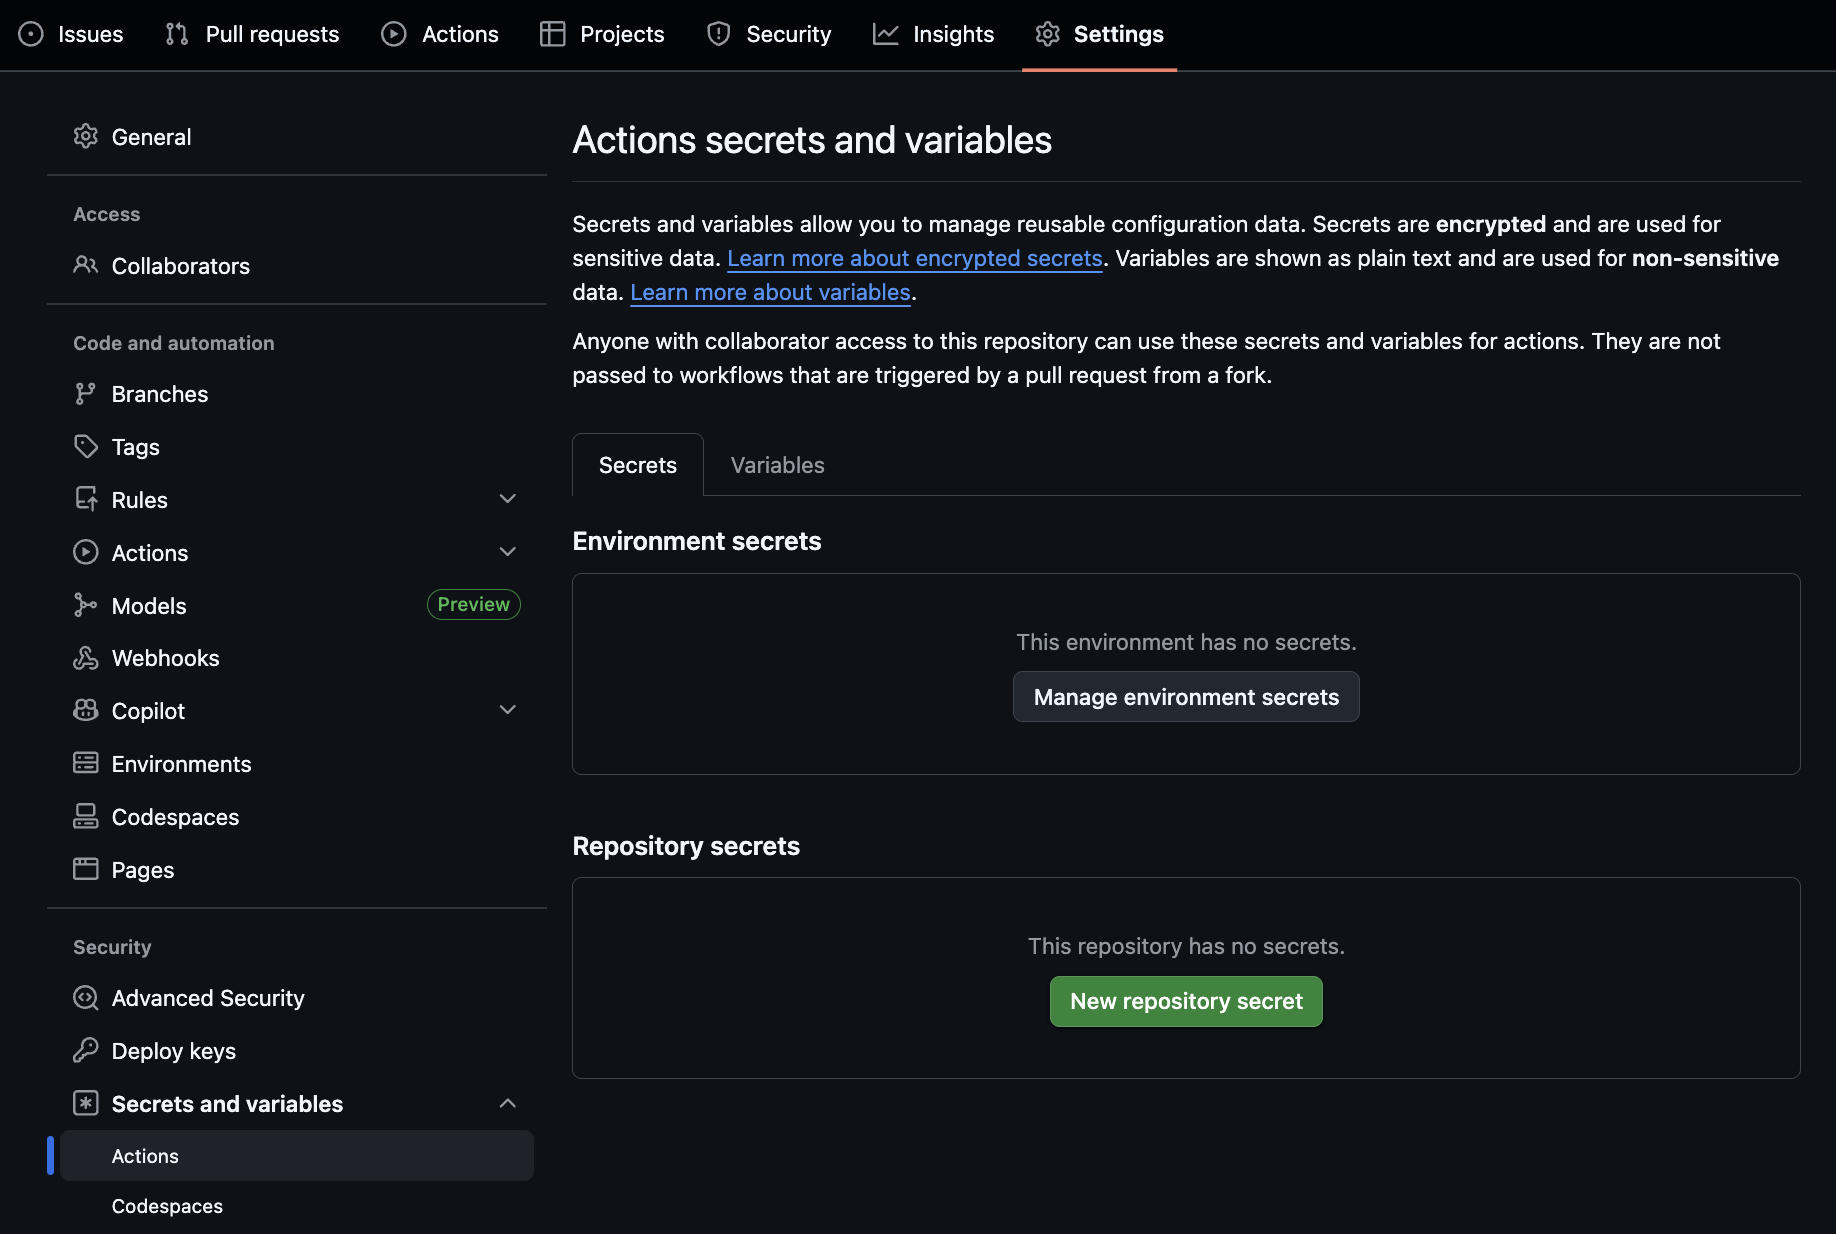
Click on New repository secret and add your API keys and token.
3. Configure the workflow
You now need to grant GitHub write permissions. Still in Settings, go to Actions > General.
Scroll down to the Workflow permissions section and check the box Read and write permissions. Then click Save.

Automating onboarding with Kinsta API and Trello
Now you have your API keys and Trello token. The next step is integrating your Kinsta hosting with your Trello project management system.
We’ll use GitHub Actions to run a synchronization script between Kinsta and Trello periodically. This automated process will query the Kinsta API at set intervals for new sites, and then use the Trello API to ensure that your Trello board perfectly mirrors your Kinsta site portfolio.
In GitHub, you need to create a YAML configuration file to specify when the script should run. In our example, the script will run every 30 minutes.
Go back to the Code section of your repository and click Add file > Create new file.
Enter .github/workflows/main.yml in the file name. GitHub will automatically create the .github and workflows folders. Then paste the following code:
name: Kinsta-Trello Integration
on:
schedule:
- cron: '*/30 * * * *' # Run every 30 minutes
workflow_dispatch: # Allows to start it manually for testing
jobs:
run-sync:
runs-on: ubuntu-latest
steps:
- name: Checkout code
uses: actions/checkout@v4
- name: Setup Node.js
uses: actions/setup-node@v4
with:
node-version: '20'
- name: Run automation script
env:
KINSTA_API_KEY: ${{ secrets.KINSTA_API_KEY }}
KINSTA_COMPANY_ID: ${{ secrets.KINSTA_COMPANY_ID }}
TRELLO_API_KEY: ${{ secrets.TRELLO_API_KEY }}
TRELLO_TOKEN: ${{ secrets.TRELLO_TOKEN }}
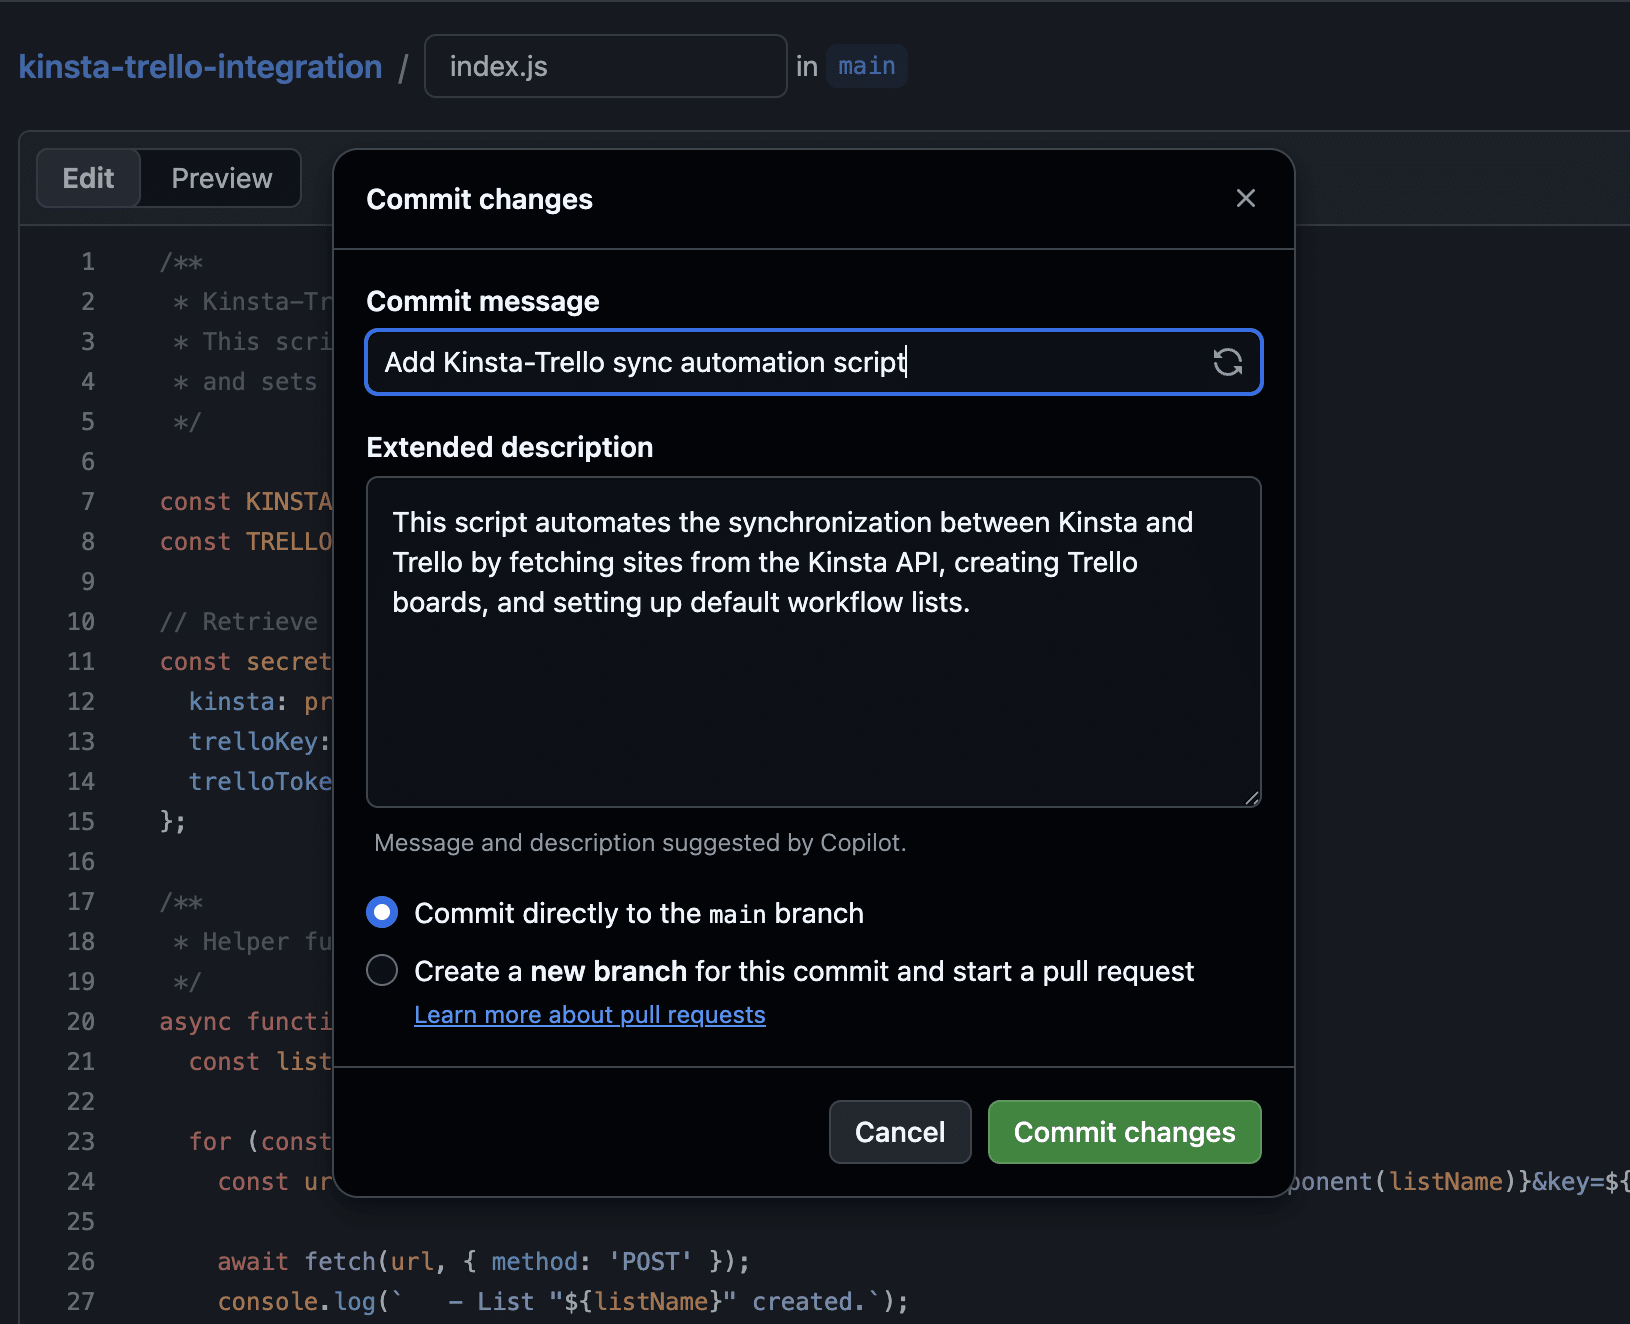
run: node index.jsOnce you are done, click the green Commit changes… button.
The initial setup is complete. You can now move on to creating the script.
Step 2. Create the script
You’ll need to create a new index.js file in the root directory of your GitHub project and add the code shown in the following sections.
1. Declaring variables
The first step is to declare the variables the script needs to perform its tasks.
const KINSTA_API_URL = 'https://api.kinsta.com/v2';
const TRELLO_API_URL = 'https://api.trello.com/1';

const secrets = {
	kinsta: process.env.KINSTA_API_KEY,
	company: process.env.KINSTA_COMPANY_ID,
	trelloKey: process.env.TRELLO_API_KEY,
	trelloToken: process.env.TRELLO_TOKEN
};
2. Define the automation function
The next step is to define the automation function.
async function startAutomation() {
	try {
		console.log("🚀 Starting Kinsta-Trello automation...");

		const kinstaUrl = `${KINSTA_API_URL}/sites?company=${secrets.company}`;

		const kinstaResponse = await fetch(kinstaUrl, {
			method: 'GET',
			headers: {
				'Authorization': `Bearer ${secrets.kinsta}`
			}
		});

		if (!kinstaResponse.ok) throw new Error(`Kinsta API error: ${kinstaResponse.status}`);

		const kinstaData = await kinstaResponse.json();

		const sites = kinstaData.company?.sites || [];

		console.log(`✅ Successfully fetched ${sites.length} sites from Kinsta.`);

		const trelloResponse = await fetch(`${TRELLO_API_URL}/members/me/boards?key=${secrets.trelloKey}&token=${secrets.trelloToken}`);

		if (!trelloResponse.ok) throw new Error(`Trello API error: ${trelloResponse.statusText}`);

		const trelloBoards = await trelloResponse.json();

		for (const site of sites) {
			const boardExists = trelloBoards.find(board => board.name === site.name);

			if (!boardExists) {
				console.log(`✨ New site found: ${site.name}. Provisioning workflow...`);

				const createBoardUrl = `${TRELLO_API_URL}/boards/?name=${encodeURIComponent(site.name)}&defaultLists=false&key=${secrets.trelloKey}&token=${secrets.trelloToken}`;
				const newBoardResponse = await fetch(createBoardUrl, { method: 'POST' });
				const newBoard = await newBoardResponse.json();

				if (newBoardResponse.ok) {
					console.log(`✅ Board created for ${site.name}. Setting up workflow...`);

					const toDoListId = await createWorkflow(newBoard.id);

					if (toDoListId) {
						await createGoLiveCard(toDoListId);
					}
				} else {
					console.log(`❌ Failed to create board for ${site.name}.`);
				}
			} else {
				console.log(`ℹ Site "${site.name}" already has a board. Skipping.`);
			}
		}

		console.log("🏁 Automation workflow finished!");

	} catch (error) {
		console.error("❌ Critical error during automation:", error.message);
	}
}

startAutomation();
Let’s analyze this function block by block.
The first console.log indicates that the process has started:
console.log("🚀 Starting Kinsta-Trello automation...");The following code retrieves sites from your MyKinsta company:
const kinstaUrl = `${KINSTA_API_URL}/sites?company=${secrets.company}`;

const kinstaResponse = await fetch(kinstaUrl, {
	method: 'GET',
	headers: {
		'Authorization': `Bearer ${secrets.kinsta}`
	}
});

if (!kinstaResponse.ok) throw new Error(`Kinsta API error: ${kinstaResponse.status}`);

const kinstaData = await kinstaResponse.json();

const sites = kinstaData.company?.sites || [];

console.log(`✅ Successfully fetched ${sites.length} sites from Kinsta.`);- If the response is not
kinstaResponse.ok, it throws an error message. If the API returns a valid result, the function stores the list of sites in thesitesarray and displays a success message.
The next step is to retrieve your existing Trello boards:
const trelloResponse = await fetch(`${TRELLO_API_URL}/members/me/boards?key=${secrets.trelloKey}&token=${secrets.trelloToken}`);

if (!trelloResponse.ok) throw new Error(`Trello API error: ${trelloResponse.statusText}`);

const trelloBoards = await trelloResponse.json();
Next, let’s move on to the sync logic.
for (const site of sites) {
	const boardExists = trelloBoards.find(board => board.name === site.name);

	if (!boardExists) {
		console.log(`✨ New site found: ${site.name}. Provisioning workflow...`);

		const createBoardUrl = `${TRELLO_API_URL}/boards/?name=${encodeURIComponent(site.name)}&defaultLists=false&key=${secrets.trelloKey}&token=${secrets.trelloToken}`;
		const newBoardResponse = await fetch(createBoardUrl, { method: 'POST' });
		const newBoard = await newBoardResponse.json();

		if (newBoardResponse.ok) {
			console.log(`✅ Board created for ${site.name}. Setting up workflow...`);

			const toDoListId = await createWorkflow(newBoard.id);

			if (toDoListId) {
				await createGoLiveCard(toDoListId);
			}
		} else {
			console.log(`❌ Failed to create board for ${site.name}.`);
		}
	} else {
		console.log(`ℹ Site "${site.name}" already has a board. Skipping.`);
	}
}- The
forloop iterates over the elements of thesitesarray (i.e., the list of MyKinsta company sites) and checks whether a board exists for each site. If a board with the site’s name does not exist, it creates one. - If the new board has been created successfully (
if (newBoardResponse.ok) {...}), call thecreateWorkflow()andcreateGoLiveCard()functions described below. Note thatcreateGoLiveCard()is only invoked for for your To Do list.
3. Define the createWorkflow() function
The createWorkflow() function creates three default lists in your Trello space and returns the To Do list ID.
async function createWorkflow(boardId) {
	const lists = ['To Do', 'Doing', 'Done'];
	let toDoListId = null;

	for (const listName of lists) {
		const url = `${TRELLO_API_URL}/boards/${boardId}/lists?name=${encodeURIComponent(listName)}&key=${secrets.trelloKey}&token=${secrets.trelloToken}`;
		const response = await fetch(url, { method: 'POST' });
		const newList = await response.json();

		console.log(`   - List "${listName}" created.`);

		if (listName === 'To Do') toDoListId = newList.id;
	}
	return toDoListId;
}
4. Define the helper function createGoLiveCard()
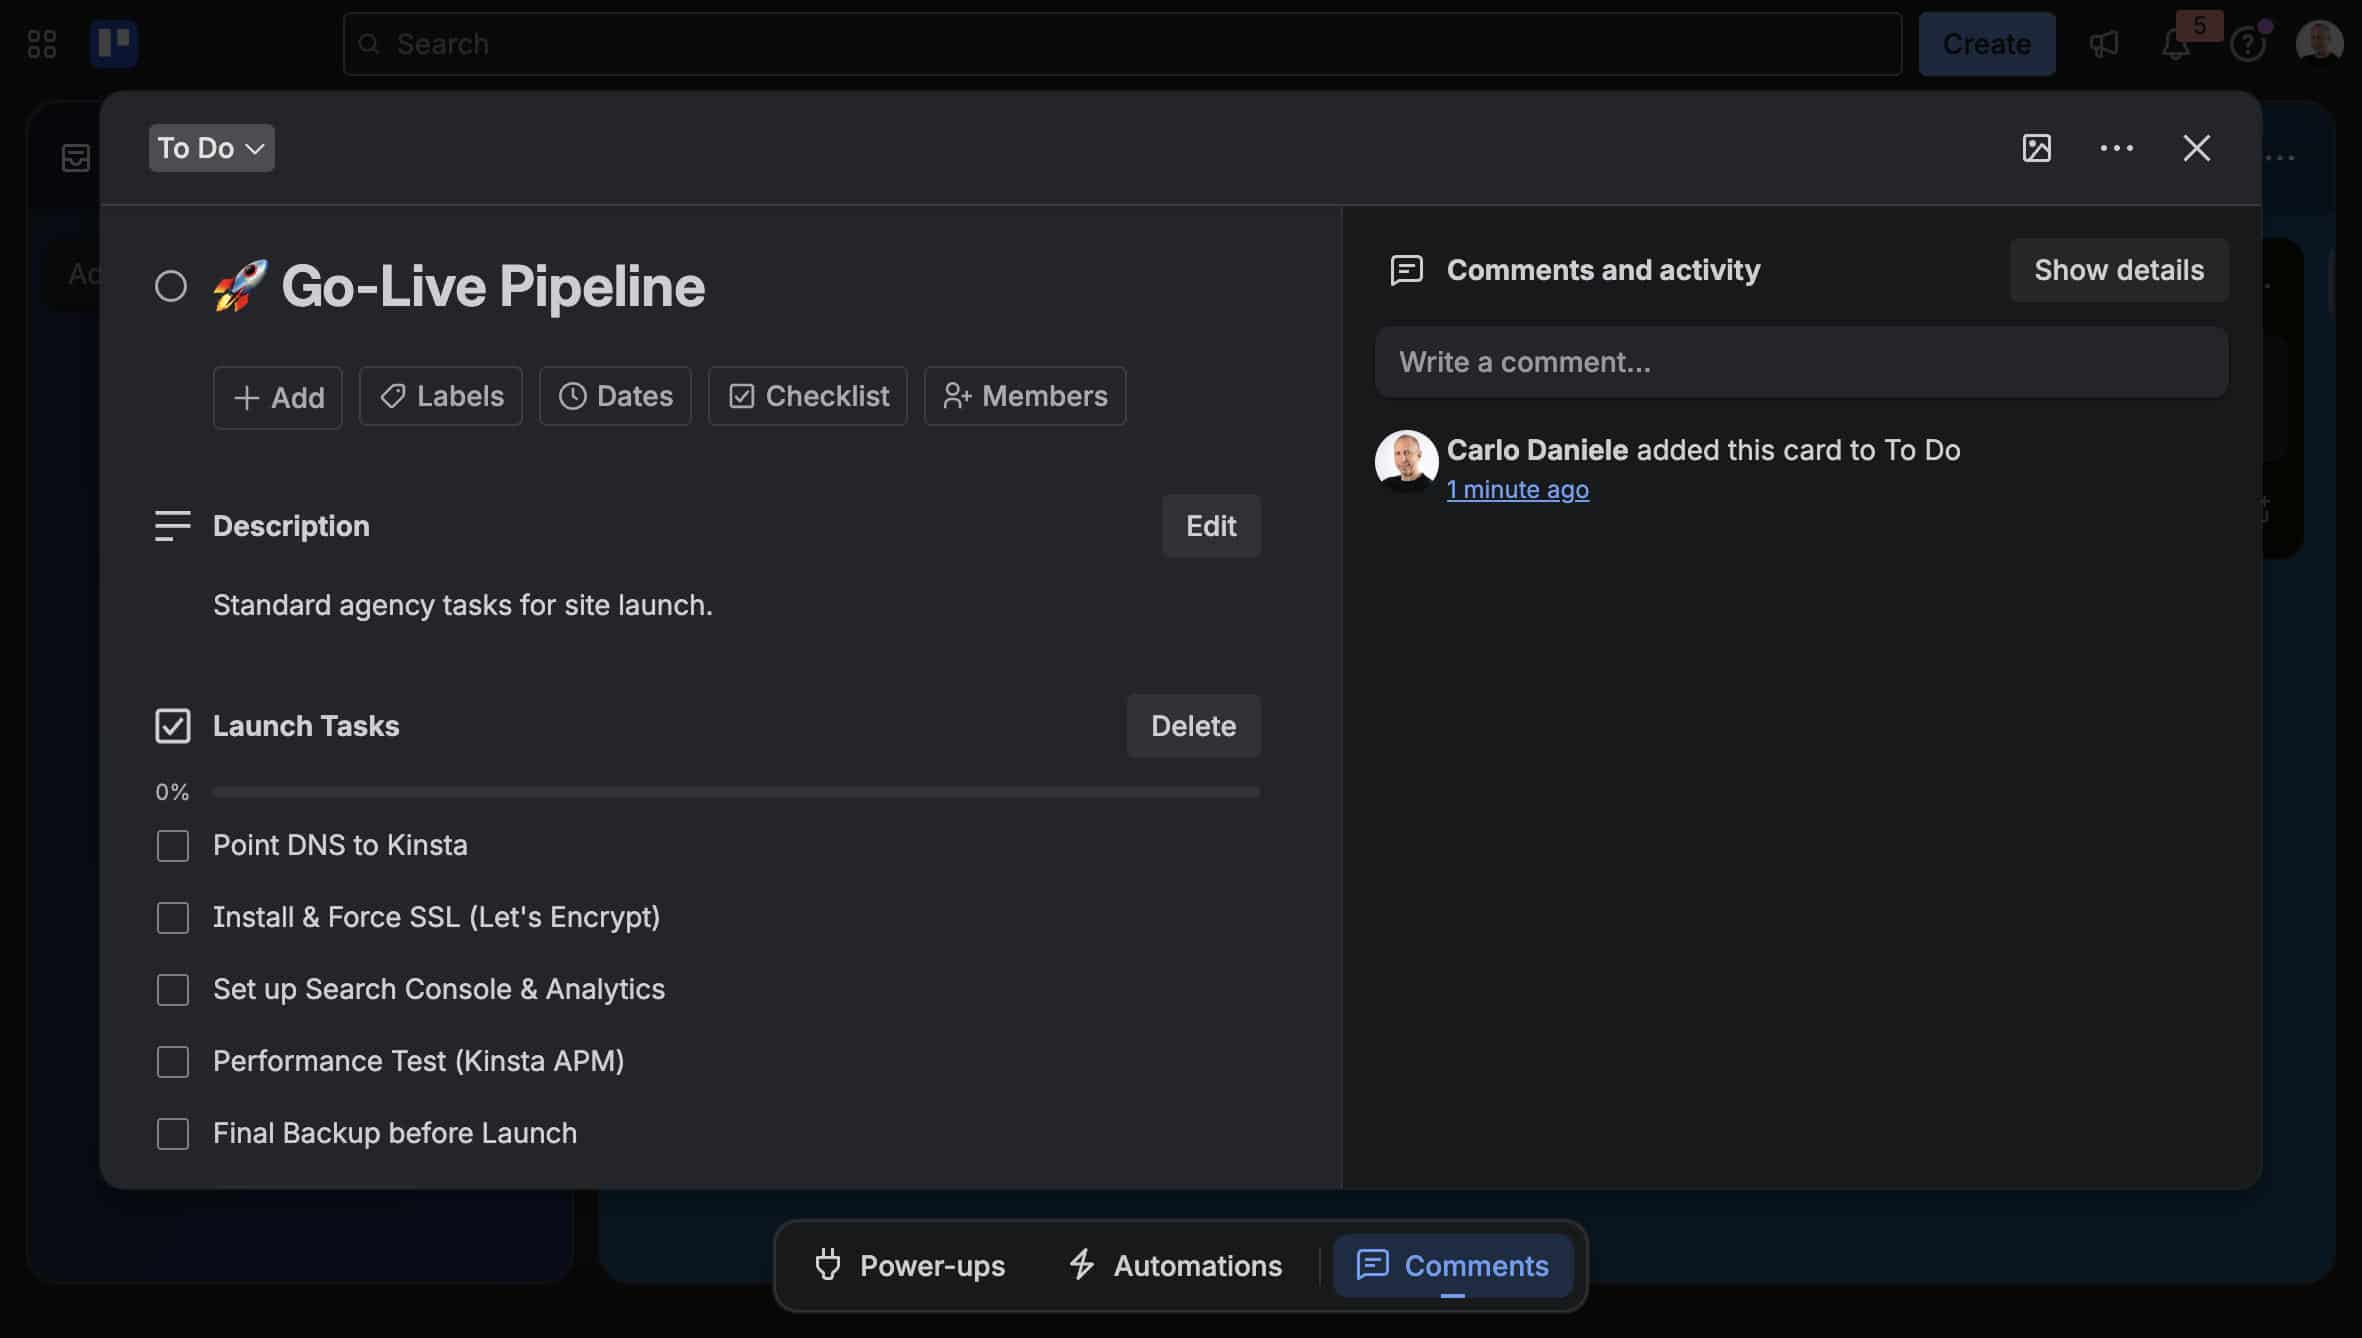
Now you need to define the function that generates the Go-Live Pipeline checklist.
async function createGoLiveCard(listId) {
	const cardUrl = `${TRELLO_API_URL}/cards?idList=${listId}&name=${encodeURIComponent('🚀 Go-Live Pipeline')}&desc=${encodeURIComponent('Standard agency tasks for site launch.')}&key=${secrets.trelloKey}&token=${secrets.trelloToken}`;
	const cardResponse = await fetch(cardUrl, { method: 'POST' });
	const card = await cardResponse.json();

	if (cardResponse.ok) {
		const checklistUrl = `${TRELLO_API_URL}/checklists?idCard=${card.id}&name=Launch%20Tasks&key=${secrets.trelloKey}&token=${secrets.trelloToken}`;
		const checklistResponse = await fetch(checklistUrl, { method: 'POST' });
		const checklist = await checklistResponse.json();

		const tasks = [
			'Point DNS to Kinsta',
			'Install & Force SSL (Let\'s Encrypt)',
			'Set up Search Console & Analytics',
			'Performance Test (Kinsta APM)',
			'Final Backup before Launch'
		];

		for (const task of tasks) {
			await fetch(`${TRELLO_API_URL}/checklists/${checklist.id}/checkItems?name=${encodeURIComponent(task)}&key=${secrets.trelloKey}&token=${secrets.trelloToken}`, {
				method: 'POST'
			});
		}
		console.log(`   - Go-Live Pipeline card with checklist created.`);
	}
}
This function does the following:
- First, it uses the Trello API to create the Go-Live Pipeline list.
- Then, if the response is
cardResponse.ok, it adds a list with 5 items to theTo Docard.
5. Run the workflow
It’s time to test your code. First, commit your changes, then go to the Actions section (link in the top menu).
Once done, click on your app in the menu on the left. In our example, this is Kinsta-Trello integration.
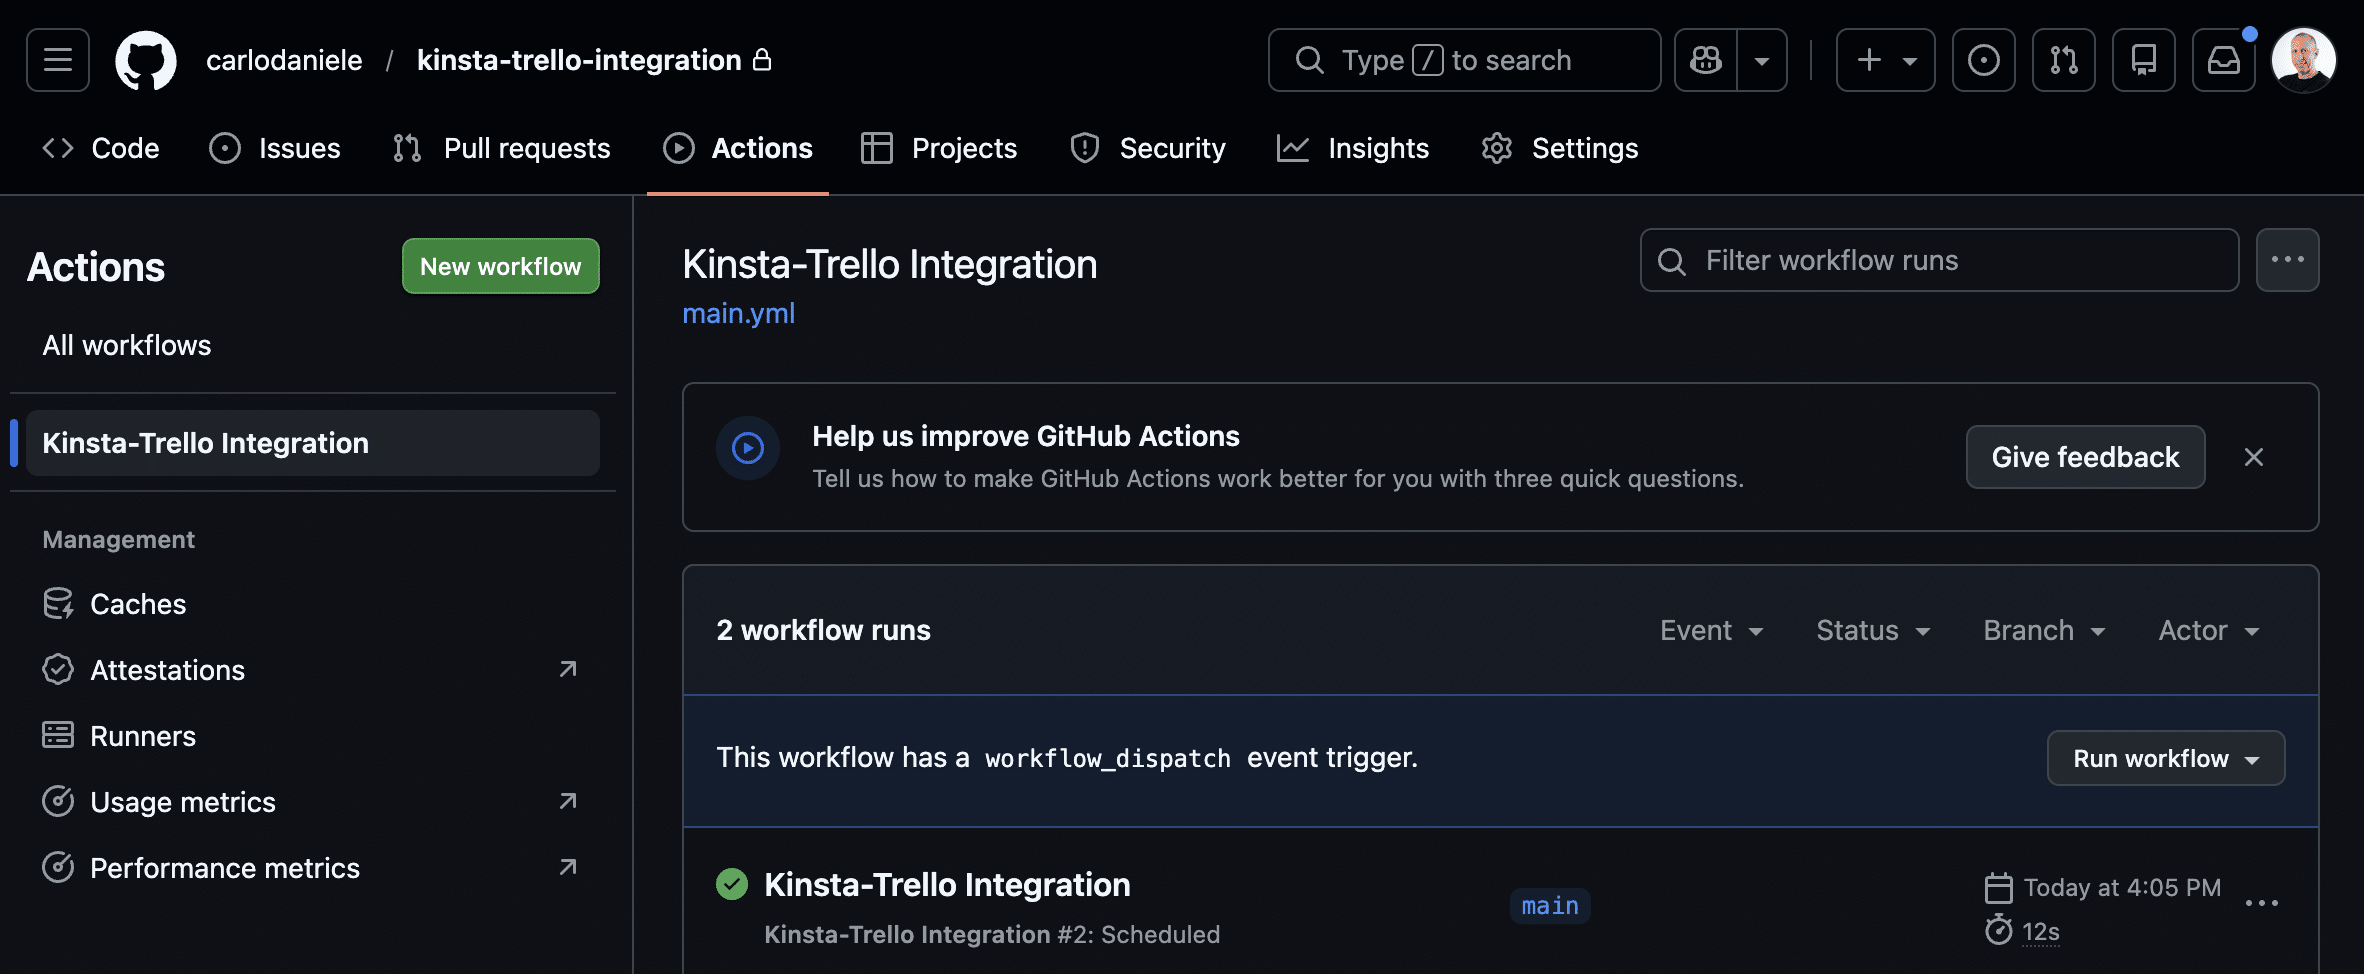
Click the Run workflow button on the right. This will start your workflow. Click on the running workflow, then click on Run automation script. You will then see the steps of the ongoing process, along with console.log success messages, or error messages if the process fails.
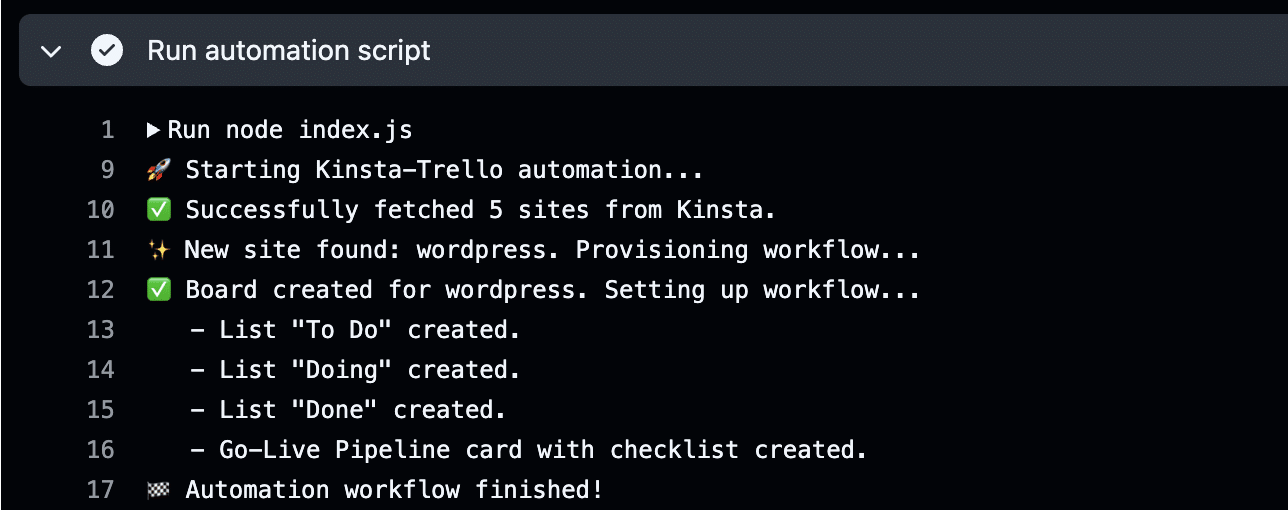
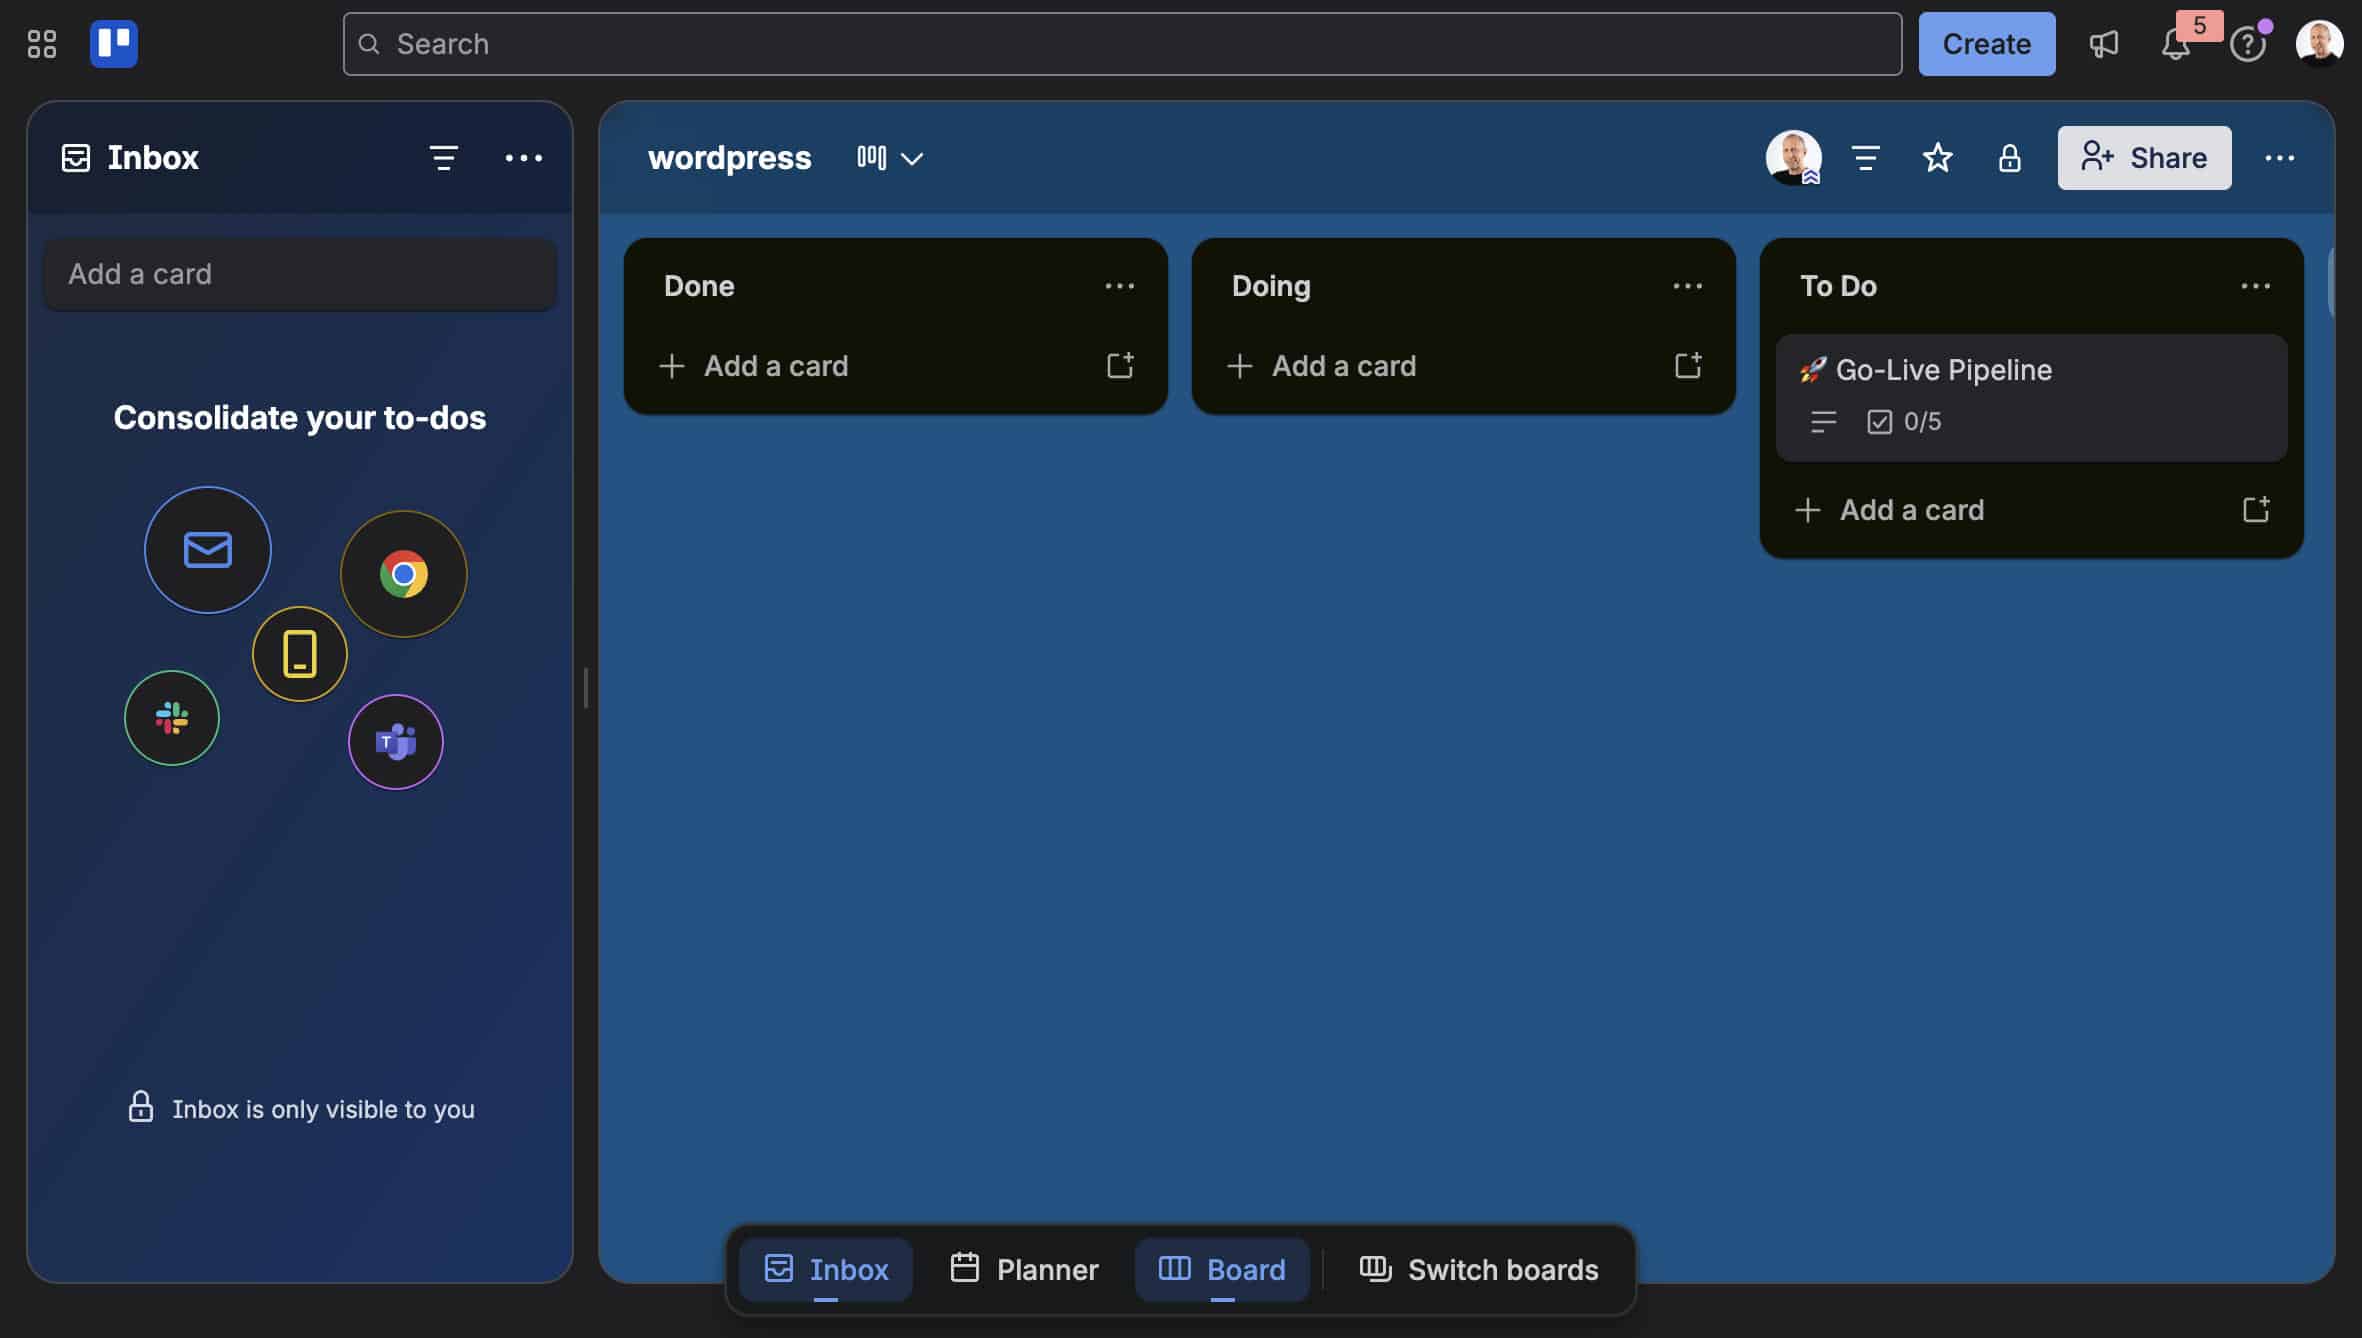
As shown in the image above, the script created a new Trello board with three lists, including the Go-Live Pipeline list. The following images show the new Trello board and the Go-Live Pipeline checklist inside the To Do card.
Proactive monitoring with Kinsta API and Trello
The integration of Kinsta hosting with Trello project management goes far beyond initial onboarding. By leveraging their respective APIs, you can maintain a continuous flow of communication between the two environments, ensuring your team stays informed in real time about the health of your sites.
For instance, you can automatically add a Trello card to your team’s board whenever a critical event occurs, such as high bandwidth usage or low disk space. The system can automatically generate a card on the technical team’s board, complete with a task checklist.
Using the same logic and tools we used for onboarding, you can also automate the monitoring and health-check management of your sites. This requires a new configuration file and a dedicated script: Go back to GitHub and create the .github/workflows/health-check.yml file with the following code:
name: Daily Health Check

on:
  schedule:
    - cron: '0 9 * * *' # Runs at 09:00
  workflow_dispatch:    # Start manually

jobs:
  health-check:
    runs-on: ubuntu-latest
    steps:
      - uses: actions/checkout@v4
      - uses: actions/setup-node@v4
        with:
          node-version: '20'
      - name: Run Health Check
        env:
          KINSTA_API_KEY: ${{ secrets.KINSTA_API_KEY }}
          KINSTA_COMPANY_ID: ${{ secrets.KINSTA_COMPANY_ID }}
          TRELLO_API_KEY: ${{ secrets.TRELLO_API_KEY }}
          TRELLO_TOKEN: ${{ secrets.TRELLO_TOKEN }}
        run: node health-check.js
Here are the key points of this configuration script:
- We have set up an automatic timer to run the script every day at 09:00 UTC ((
schedule: - cron: '0 9 * * *'). workflow_dispatchruns the script at any time via the Actions tab on GitHub. This is especially useful during development and debugging.- Then we’ve set the sequence of operations: the final command uses node to run the
health-check.jsfile.
1. Declaring variables
Navigate to the root directory of your repository, create a file named health-check.js, and declare the following variables:
const KINSTA_API_URL = 'https://api.kinsta.com/v2';
const TRELLO_API_URL = 'https://api.trello.com/1';

const secrets = {
	kinsta: process.env.KINSTA_API_KEY,
	company: process.env.KINSTA_COMPANY_ID,
	trelloKey: process.env.TRELLO_API_KEY,
	trelloToken: process.env.TRELLO_TOKEN
};
2. Get Kinsta sites
Next, define the getKinstaSites() function:
async function getKinstaSites() {
	const url = `${KINSTA_API_URL}/sites?company=${secrets.company}`;
	const response = await fetch(url, {
		method: 'GET',
		headers: { 'Authorization': `Bearer ${secrets.kinsta}` }
	});
	if (!response.ok) throw new Error(`Kinsta API error: ${response.status}`);
	const data = await response.json();
	return data.company?.sites || [];
}
This function returns either a list of the company’s sites in MyKinsta or an empty array.
3. Get bandwidth usage
Define a function called getBandwidthUsage() that returns the bandwidth usage of a website.
async function getBandwidthUsage(siteId) {
  const url = `${KINSTA_API_URL}/sites/${siteId}/usage/bandwidth/this-month`;
  const response = await fetch(url, {
    method: 'GET',
    headers: { 'Authorization': `Bearer ${secrets.kinsta}` }
  });
  if (!response.ok) return null;
  const data = await response.json();
  const bytes = data.site?.this_month_usage?.bandwidth;
  return bytes !== undefined ? Math.round(bytes / (1024 * 1024)) : 0;
}
4. Create Trello cards
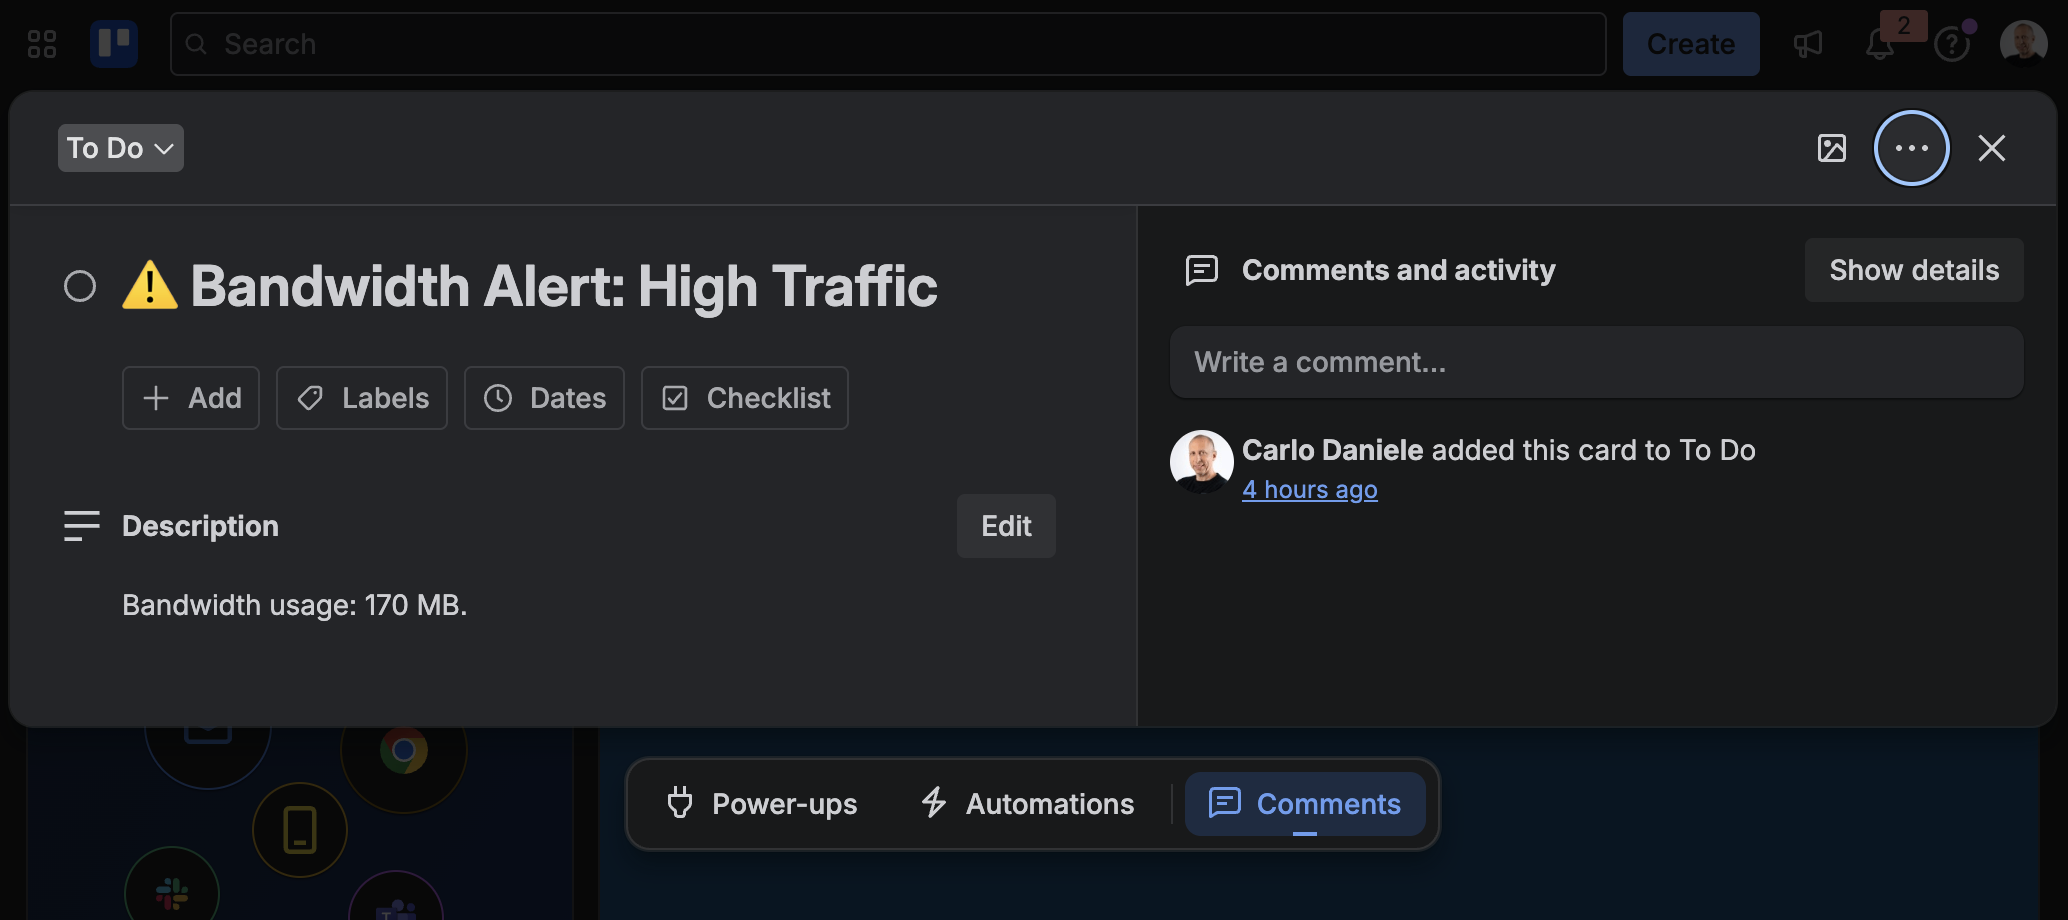
The following function generates a card titled “ Bandwidth Alert: High Traffic”:
async function postTrelloAlert(siteName, message) {
	const boardsResp = await fetch(`${TRELLO_API_URL}/members/me/boards?key=${secrets.trelloKey}&token=${secrets.trelloToken}`);
	const boards = await boardsResp.json();
	const board = boards.find(b => b.name === siteName);

	if (board) {
		const listsResp = await fetch(`${TRELLO_API_URL}/boards/${board.id}/lists?key=${secrets.trelloKey}&token=${secrets.trelloToken}`);
		const lists = await listsResp.json();
		const targetList = lists.find(l => l.name === 'To Do') || lists[0];

		const cardsResp = await fetch(`${TRELLO_API_URL}/lists/${targetList.id}/cards?key=${secrets.trelloKey}&token=${secrets.trelloToken}`);
		const cards = await cardsResp.json();

		const alertTitle = `⚠ Bandwidth Alert: High Traffic`;
		if (!cards.find(c => c.name === alertTitle)) {
			await fetch(`${TRELLO_API_URL}/cards?idList=${targetList.id}&name=${encodeURIComponent(alertTitle)}&desc=${encodeURIComponent(message)}&key=${secrets.trelloKey}&token=${secrets.trelloToken}`, {
				method: 'POST'
			});
		console.log(`📌 Alert posted for ${siteName}`);
		}
	}
}- Note the condition
if (!cards.find(...)). It prevents cluttering your board with duplicate notifications.
5. Run the script
Finally, define a function that monitors your sites.
async function runMonitoring() {
  console.log("📊 Starting standalone Health Check...");
  const sites = await getKinstaSites();
  for (const site of sites) {
    const usage = await getBandwidthUsage(site.id);
    if (usage !== null) {
      console.log(`Site: ${site.name} | Usage: ${usage} MB`);
      if (usage > 100) { // Test threshold
        await postTrelloAlert(site.name, `Bandwidth usage: ${usage} MB.`);
      }
    }
  }
}

runMonitoring().catch(console.error);
When executed, this function calls the previously defined functions:
getKinstaSites(): Fetches the list of company sites in MyKinsta;getBandwidthUsage(): Checks the current month’s bandwidth usage for each site;postTrelloAlert(): Automatically generates a Trello card only when it reaches the threshold and no previous card exists.
Scaling smarter, not harder with Kinsta
Scaling up doesn’t have to mean doing more work. With a well-designed automation strategy, repetitive manual tasks can be eliminated and new projects added to your portfolio without overburdening your operations.
By bridging the gap between your site infrastructure and project management, you can establish seamless communication channels that convert raw hosting data into actionable operational tasks.
Thanks to Kinsta’s APIs and GitHub Actions, we have created an automated onboarding and proactive monitoring system that reduces the risk of human error, lightens your team’s workload, and ensures you are always ready to respond to issues as they arise. This enables you to move from reactive firefighting to proactive future-proofing.
Are you ready to automate your agency’s workflows? Check out our plans to find the one that’s right for you.
The post Automate your agency workflow with Kinsta API and Trello appeared first on Kinsta®.